You won’t believe how easy it is to make a balloon arch!!
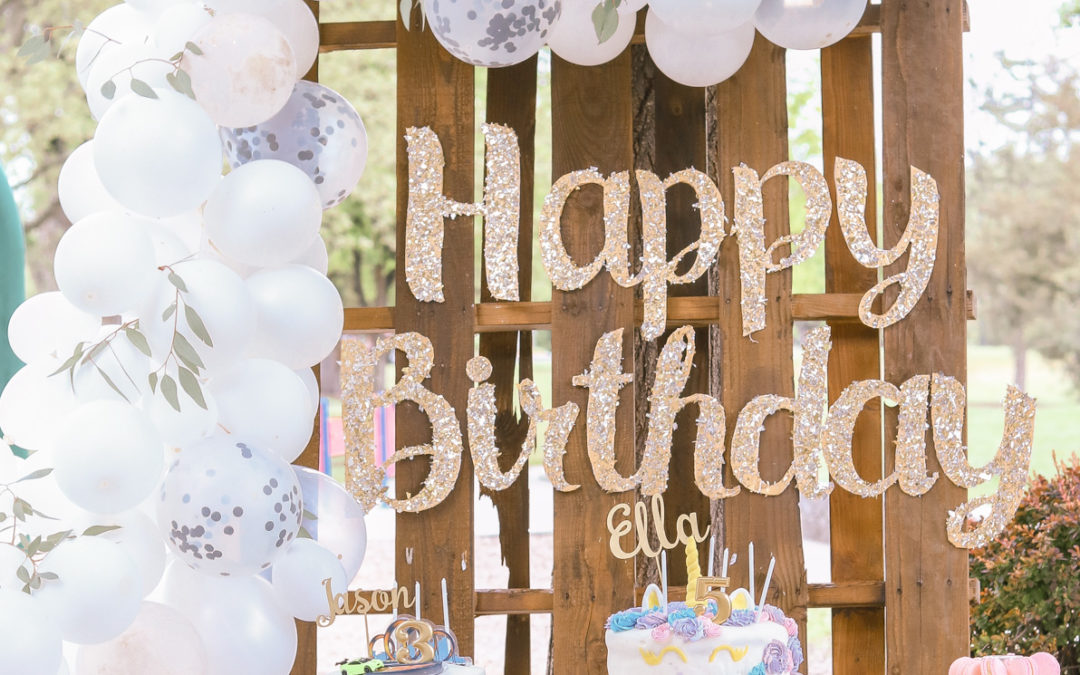
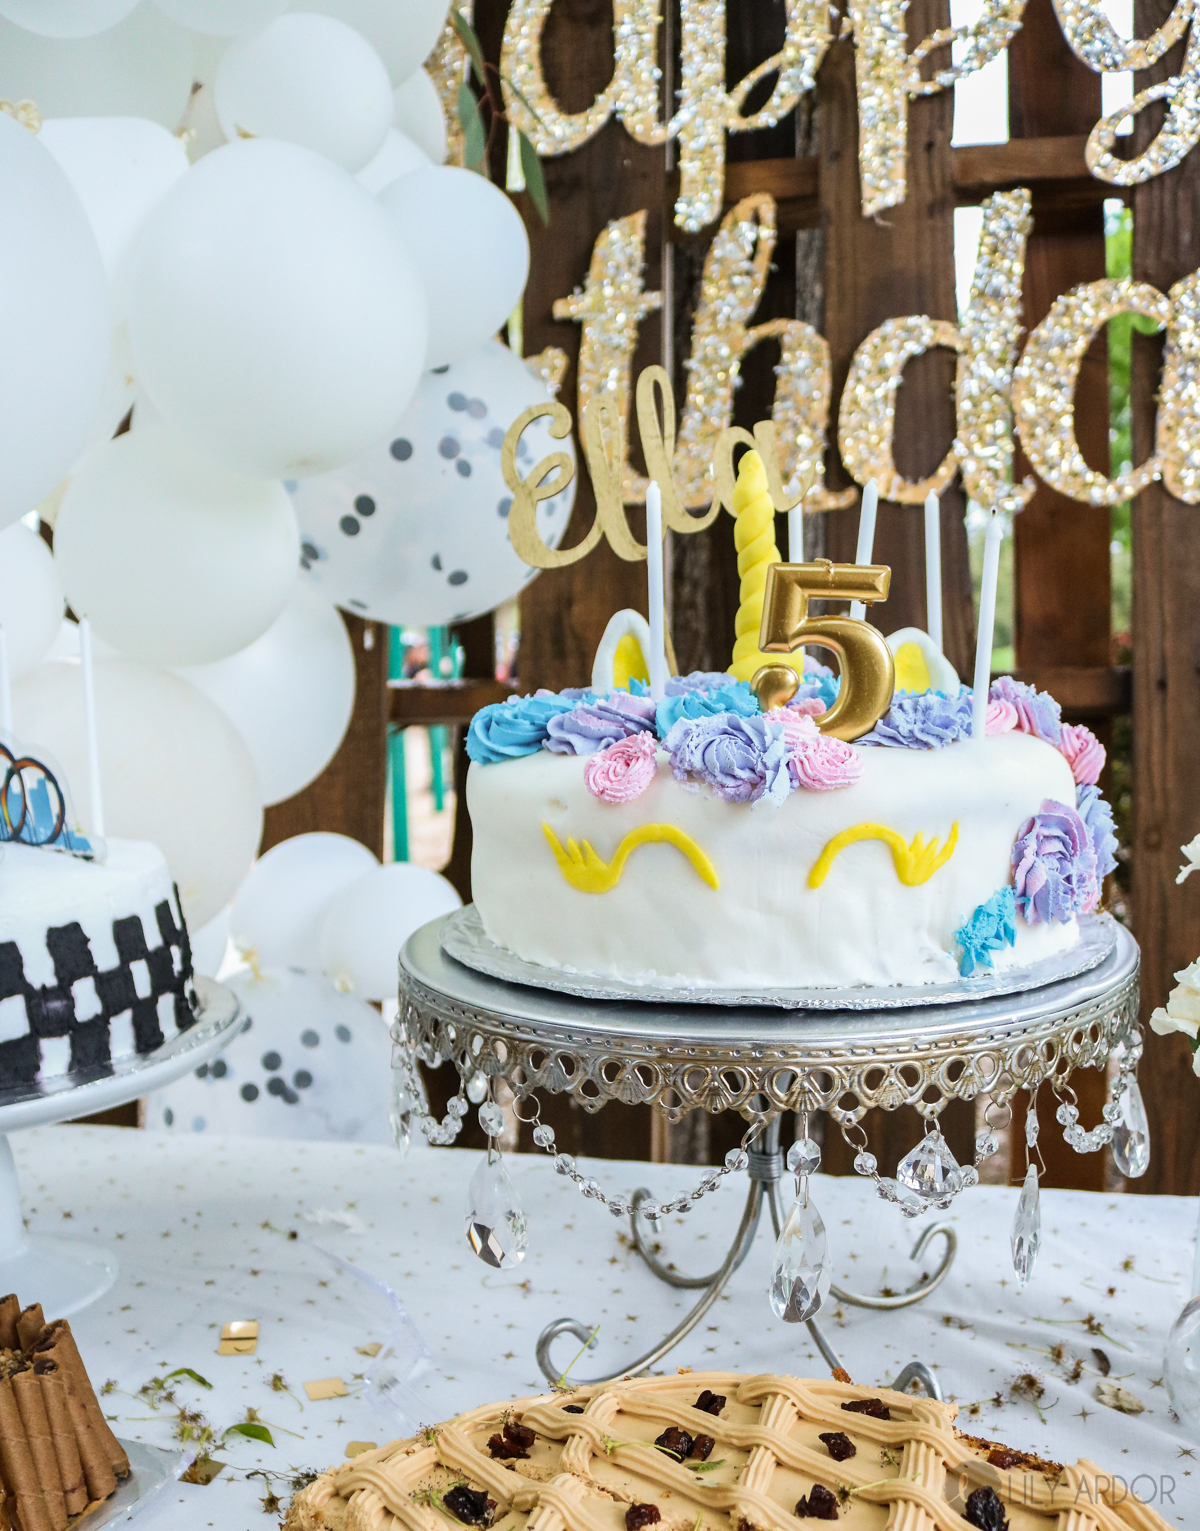
I hope your week is going well. This last weekend was quite the busy one for me😁! We had a close friends birthday celebration and every once in a while I get to decorate for events like these. This isn’t the first party I’ve decorated and it’s a bummer I haven’t posted tutorials for all that party decor. It usually happens so quick I don’t have time to take photos or a video along the way. Since I had at least two days to prep for this balloon arch I was super excited to share this DIY with you.
Ok so originally I was thinking this balloon decoration was called a banner or even a garland but, for some reason when I googled it, it didn’t look anything like the one I made. I ended up searching balloon arch and found it was more similar to what I made. So, if you’re wondering why I called it a balloon arch even though it looks like a garland. That’s why! 😆
Why I love this super easy balloon arch
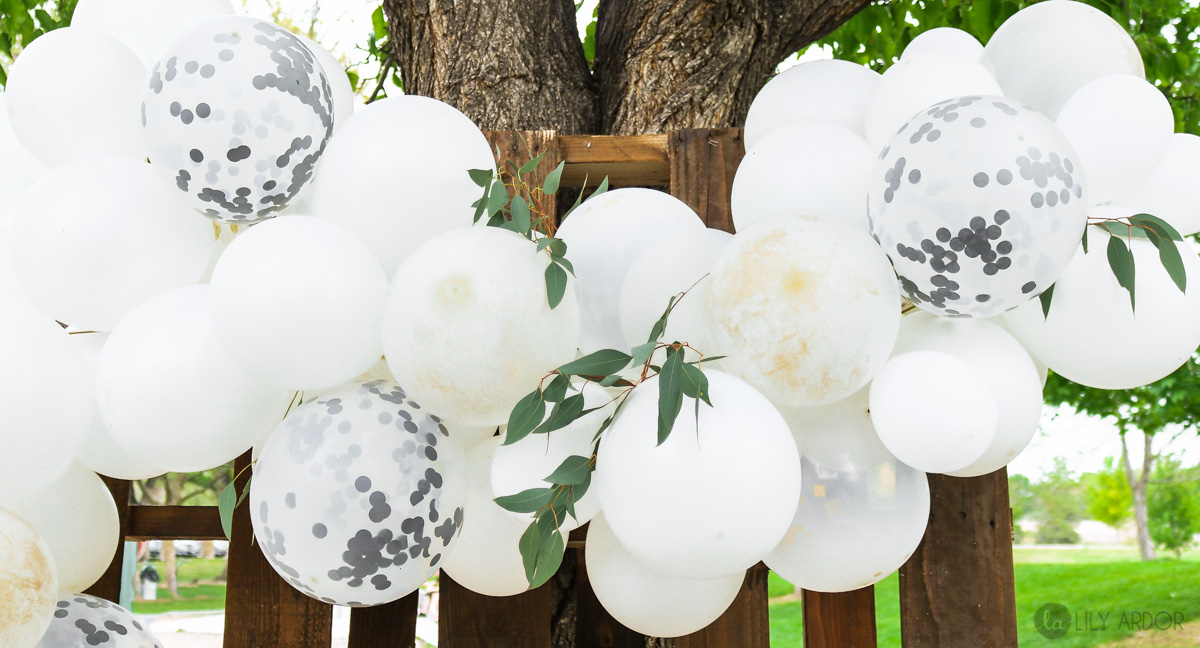
There are some many ways to make these arches. I’ve seen people use cardboard, chicken wire, pvc pipes and sssso much more to make them. When we were planning to make this balloon arch my friend brought up the idea of using tape. After weighing out our options this was by far the most budget friendly and easiest way to make it. I love that this technique has no limit to size. You can make your banner as big or as small as you’d like. Plus it’s very easy to add on length. OH😍 man and my favorite part of all is that you can switch out balloon colors super duper easy!! Yes even if you’re arch is complete!! Click here if you want to learn how to make that custom happy birthday sign.
What you’ll need
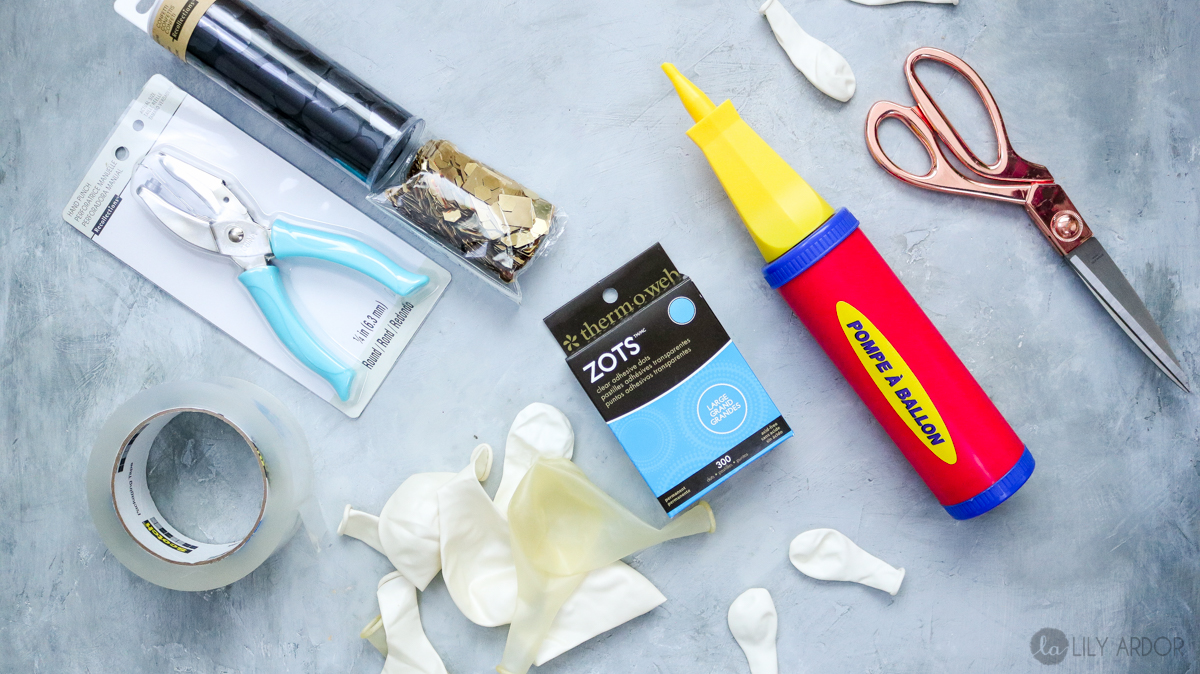
- Balloon pump
- confetti (optional: if you choose to add confetti to your balloons)
- 5 inch + 12 inch in diameter Balloons (we got ours at the zurchers party store) If you plan on doing confetti clear balloons work best!
- Clear adhesive dots (these are like little gel stickers sold at any craft store)
- Clear Tape
- Hole Punch
- Scissors
- Balloons
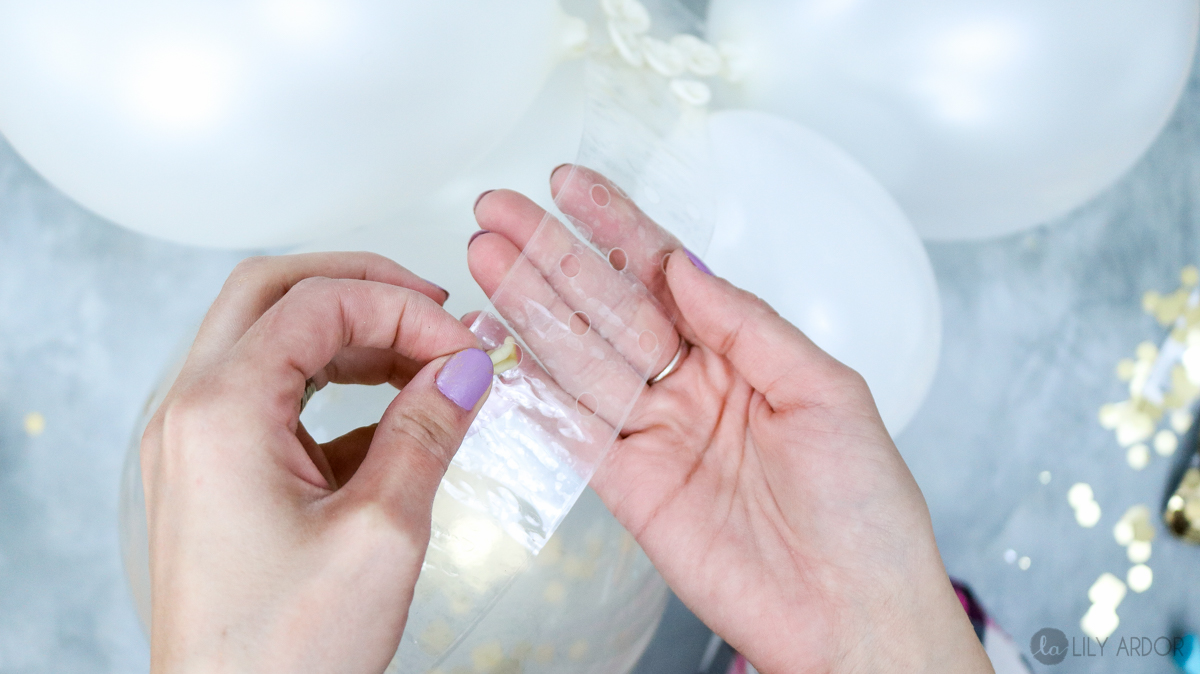
To begin start by connecting 4 layers of tape into one thick layer. I like to work in 4 ft sections. It’s easiest that way. You can always connect your tape to add length to your balloon arch. 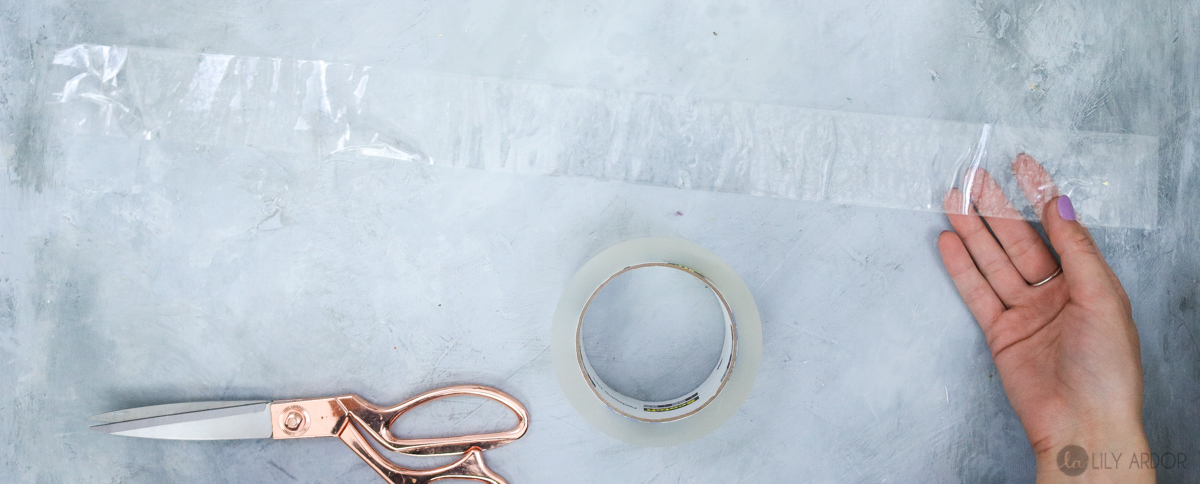
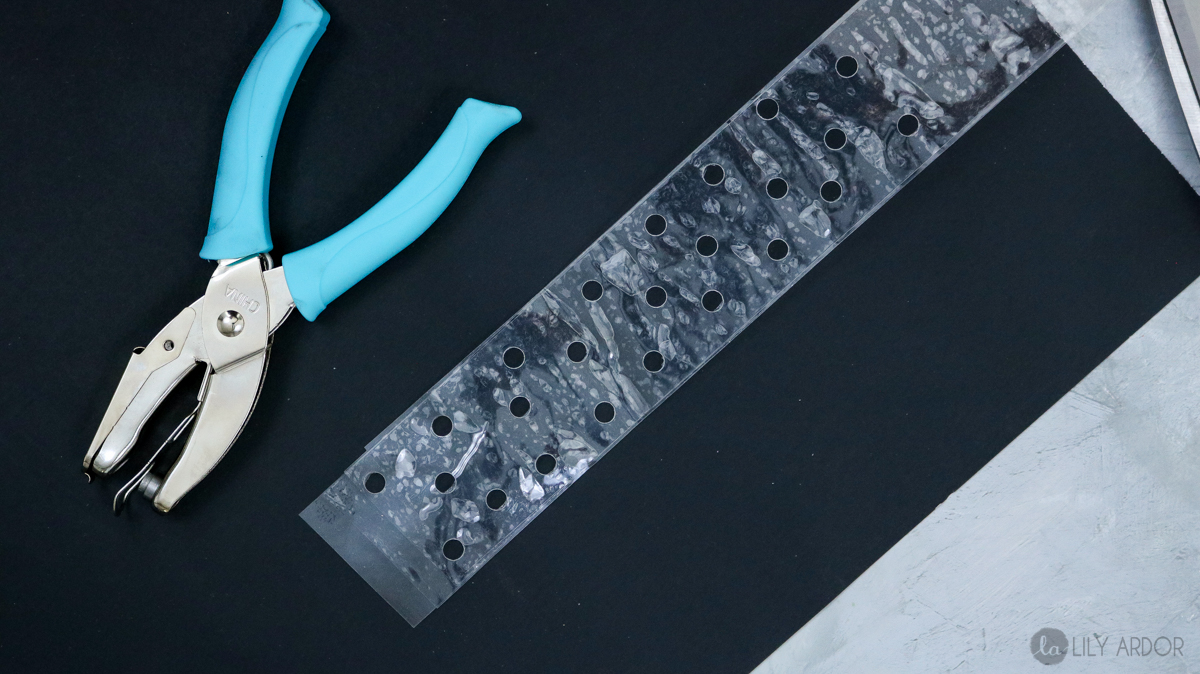
Following that use your hole punch to make holes in your strip of tape. Here’s a photo showing you how many holes I made (below). Honestly this was way to many holes. I spend so much time and energy making the holes and realized it’s too much once I was adding the balloons. For my last strip of tape I did about half the amount holes if not less and it was perfect. Every once in a while I needed to add a hole which was still way easier then making all those holes and not using them.
Don’t make this Confetti Mistake
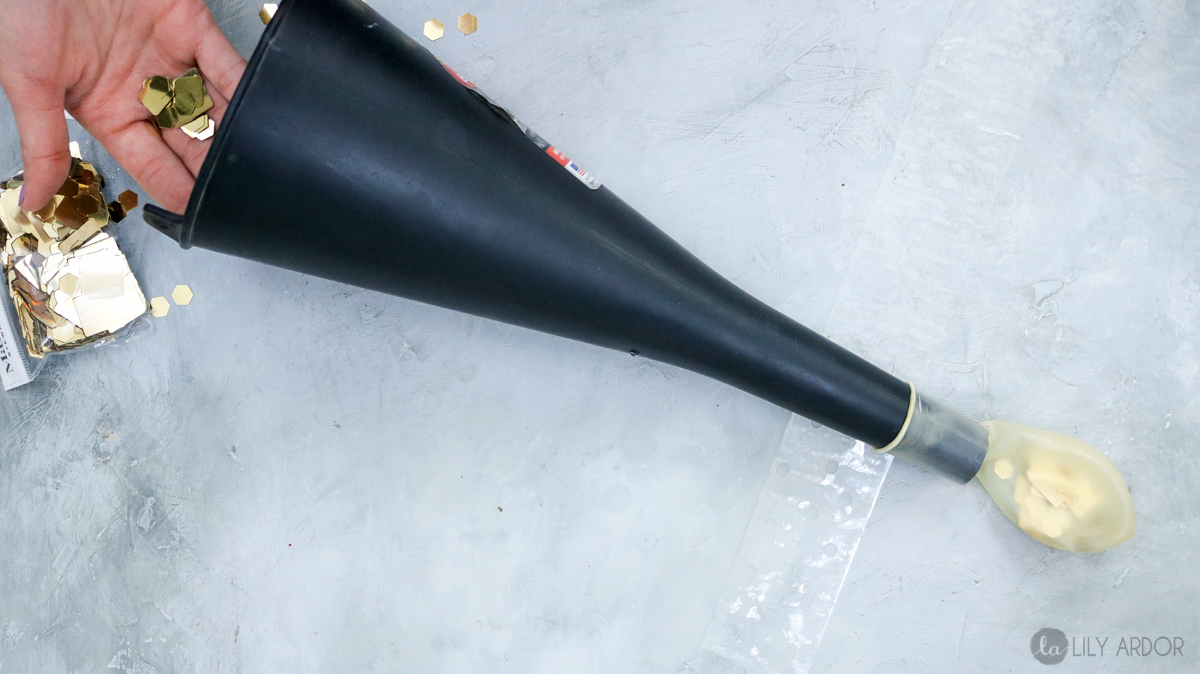
Okay so if you’re using large confetti like I did you’ll need a bigger funnel. You can also try taking a pinch of confetti and squeezing it into the balloon although I haven’t tried this. Oh on the subject of confetti. The best confetti for your balloons is the ones that come in the form of tissue paper. As you can see in the photo below I’m using plastic gold confetti. My gold confetti balloons were a complete fail because the plastic confetti is too heavy and doesn’t stick to the walls of the balloon. Plastic confetti simply falls to the bottom of the balloon and therefore is pretty much pointless because you can’t see it. There is super thin plastic confetti that’ll work as well. If we’re talking glitter like huge confetti than it won’t work (that’s what I used in the photo below). Hope this makes sense. Oh by the way small glitter works well too.
Putting together your balloon arch
Okay this is when everything starts to come together. Once you’ve blown up all your balloons start by sticking the knots of your balloons through your tape holes.
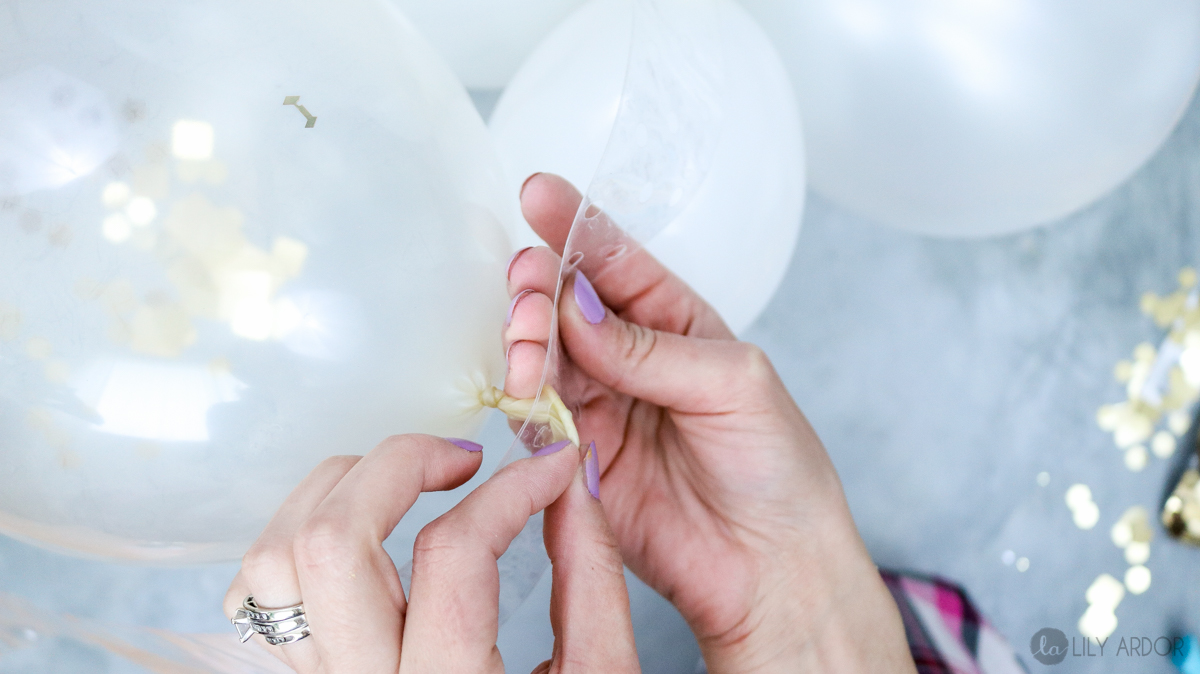
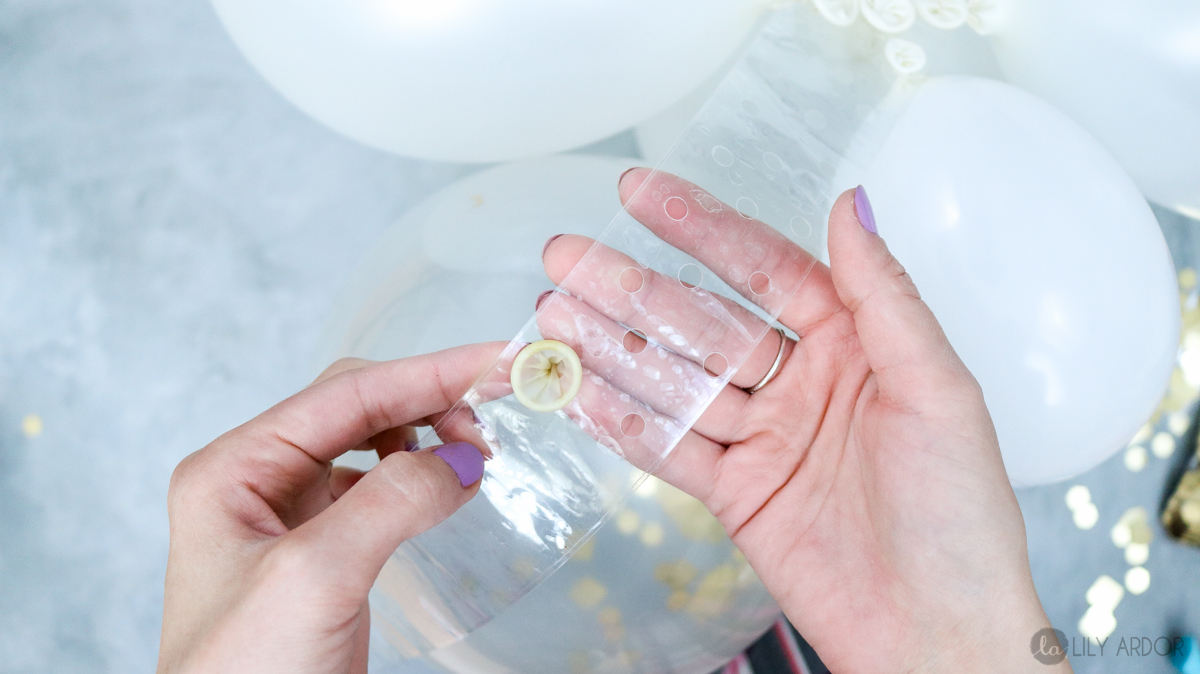
Here’s what the balloons look like once you squeeze them through the punch holes. As I’ve mentioned the first time around I made way to many holes in the tape. So my second strip of tape has 1/2 those holes if not less.
To built up the shape of my balloon arch I used the 12″ inch balloons to fill in all my punch holes. Once you fill all your punch holes with balloons you should have a pretty balloon garland. Following that I hung my balloon garland on my pallet using regular push pins on both sides and started using my 5 inch balloons to build up the shape and add more contrast. 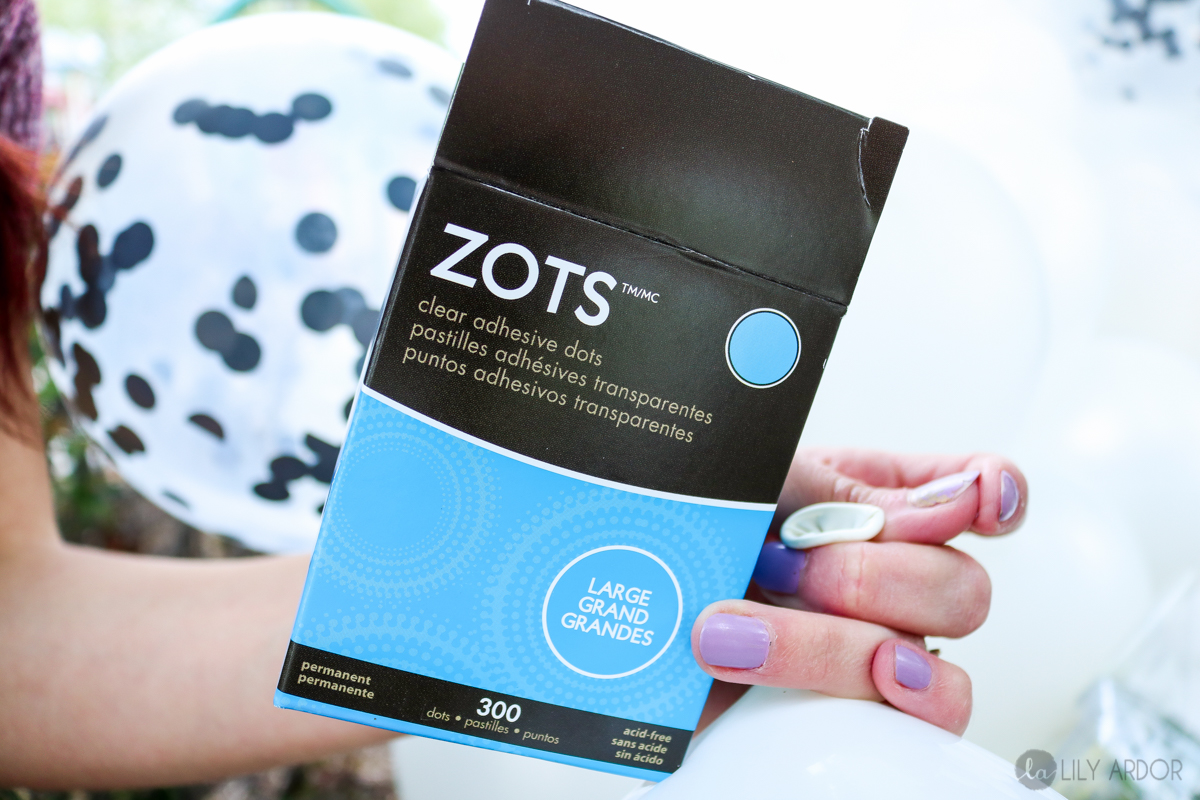
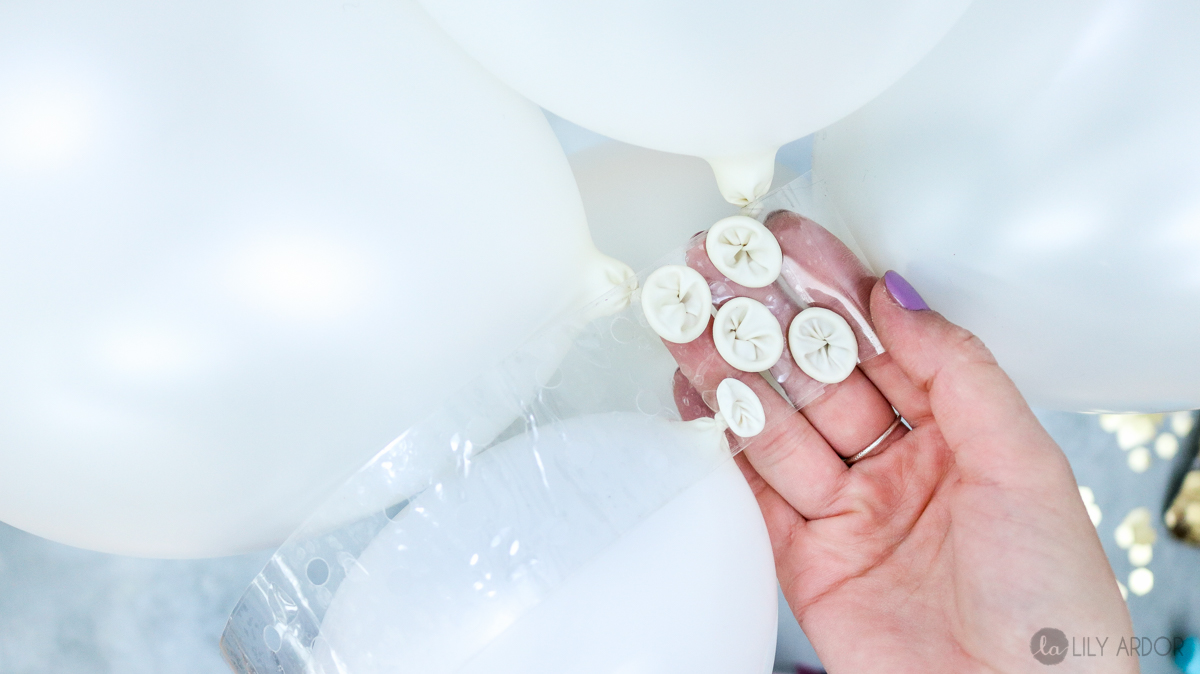
How to add your 5″ balloons
I used zots to attach the small 5 inch balloons to the balloon arch to add more shape. Honestly I wish I had more time to add more tiny balloons. I was in such a big rush I didn’t get a chance to really complete shaping off the balloon arch.
Here’s a quick video of how I put it together!
The black confetti I used in the balloons was made of tissue paper and as you can see it stuck onto the walls of the balloons very beautifully. There’s a gold balloon to the right bottom of the photo and as you can see the gold confetti isn’t really visible. The small gold glitter however is pretty visible. 🙂 (top right balloon is small gold glitter) 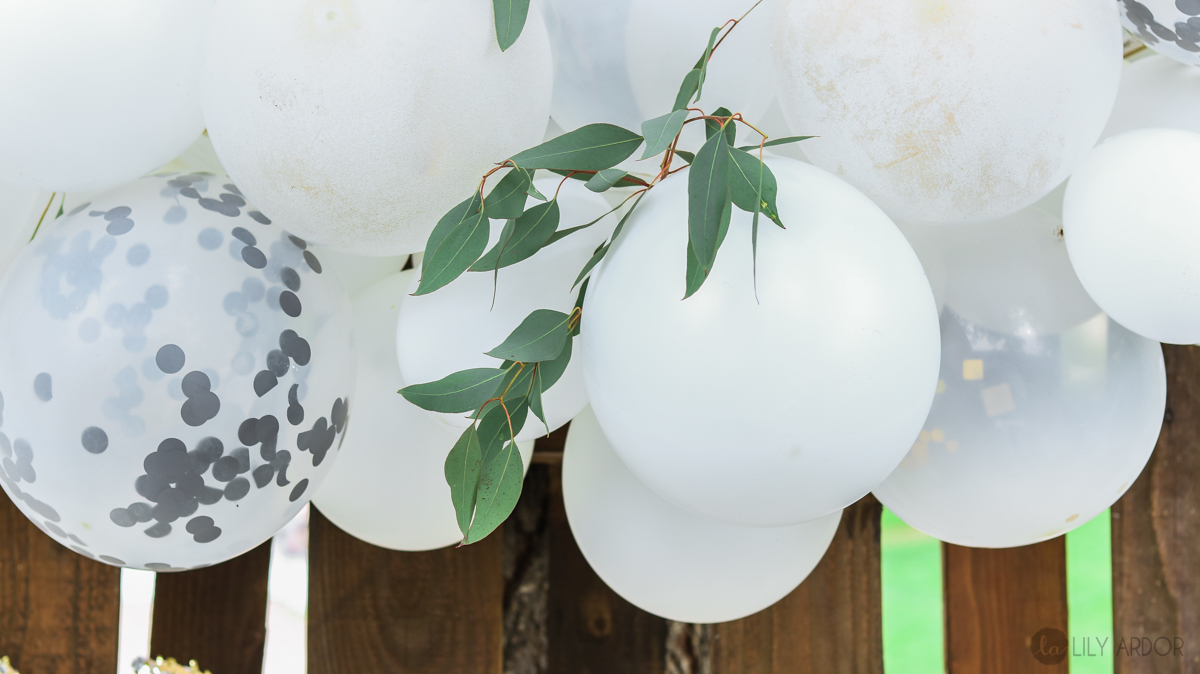
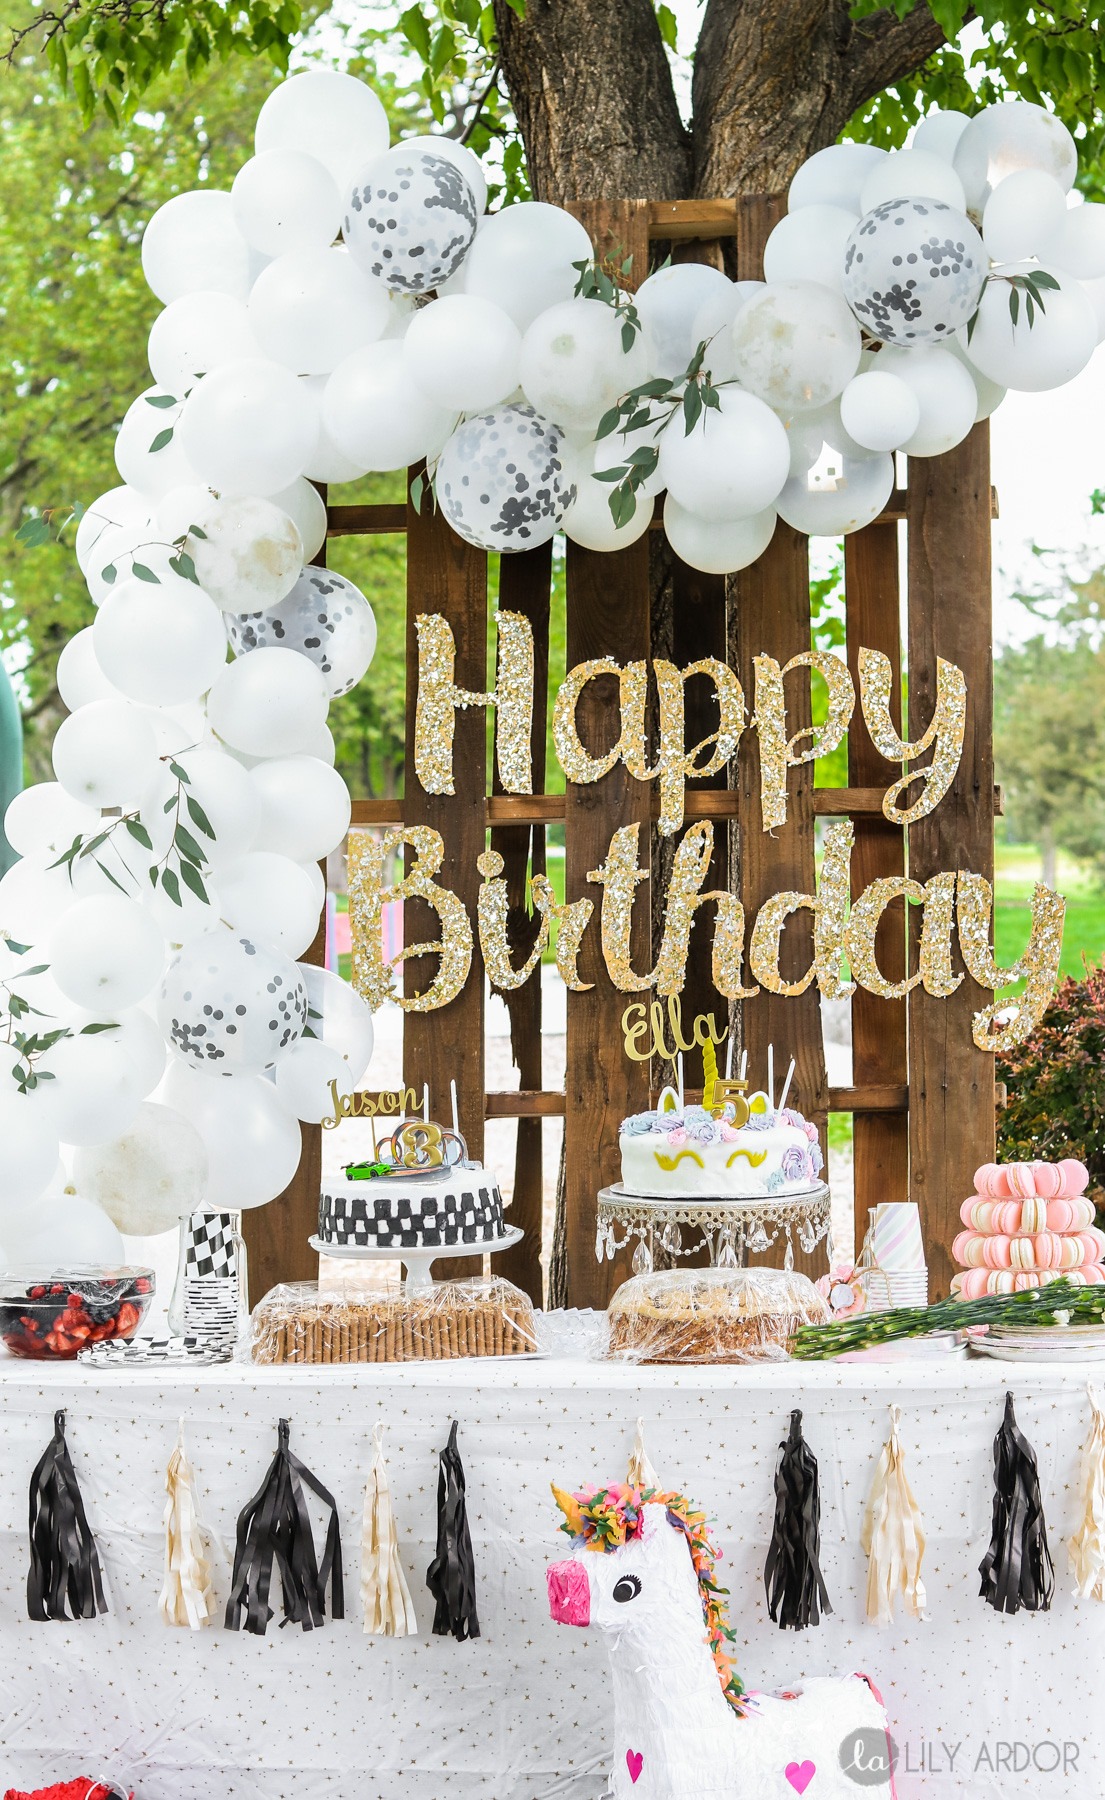
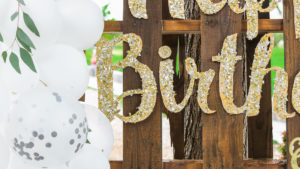
I didn’t get a chance to add much small balloons to the top of the arch at all but, I think it still has a pretty shape. This pallet was 8ft tall so it’s pretty hard to get too 😑.
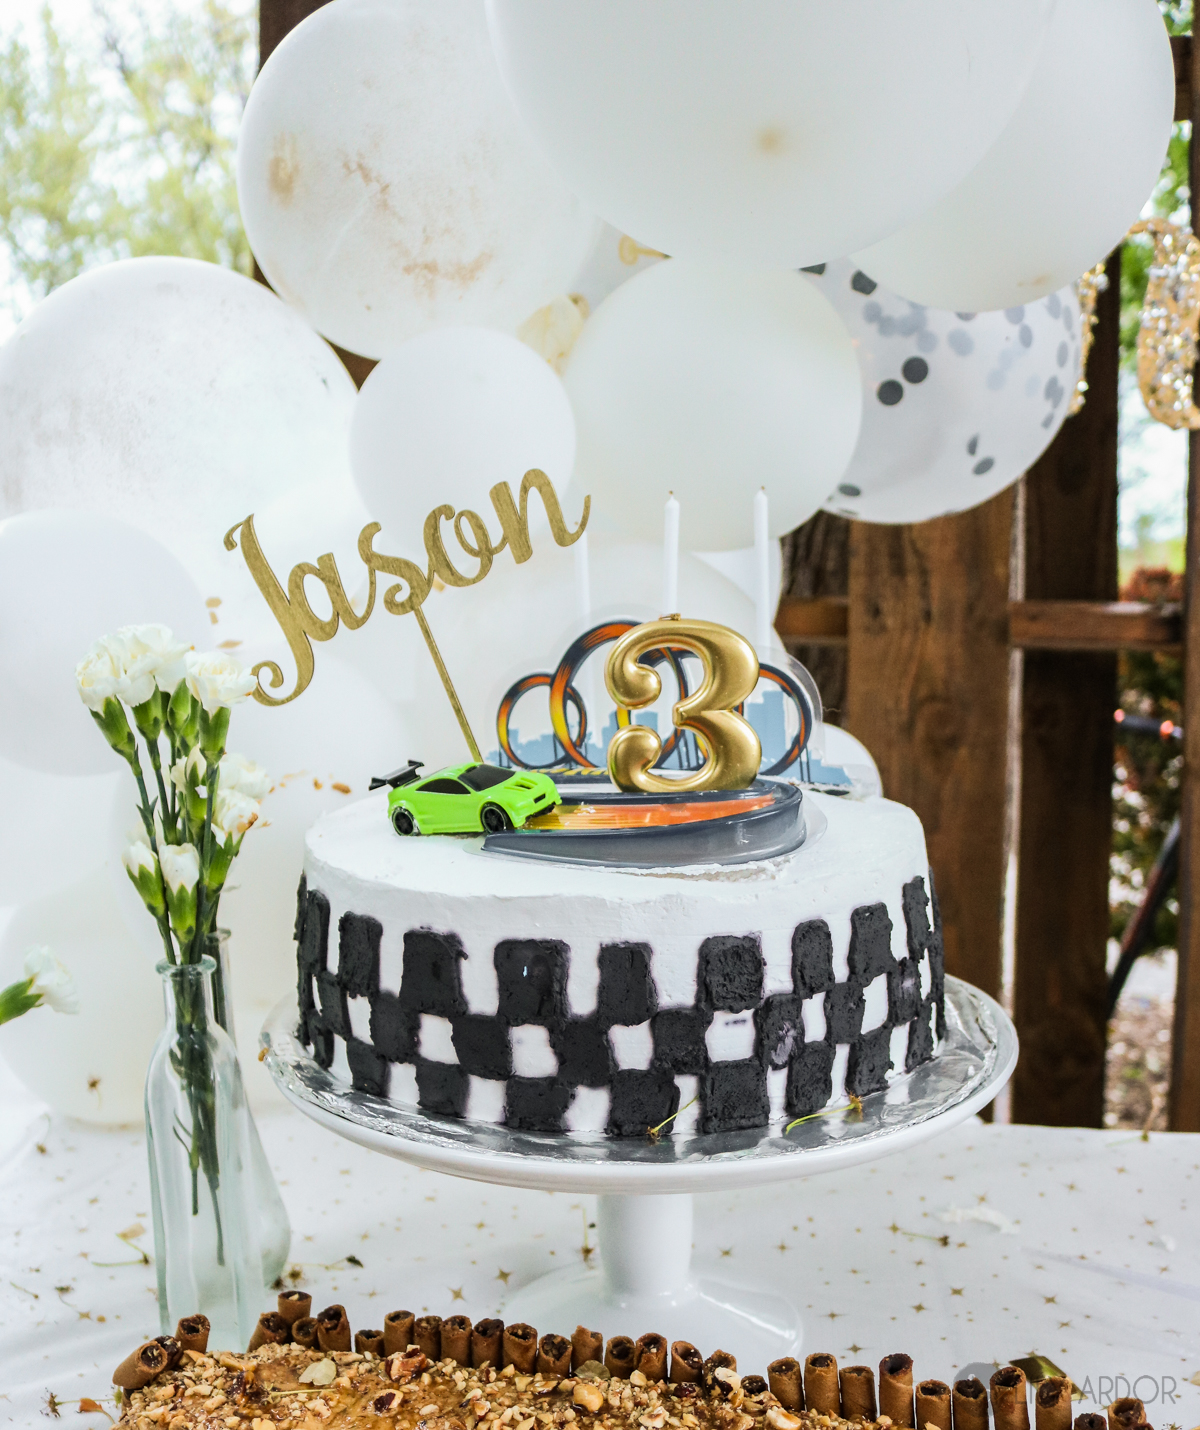
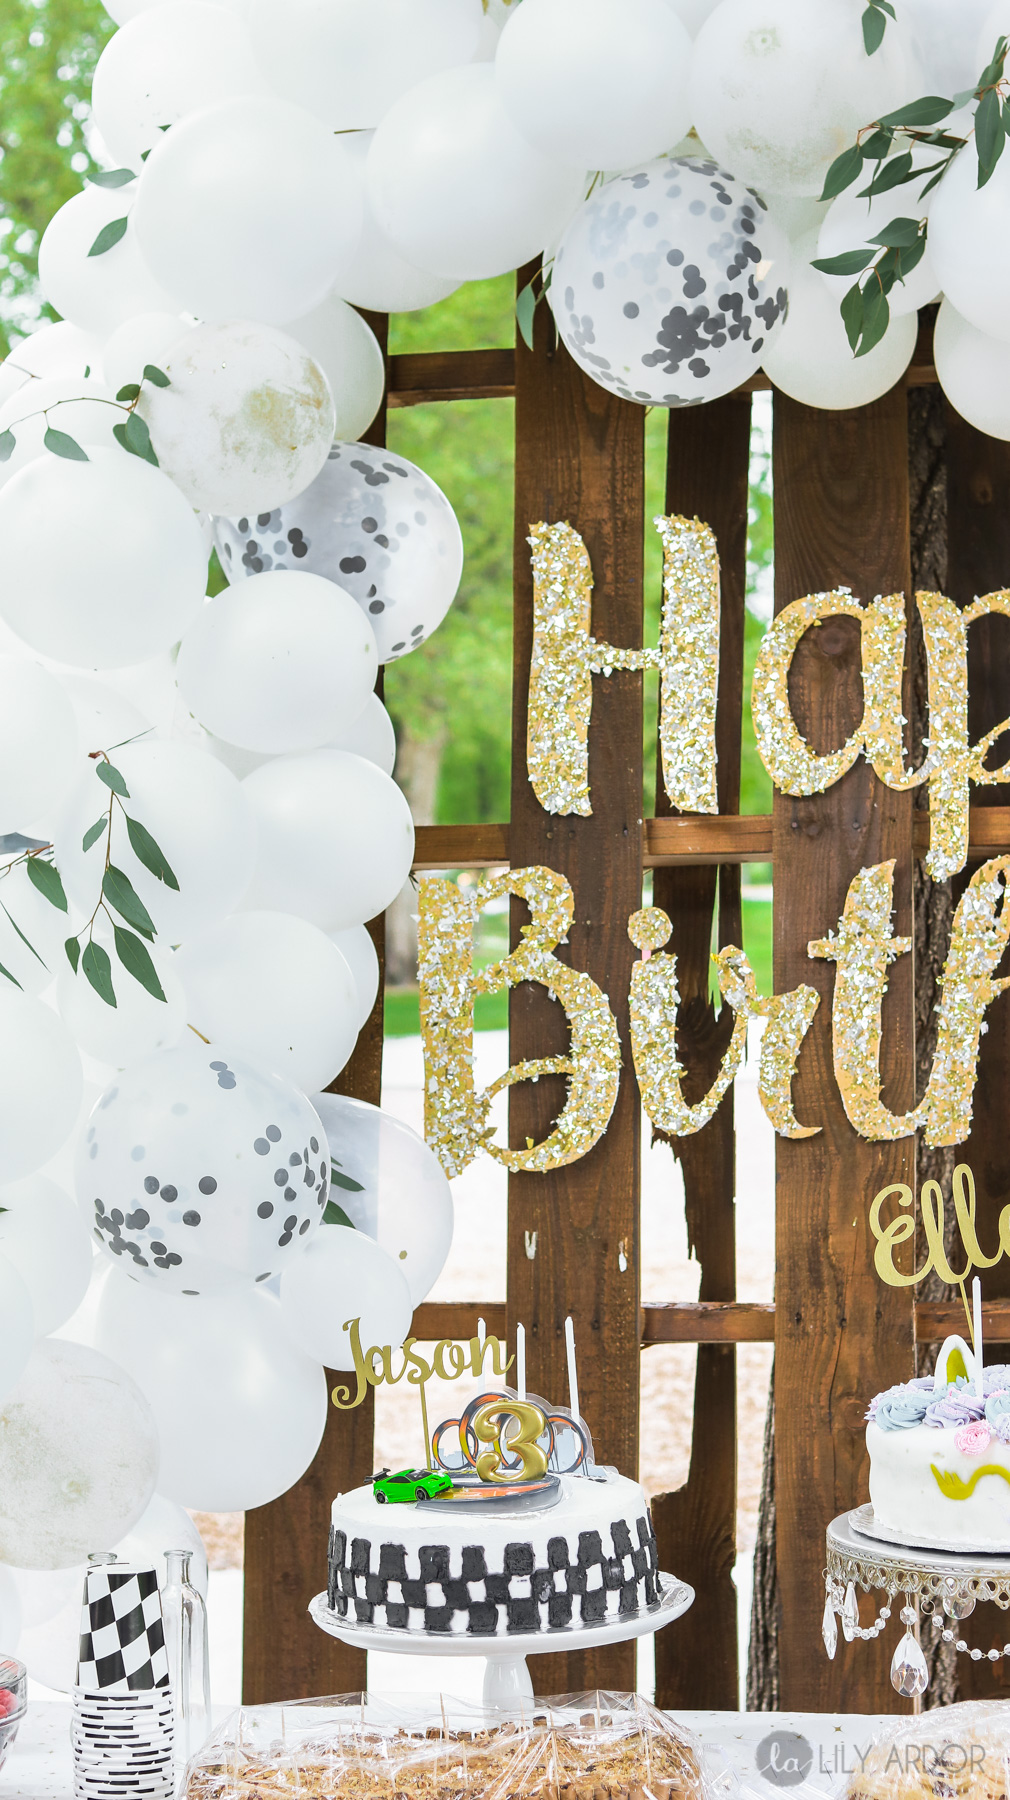
I love the concept behind this balloon arch! It would look ssso cool in color. Since this was a double birthday for brother and sister we had to keep it neutral. I hope this inspired you to make your own balloon arch! 😊
Let me know if you have any questions. I know I usually do more step by steps photos. 🙂
Here’s how you can make that custom happy birthday sign from dollar store foam board!
Beautiful birthday party decor, love it.
YAY! Glad to hear that Mira. 😀 😀 Thank you 😀
Wow well I never would have thought about making the arch that way with the tape ! That’s so brilliant ! And takes up a lot less time stringing them together with ribbon!
It’s ssso easy this way. I love that you can switch the balloons out so easily if you want different colors in spots. Gosh yes I can’t imagine how long it would take with a ribbon. So glad you liked it 😀 😀
How in advance can you make the arch?
The balloon garland wouldn’t be a good idea to make in advance as the balloons deflate. If you’re looking to blow the balloons up quick you can use air compressor air or balloon pump sold in stores.
I love how this looks!!! What a brilliant idea with the tape! super simple and so easy to recreate!! Thanks for the inspiration, Lily!
Thanks Nickell, I’m so glad you love it! Yes I love how easy it is to make. I really wanna try it in different colors. That would be sssso fun!
Wow you make it look so easy, this is beautiful! Bookmarking for my next party 😀
Awe I’m so glad to hear that. YAY! Share photos when you make one! I can’t wait to see 😀 😀
great post. very easy to understand and good pics. plus i love that cake plate!!!
Awe thank Angela 😀 😀 Glad to hear the pics and instructions are good. LOL I was in a such a hurry I felt like I forget to take pics for everything I needed. Oh man the deserts were so good 😀 😀
Hi! How did you attach the birthday sign to the wood ?
Hi Janet. I used a stapler.
Very cute Lily ! Great tips for both the arch and the sign, can’t wait for a birthday or something so I can make them. Thanks, have a great weekend.
Thank you Diena. Glad you liked the idea. Oh man i know exactly what you mean I’ve been wanting to do a colorful one so bad 😀 😀 Thank you 🙂 I had a wonderful weekend. You have a great week as well 😀 😀
LOVE the arch! How did you hang up the arch to the wall?
thank you!
Thank you Nina. I used regular push pins and secured the tape part with push pins to the wood. 😀 😀
I love this method! Was really concerned about chicken wire scratching up my surfaces. This is a winner! Thanks!
Yes good point. I didn’t think of the scratching part. This is so much more safe on your walls. So glad you liked it.
wow just wow
Thank you for the very very easy tutorial I have researched many tutorials on Diy Balloon Arches & this by far takes the least amount of time. I was a bit discouraged because the tutorials were so tedious but I will definitely put this back on my to-do list for my son’s birthday party this weekend.
OH my gosh I’m so glad you found this. Yes I’ve seen quite a few tedious ones out there. Happy birthday to him. let me know how the balloon arch goes?
How far in advance can you make the balloon arch w/o the balloons deflating? Ideally I do not want to make this the day of due to other food picks, decor set-up etc…
Hi Michelle, that totally makes since. I made mine the morning of the party and still noticed slight shrinkage. I’m pretty sure you can do it the night before I wouldn’t do it any sooner than that. You might need add a few more balloons to fill gaps from them shrinking though. I hope you have a great Party 😀
Nice idea!! I would like to know how did you stick it onto the wall using a two sided tape??
Yes that’s what I used. You need strong tape though.
This looks fabulous but how do u attach each 4ft piece of tape to the next one? Do u attach before u start? I know this sounds silly!!
Hi Debra, not silly at all. You can have them attached before you start if you’ll be making it in the same building you plan to decorate however I taped mine together after I had the balloons on since it was easier to stuff 4ft balloon banners into the car. Once we got to the park I pulled my 4ft sections out and taped them all together. 😀
Hello!
I’m planning on creating a balloon arch for my son’s 1st birthday. However I have a question. Since you are pushing the ends of the balloons through the same side of the tape, is the back side going to be covered enough to not see the tape?
Thank you!
Yes the balloons cover most of the tape. It also helps if you use smaller balloons to fill in gaps.
Great video!!!please do more
Thank you 😀 I hope to do more birthday decor soon 😀 😀 So glad you liked it!
Nice collection, Looking great thanks for sharing these Party decoration tips, very easy to implement and try our Party Supplies UK
Thank you for this! I find this to be more simpler than other DIYs out there – will give this a try for an event this weekend. Questions: would like to get instructions on how can we hang it on a wall instead of a pallet? And how to turn this into a stand-alone structure (instead of attaching to something)? When you said you attached 4 pieces of tape together – does that mean you used 4 pieces of tape and stacked them together to form into one? Thank you!
Hi girl! Sorry I missed your questions. I’m probably to late to answer your questions but I’ll answer just incase. If you’re hanging it on the wall you would attach it the same way. Just use a push pin and attach the tape area to the wall. Not sure how you can make this stand on it’s own. Maybe add a white pvc pipe frame under. Nothing I can think of off the top of my head.hmmm maybe, You can insert pcv pipe inside a bucket of concrete let it set and wrap the balloon banner around the pvc pipe. add balloons around the bucket to hide it. The bucket of concrete would help the pvc pipe frame from falling over. No I stacked two pieces of tape together and did 4 sections that were length wise. Than I attached these 4 sections together. I hope this makes sense.
Gorgeous! How many balloons did you use to make this length?
Thank you Cindy, Not sure I understood you question?
How many balloons did you use?
Wow tough question I have no idea. It’s been a while. Probably around 100 ?
Do you use weights on both ends of the tape
No weights 😀
Worked great! Thank you so much for sharing!!!
Happy to hear that 😀 Thank you
I wanted to thank you for posting how to make the balloon tape. I was unable to get any supplies in time for daughter b-day during lock down. I wanted do something since she was so disappointed she couldn’t take the Driver test here in NJ. I found your pin.Life saver It was perfect to make her 17th drive by birthday special !
AWWWE that’s so sweet! I’m so glad you got it to work! Happy Late Birthday to your girl! 🙂
This is amazing. I have been ballooning for15 years and I like when I find crafty people that have figured out ways that are simple. Thanks! I never thought about using tape in that way. I noticed comments about preparing balloons ahead of time. Balloons can be prepared at least one week in advanced and kept in large trash bags. Yes, there will be some shrinkage. The solution is to blow extra balloons to and bag them as well. The balloons look great. Balloons tend to oxidize outside, so color balloons look ashy or not as vibrant. I use pearlier or chrome for outdoors. White balloons are perfect outside because the oxidation is not as noticeable. Great job.
Hi, thank you. I’m so happy to hear this was helpful. WOW I didn’t know you can prepare balloons that far ahead. That’s definitely good to know. OOH I had no idea balloons oxidize outside. That’s so weird. I’ll definitely keep that in mind. Thanks for all the tips! This is awesome!
Balloons are great for every ocassion