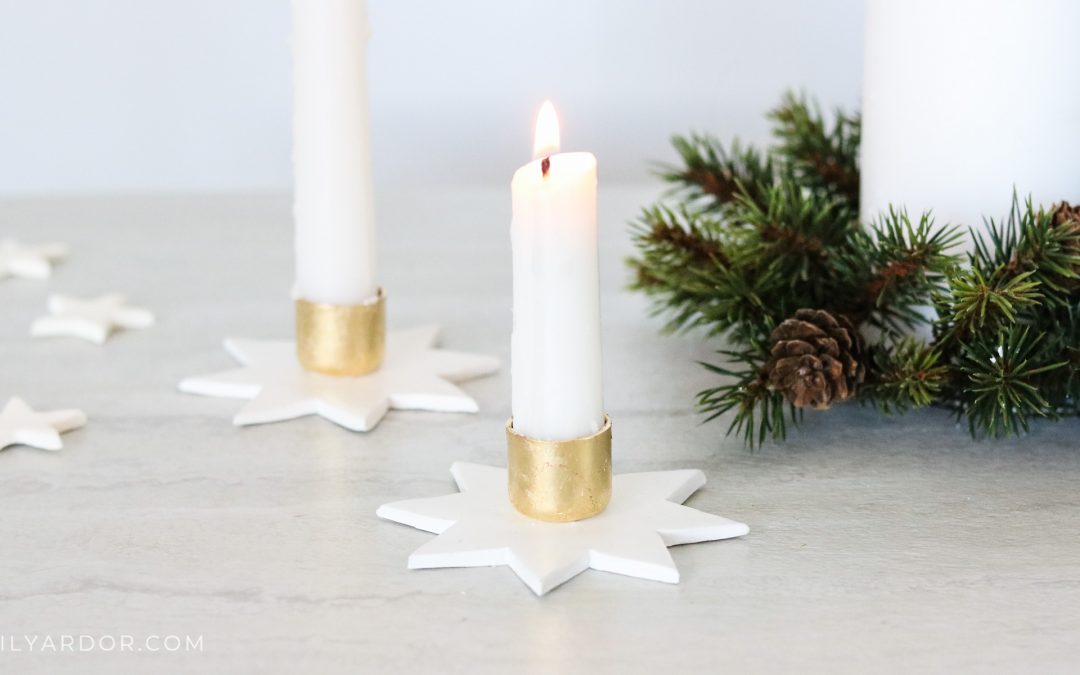
Hi everyone! Happy Friday! I’ve been away for a few weeks and it’s so nice to finally be home catching up on crafts. I have so many Christmas DIY’s planned and hope to make them all on time😁! Today’s DIY is a star candle holder!
In our house we use candles during the winter season a lot more than in the summertime so, since winter is almost here I came up with some cute ideas for candle holders. This star candle holder is super simple and really easy to make. Totally kid friendly and you can make the base any shape you want. I will be sharing 1 more DIY in the next blog post which is also a candle holder. Hope you check it out 🙂 .
*this post contains affiliate links for more info visit my disclosure page here
TOTAL COST:
About $4 a piece. I had a lot my supplies which cut down on the cost. The glue is usually around $4 and I’ve used it for some many projects already.
TIME NEEDED:
About 20 minutes not including bake time.
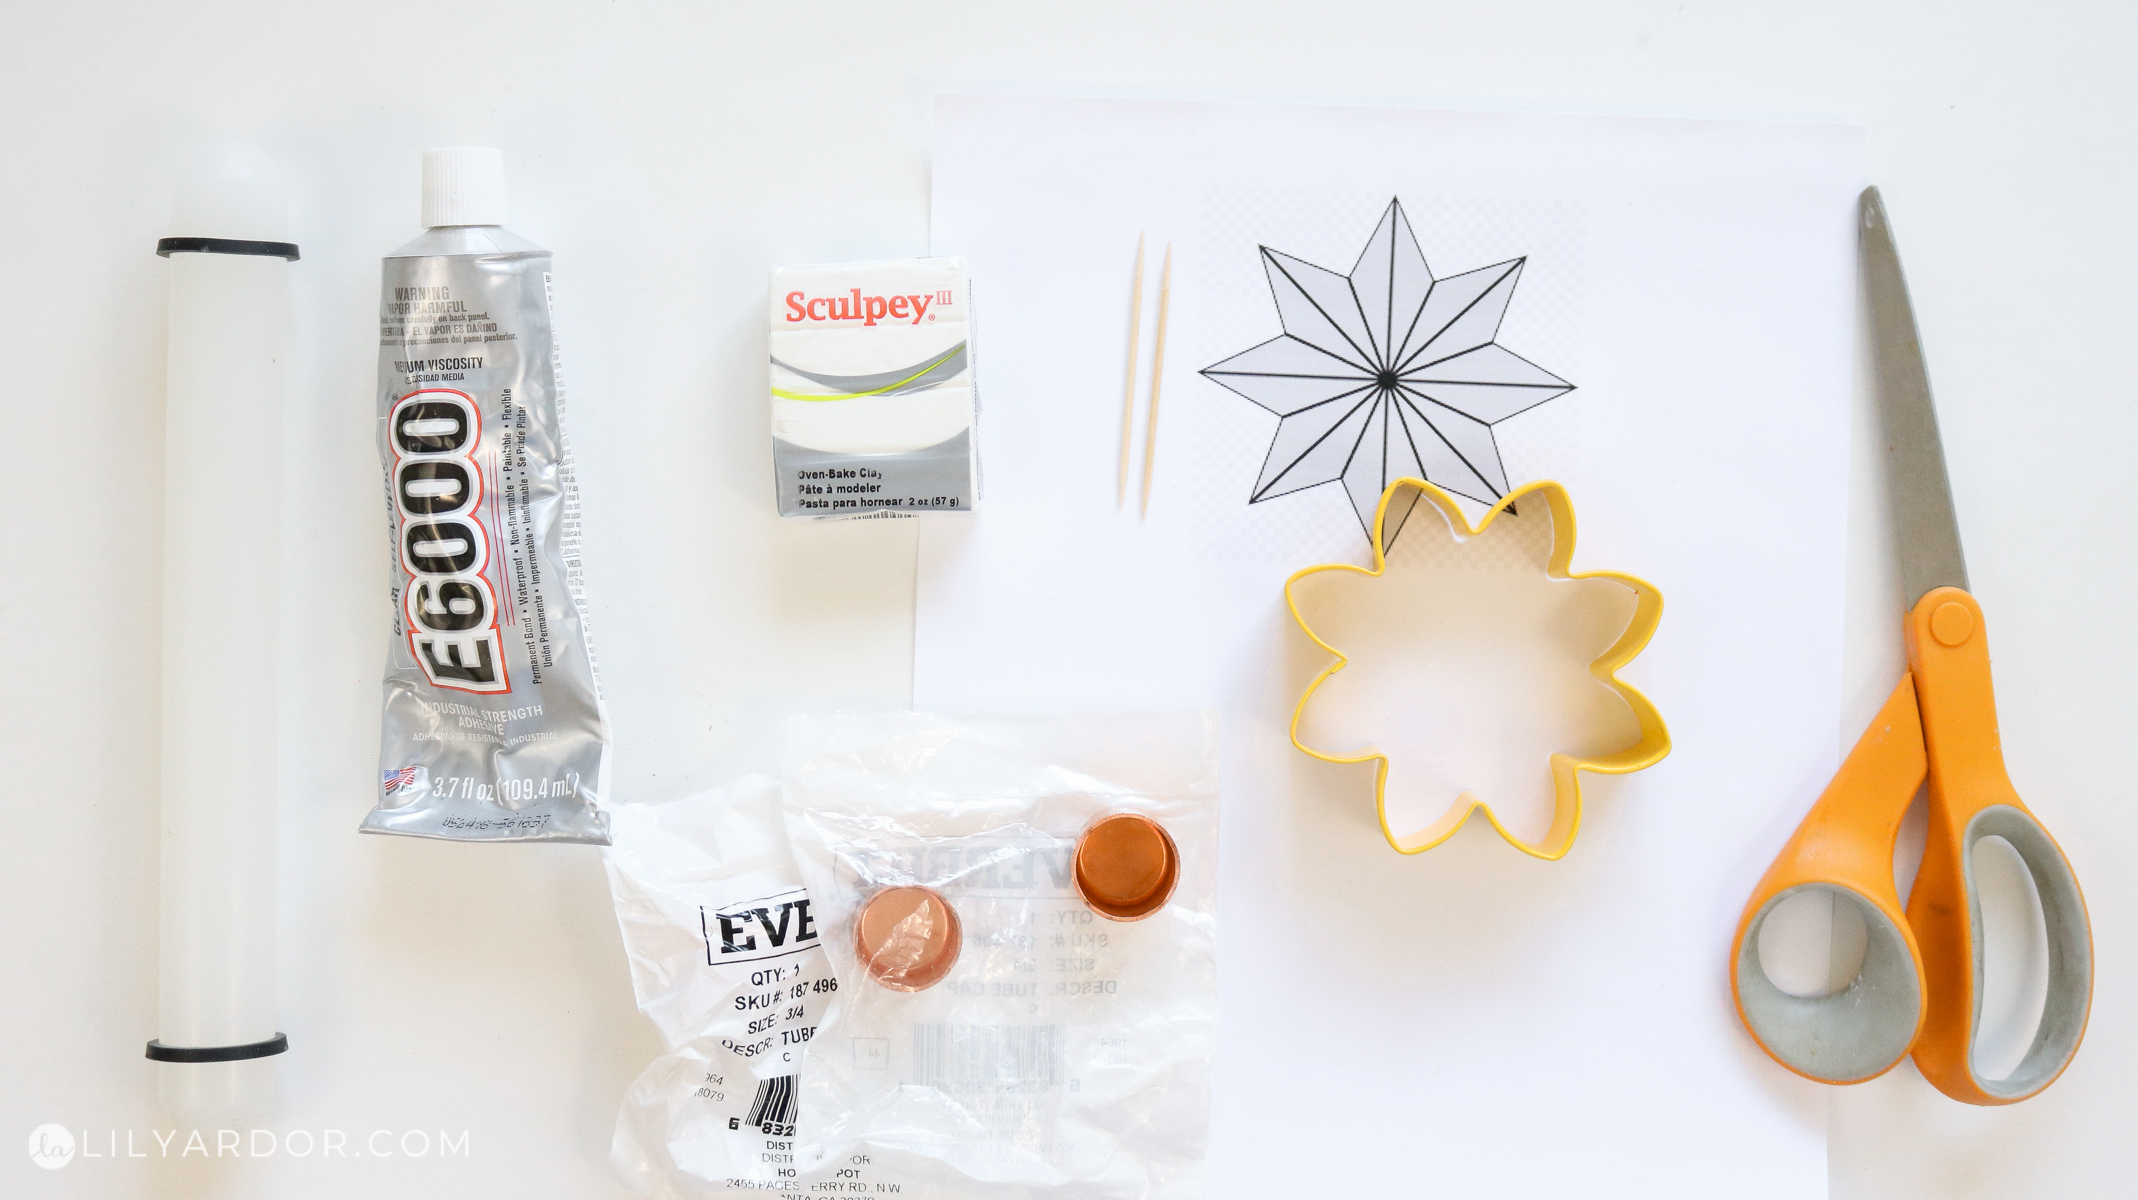
SUPPLIES:
- cookie cutter or printable
- E6000
- rolling pin
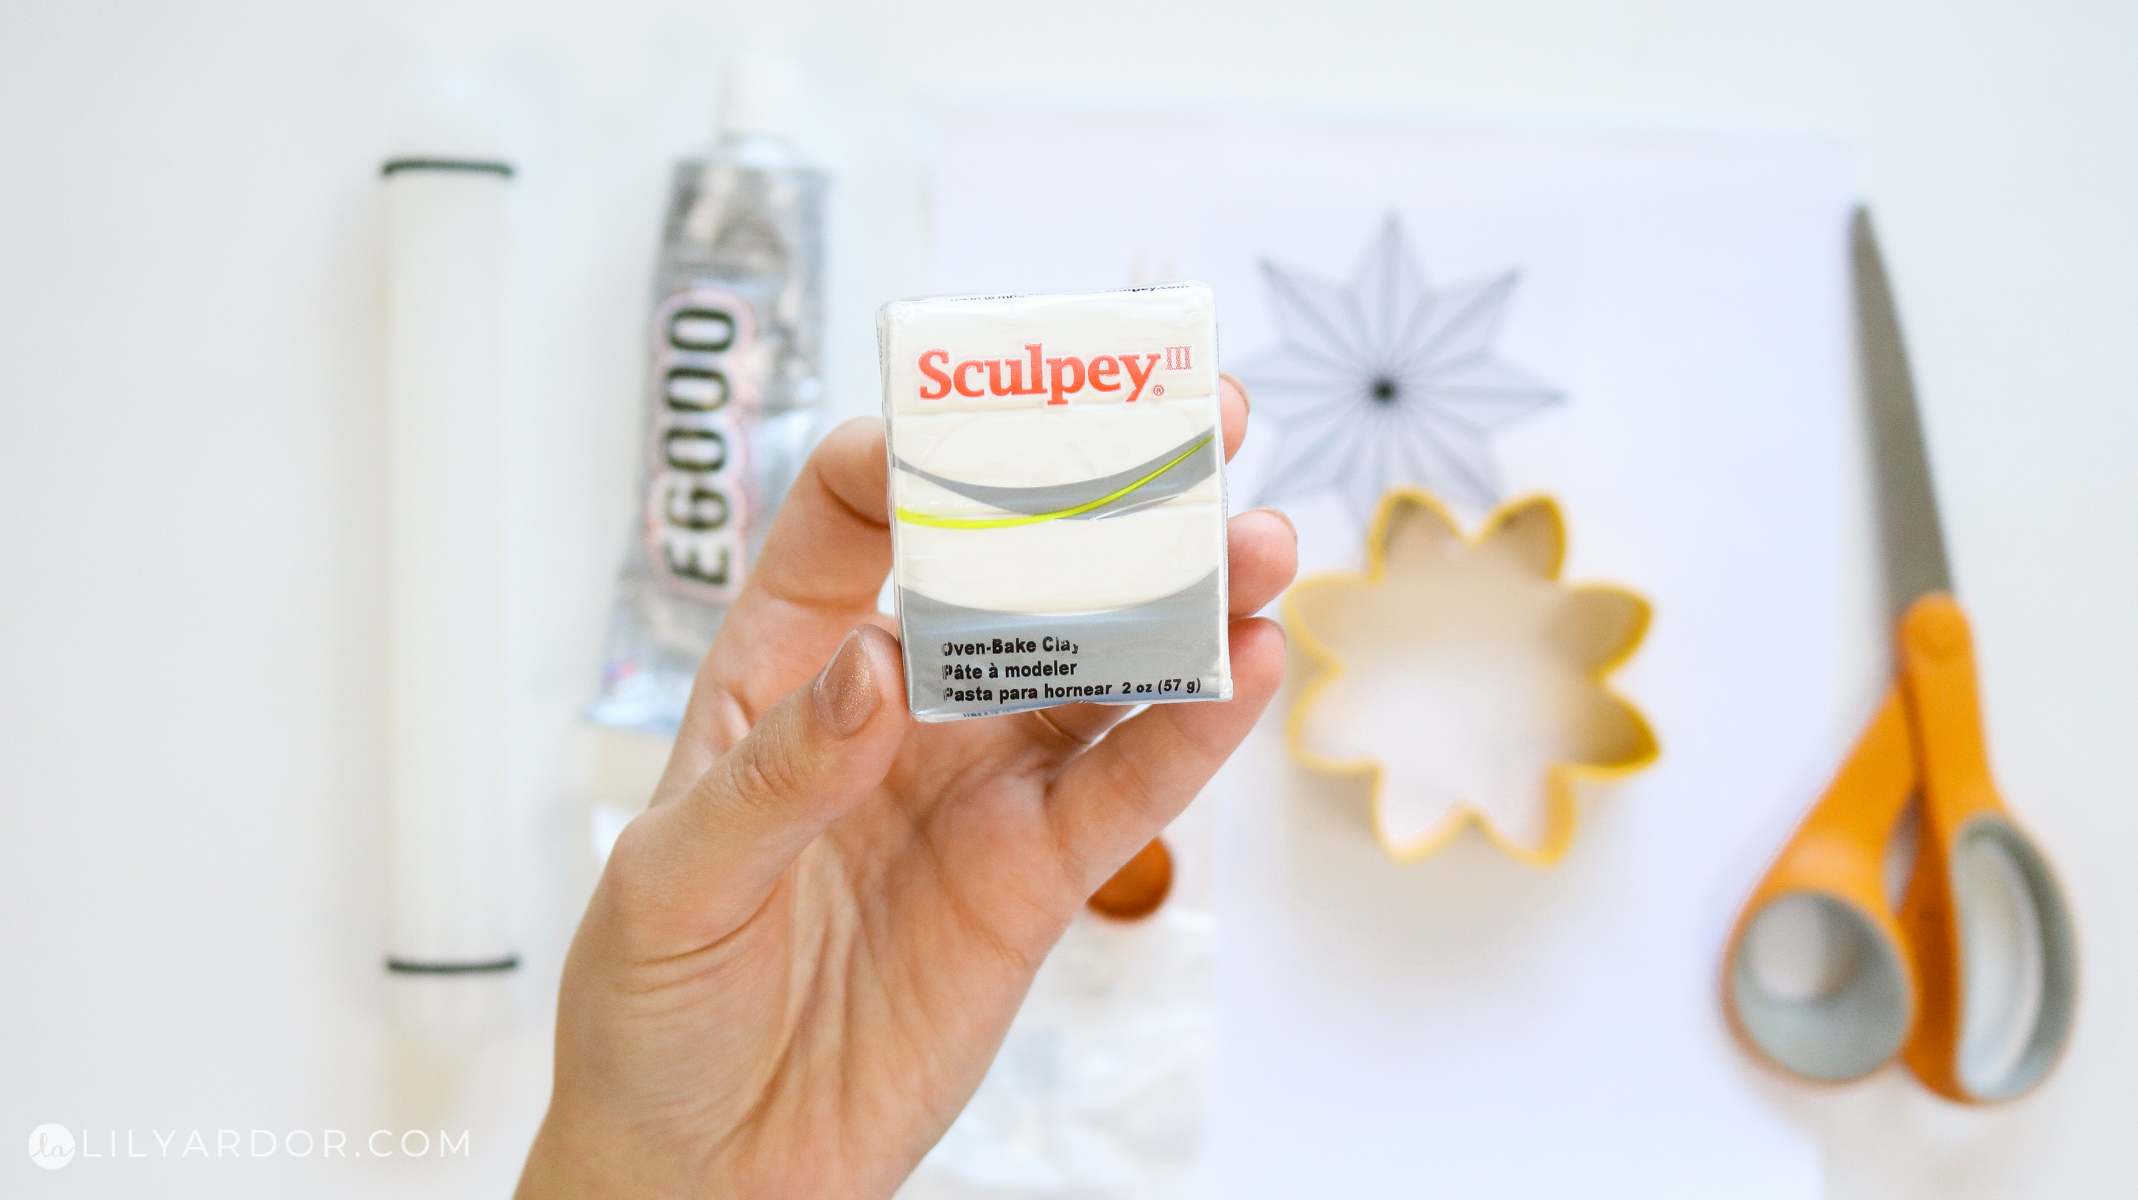
- sculpey polymer clay ( 2oz makes 2 stars)
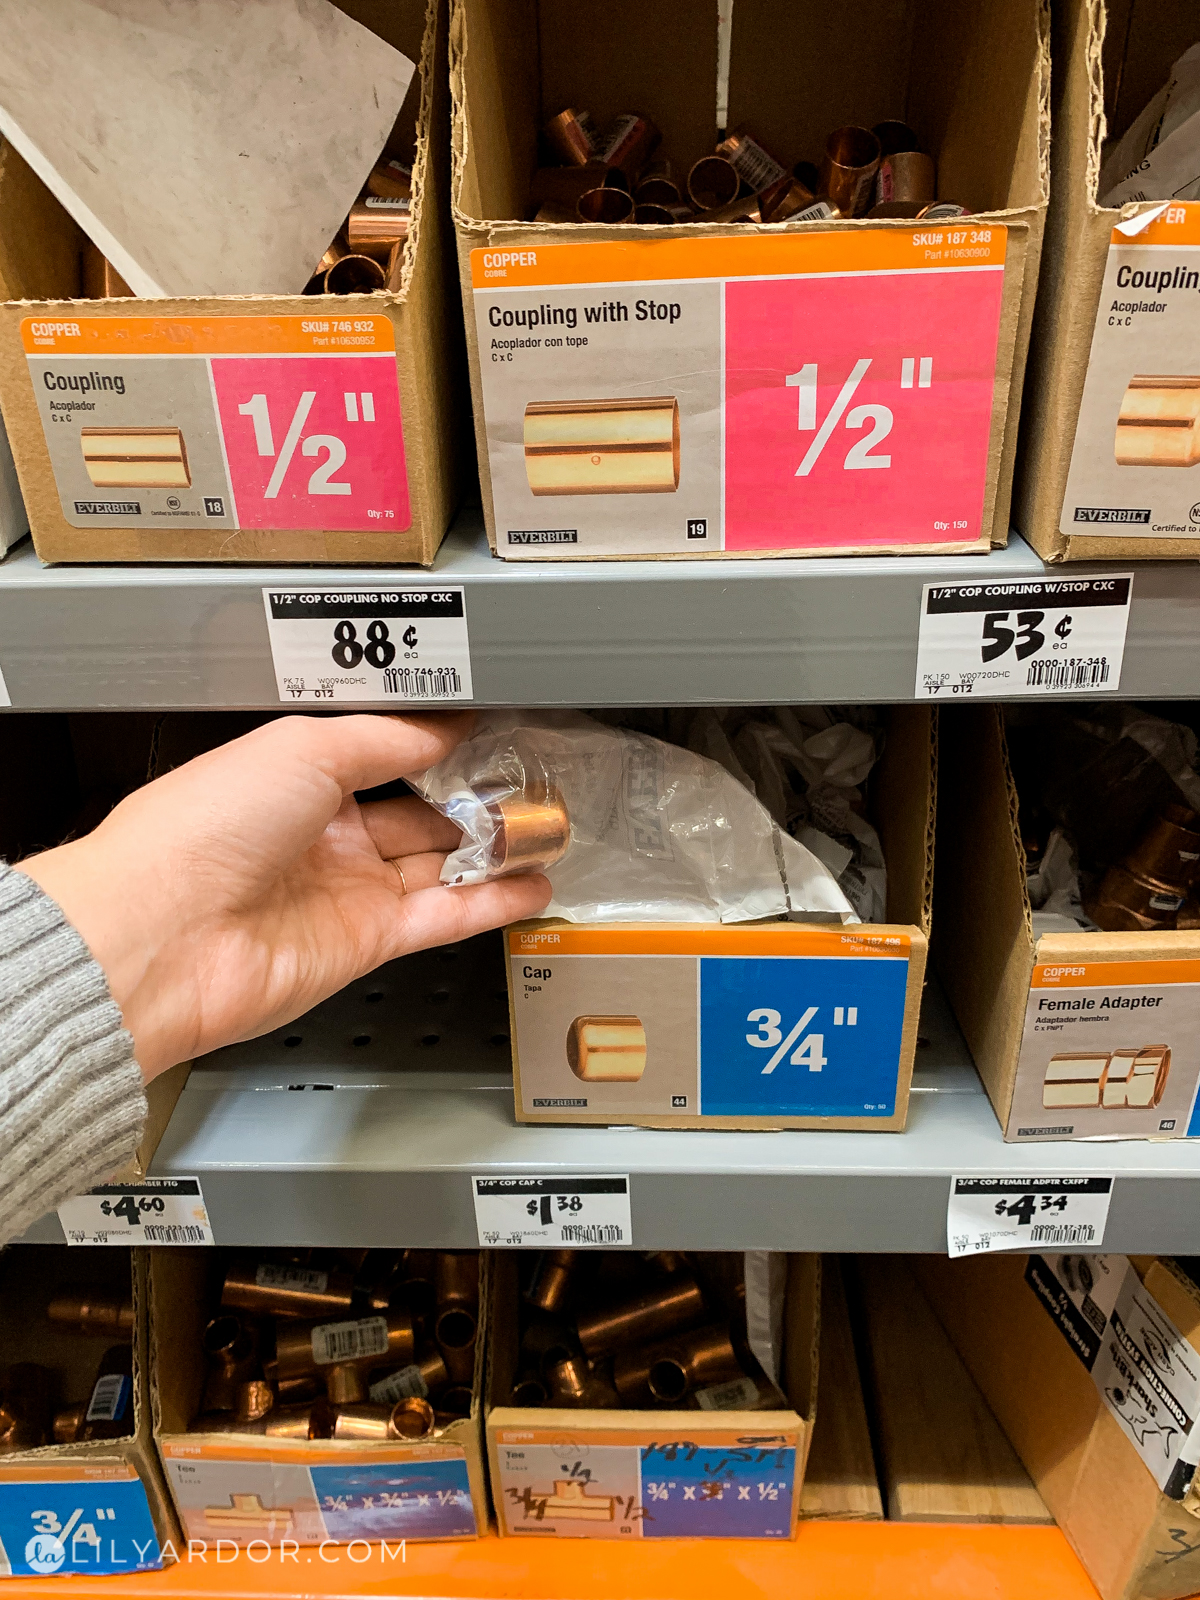
- copper tube cap (3/4 inch size) sold at most hardware stores in the plumping section.
- toothpick
Sculpey is my favorite brand of polymer clay to use because it’s always workable. I’ve tried using other brands and hated it because they’re rock hard.
Making The Star Base – Cookie Cutter Version
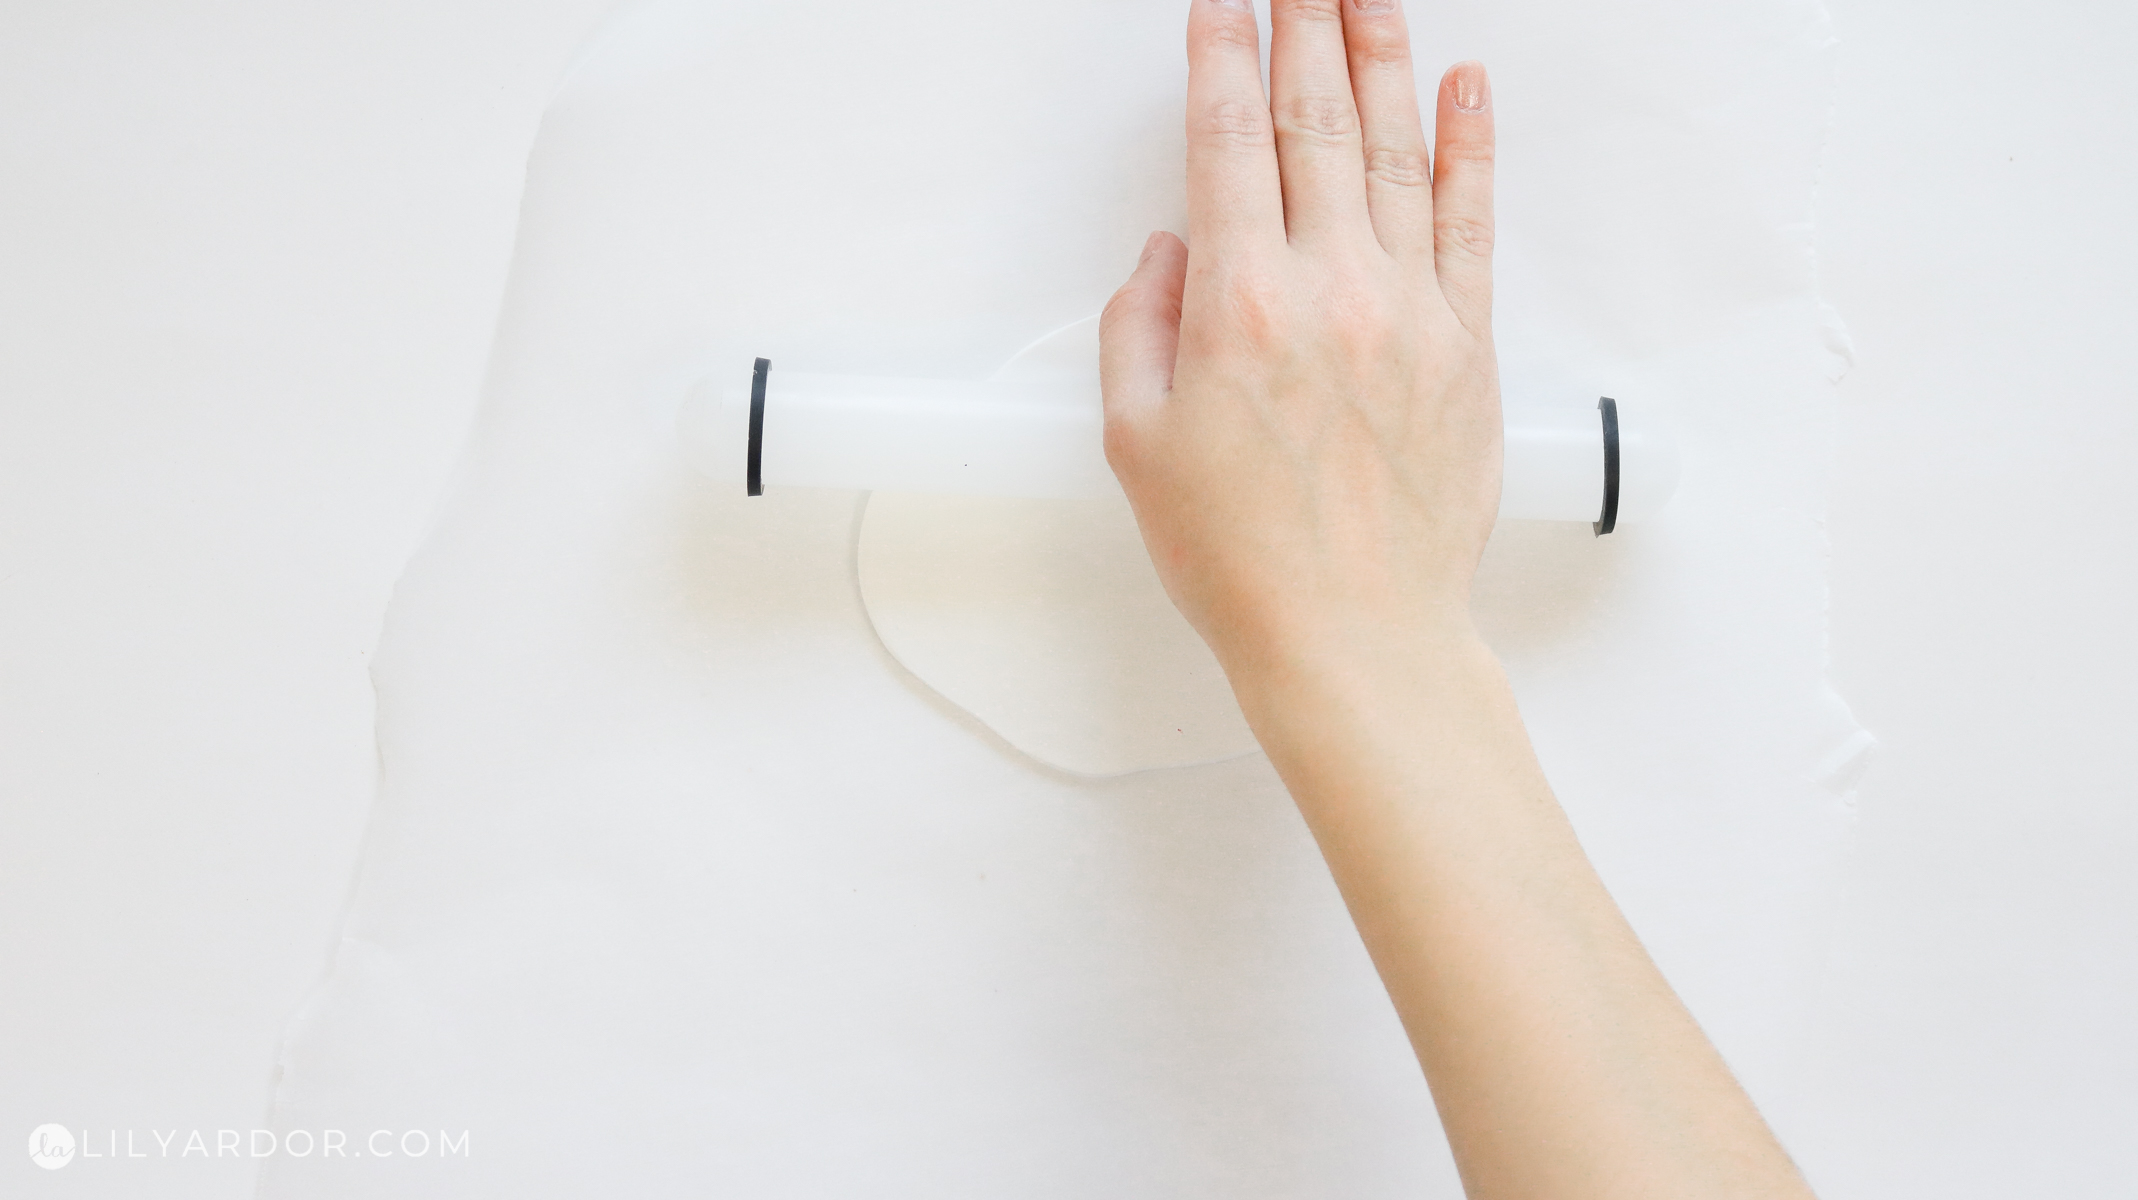
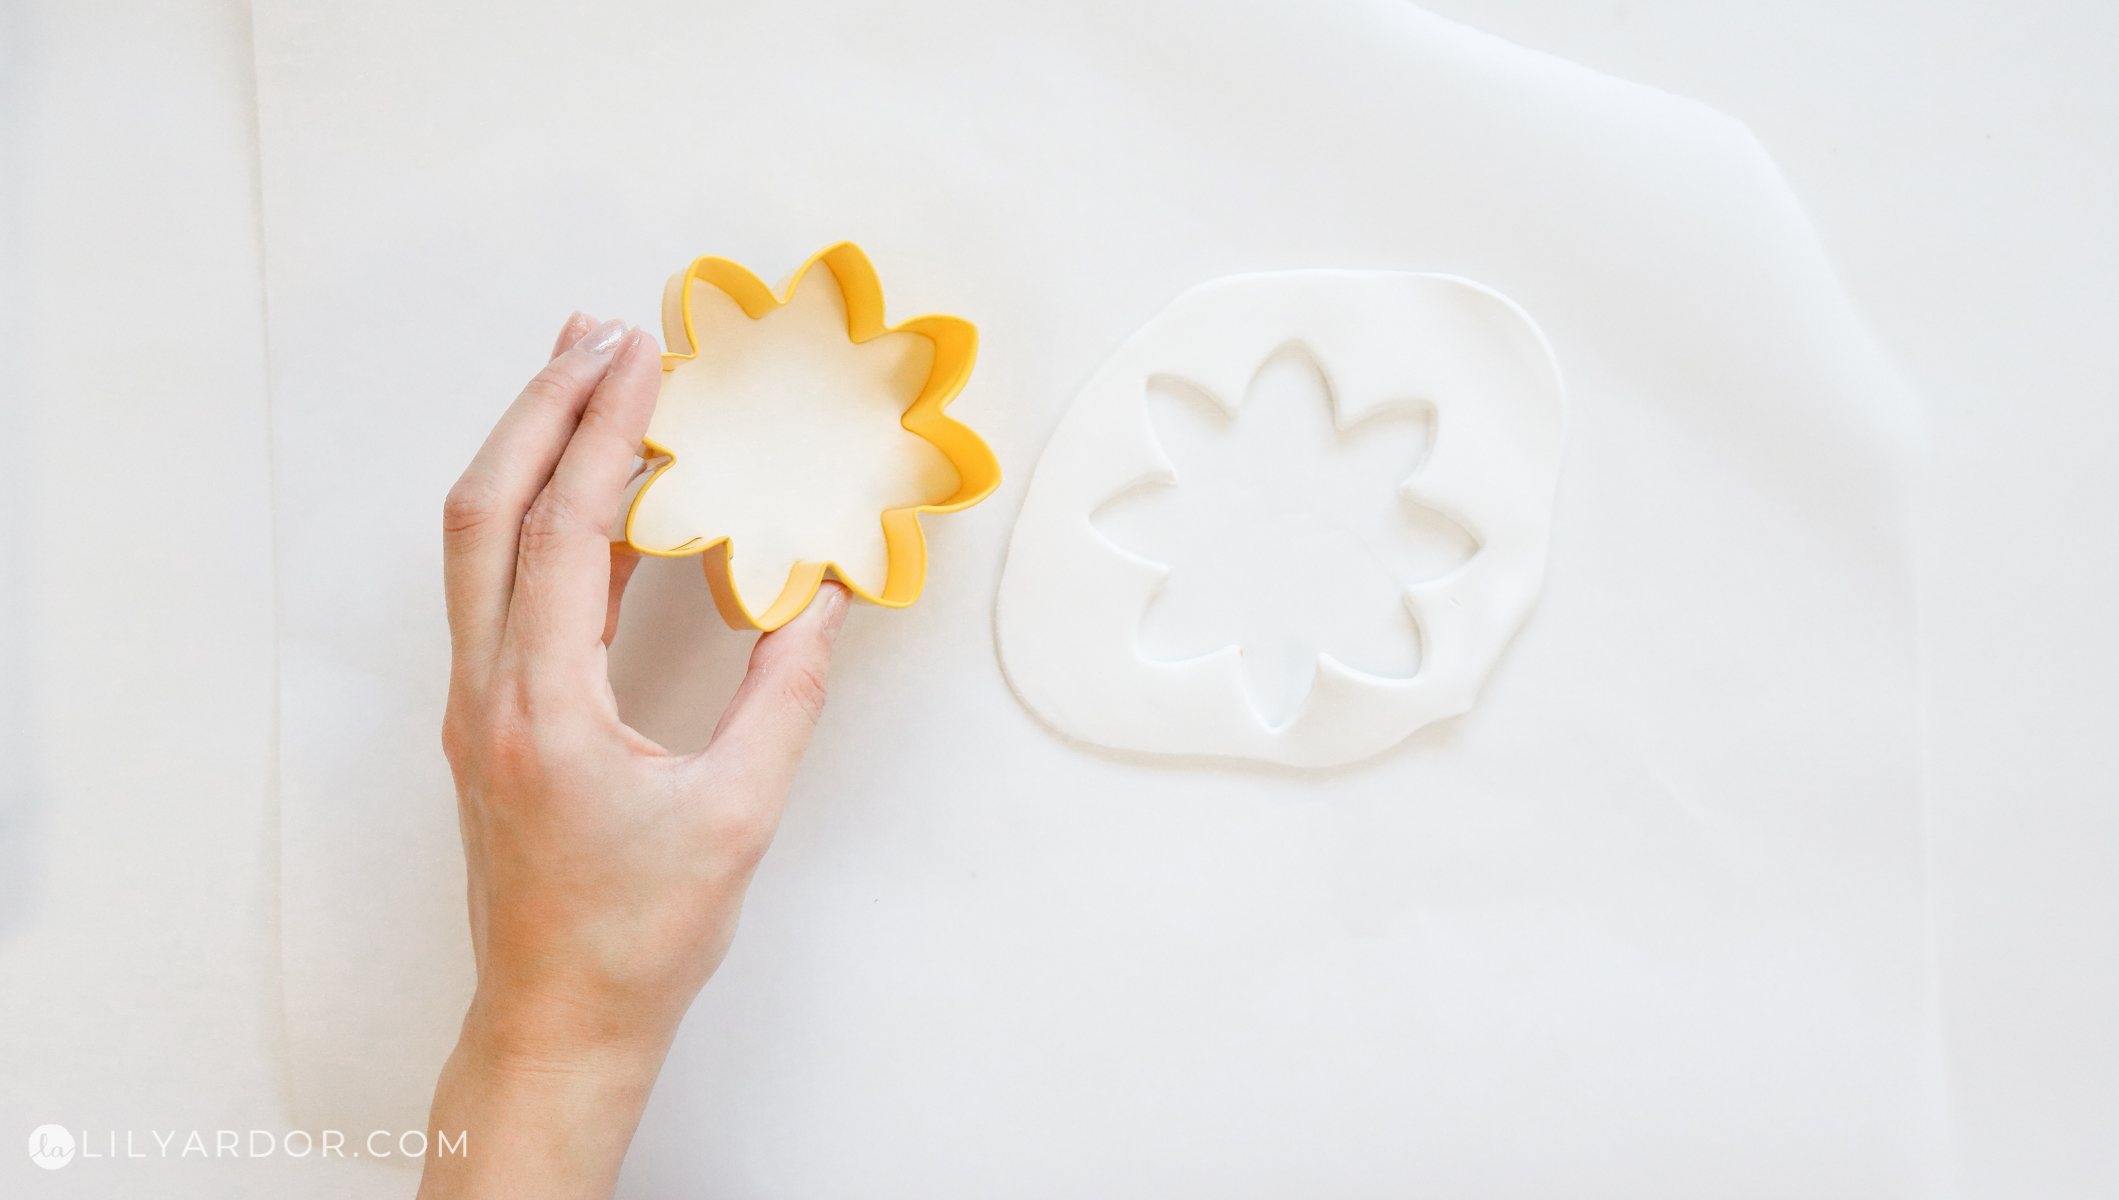
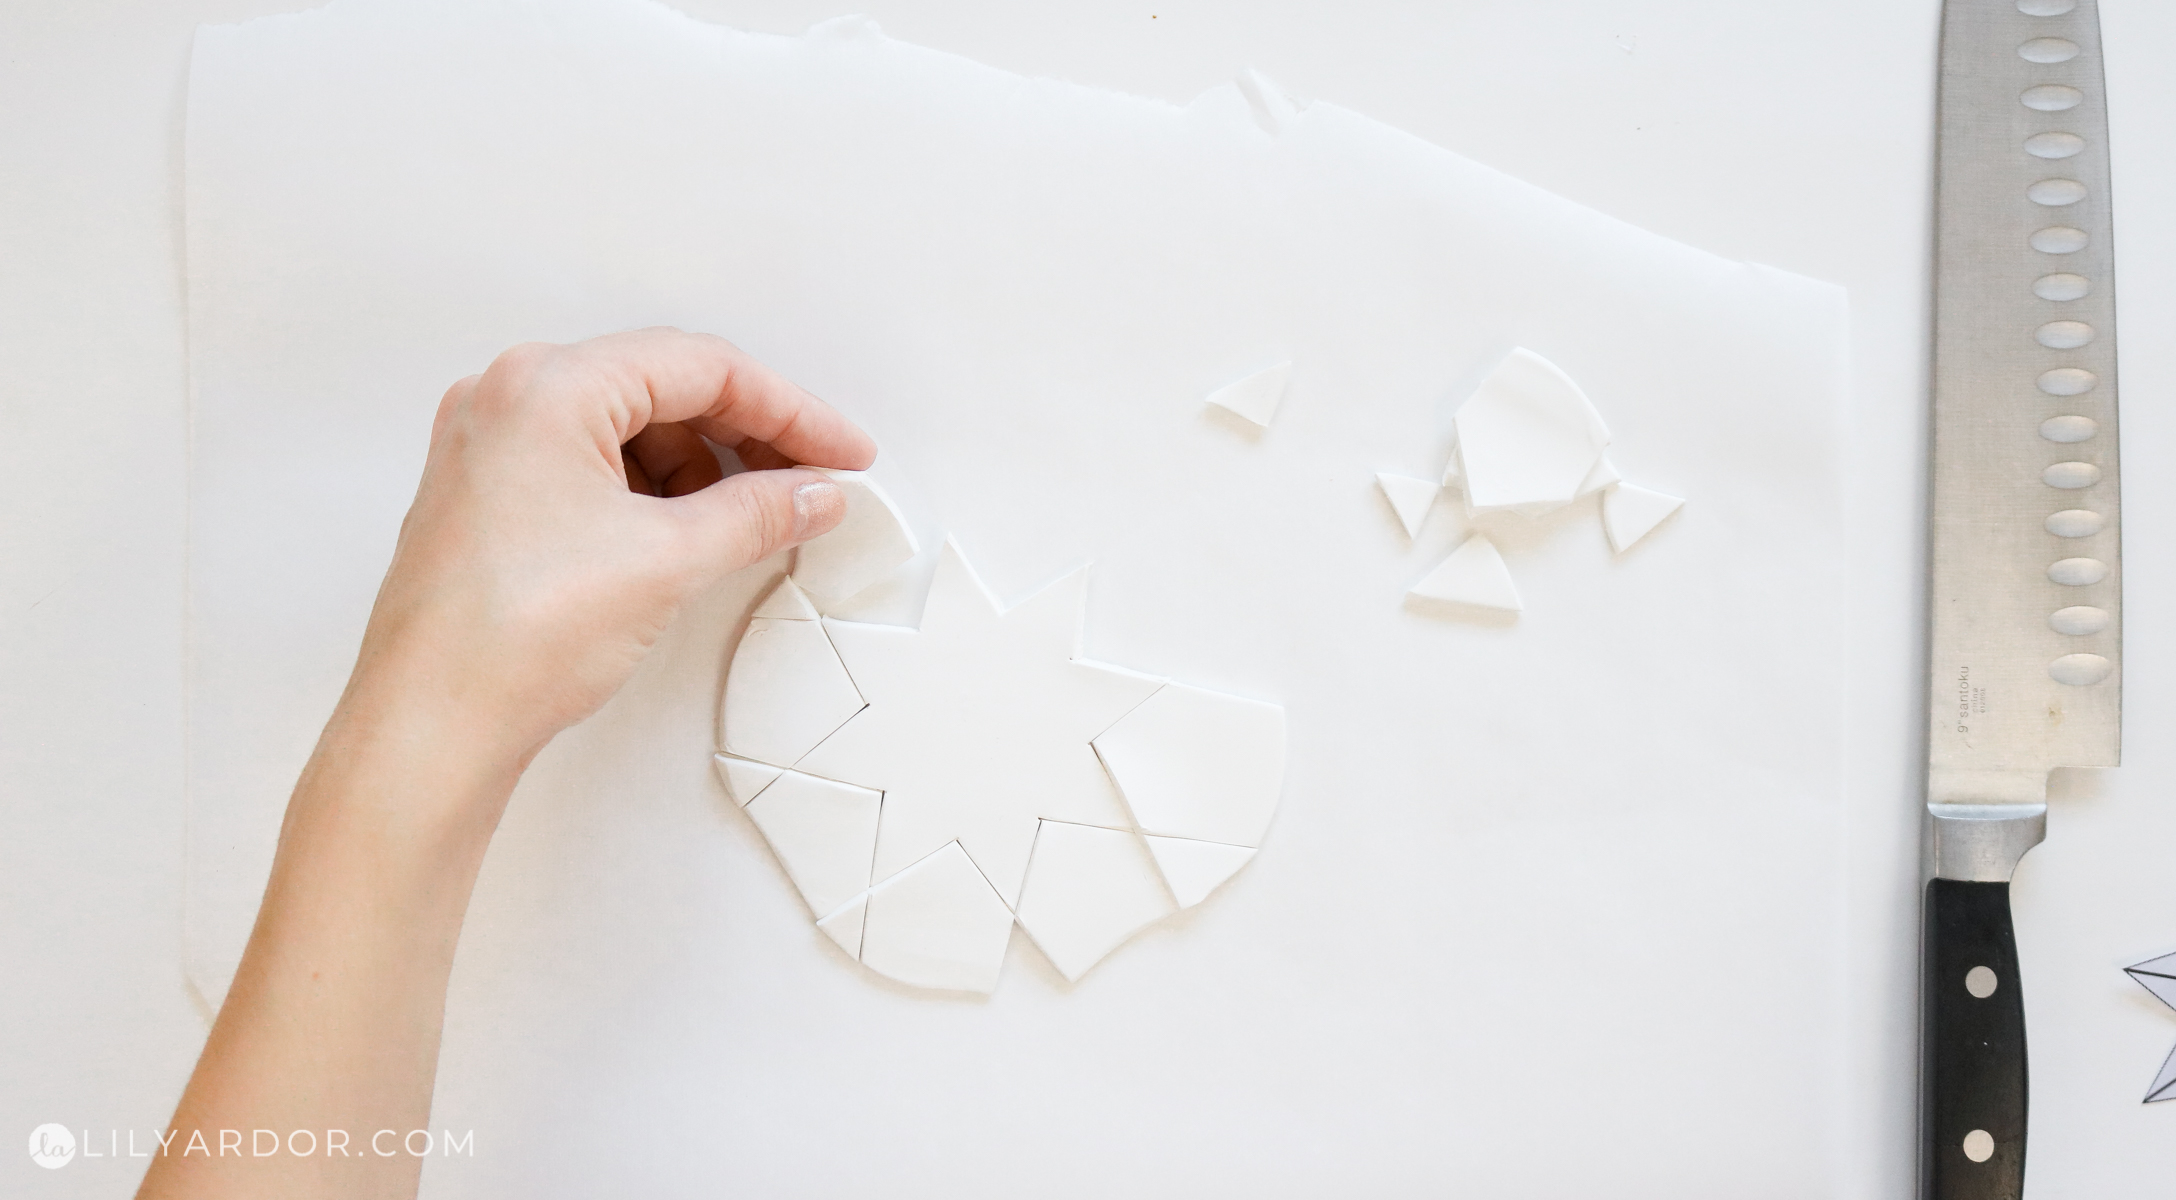
Start by rolling out the polymer clay to an even thickness. I made sure mine was about 1/4 inches in thickness. There’s two way to make the stars. You can use a cookie cutter and punch out the shape or you can customize the shape by using a printable. If you don’t want a star you can always use a drinking glass to make round ones too.
The cookie cutter method is pretty self explanatory. You simple flatten out the polymer clay and punch out a star with the cookie cutter. It might get stuck in the cookie cutter you’ll gently need to pull it out.
I got this rolling pin ( photo below) at Michaels and love it! It has these removable rubber bands that can be attached to make sure you’re rolling out your dough at an even thickness.

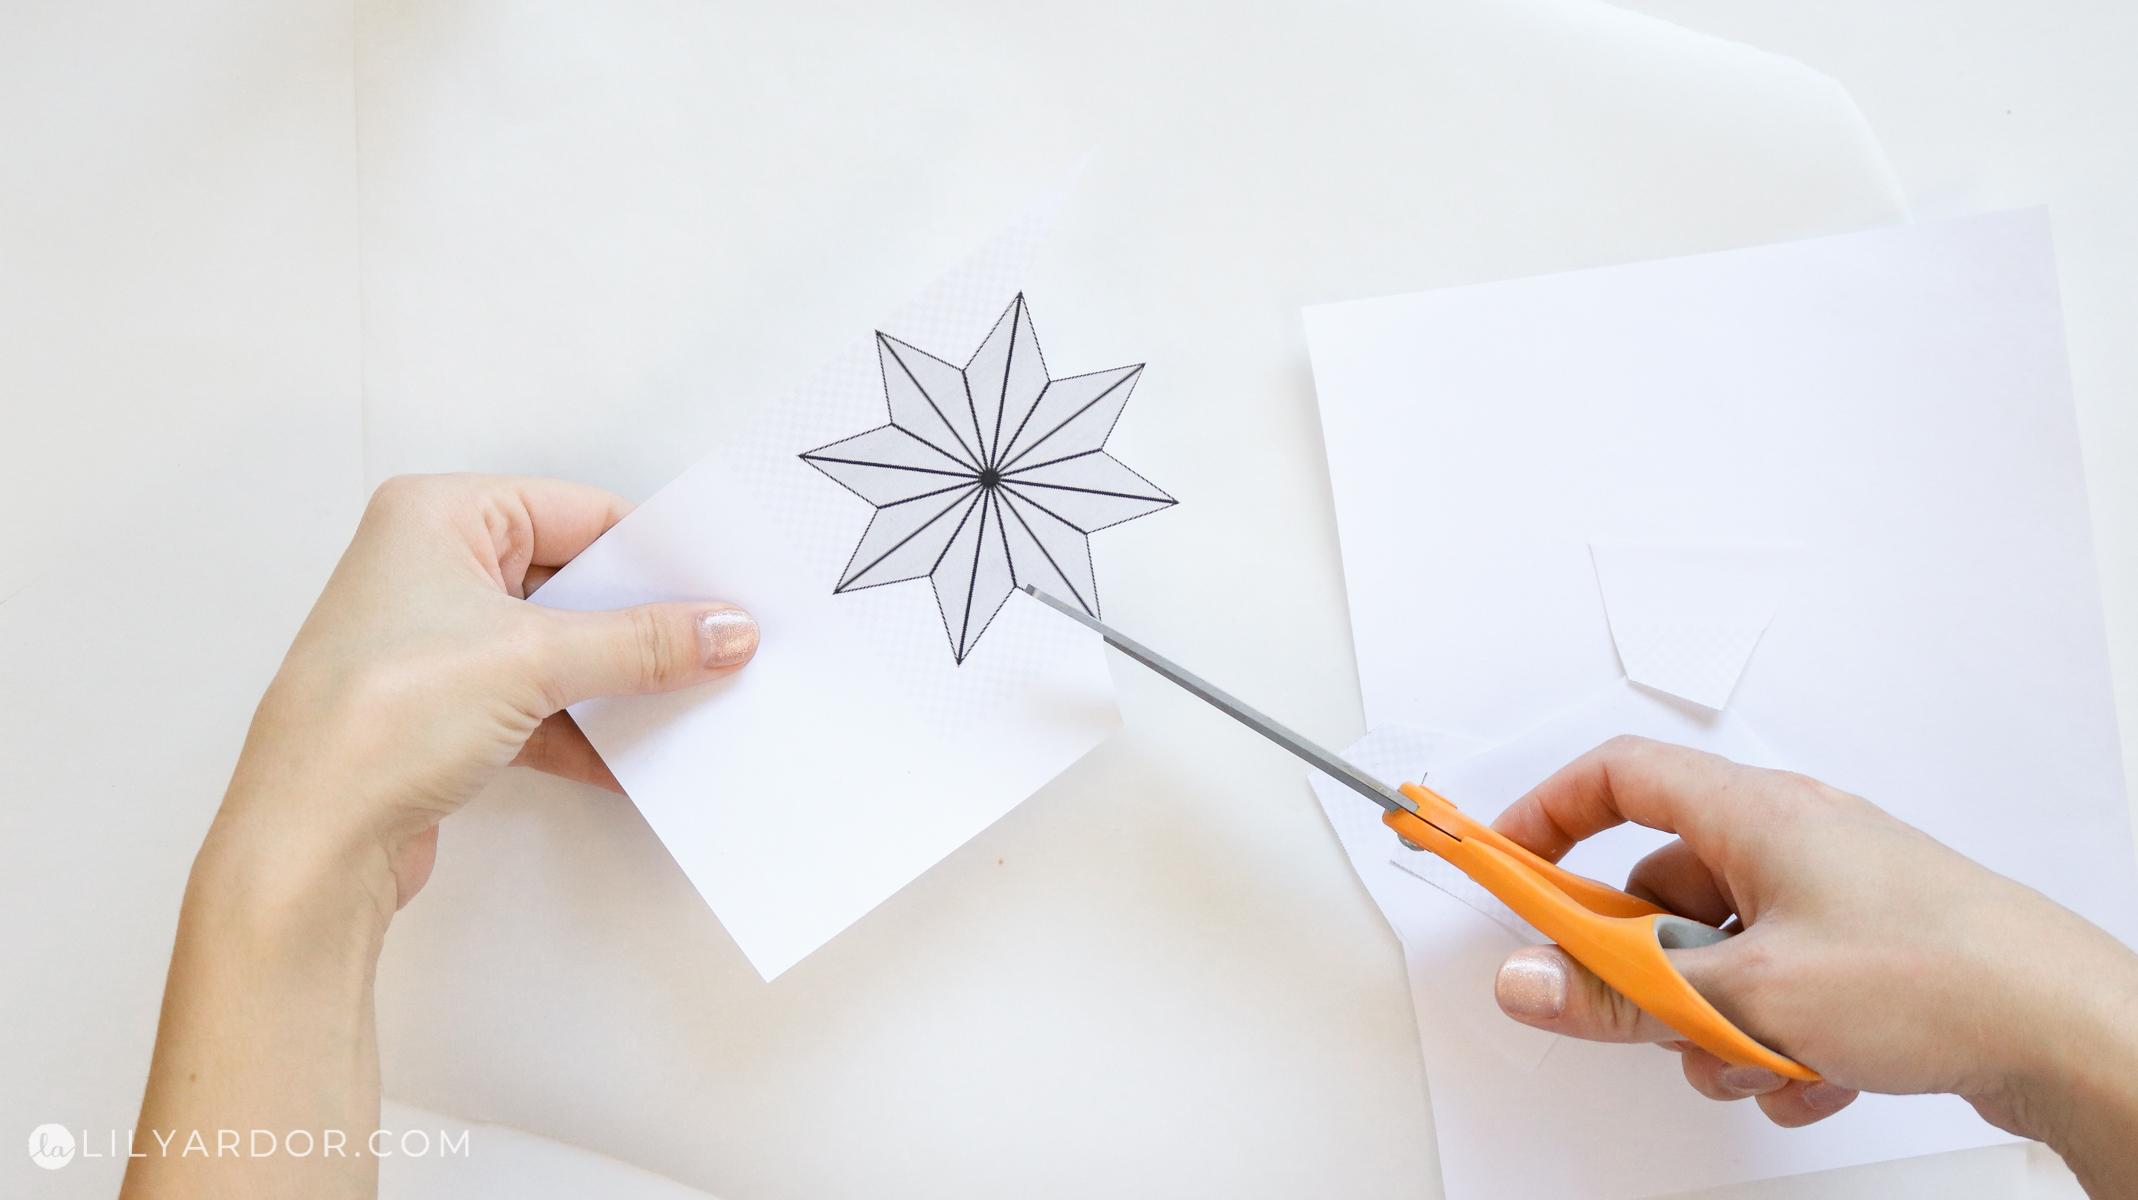
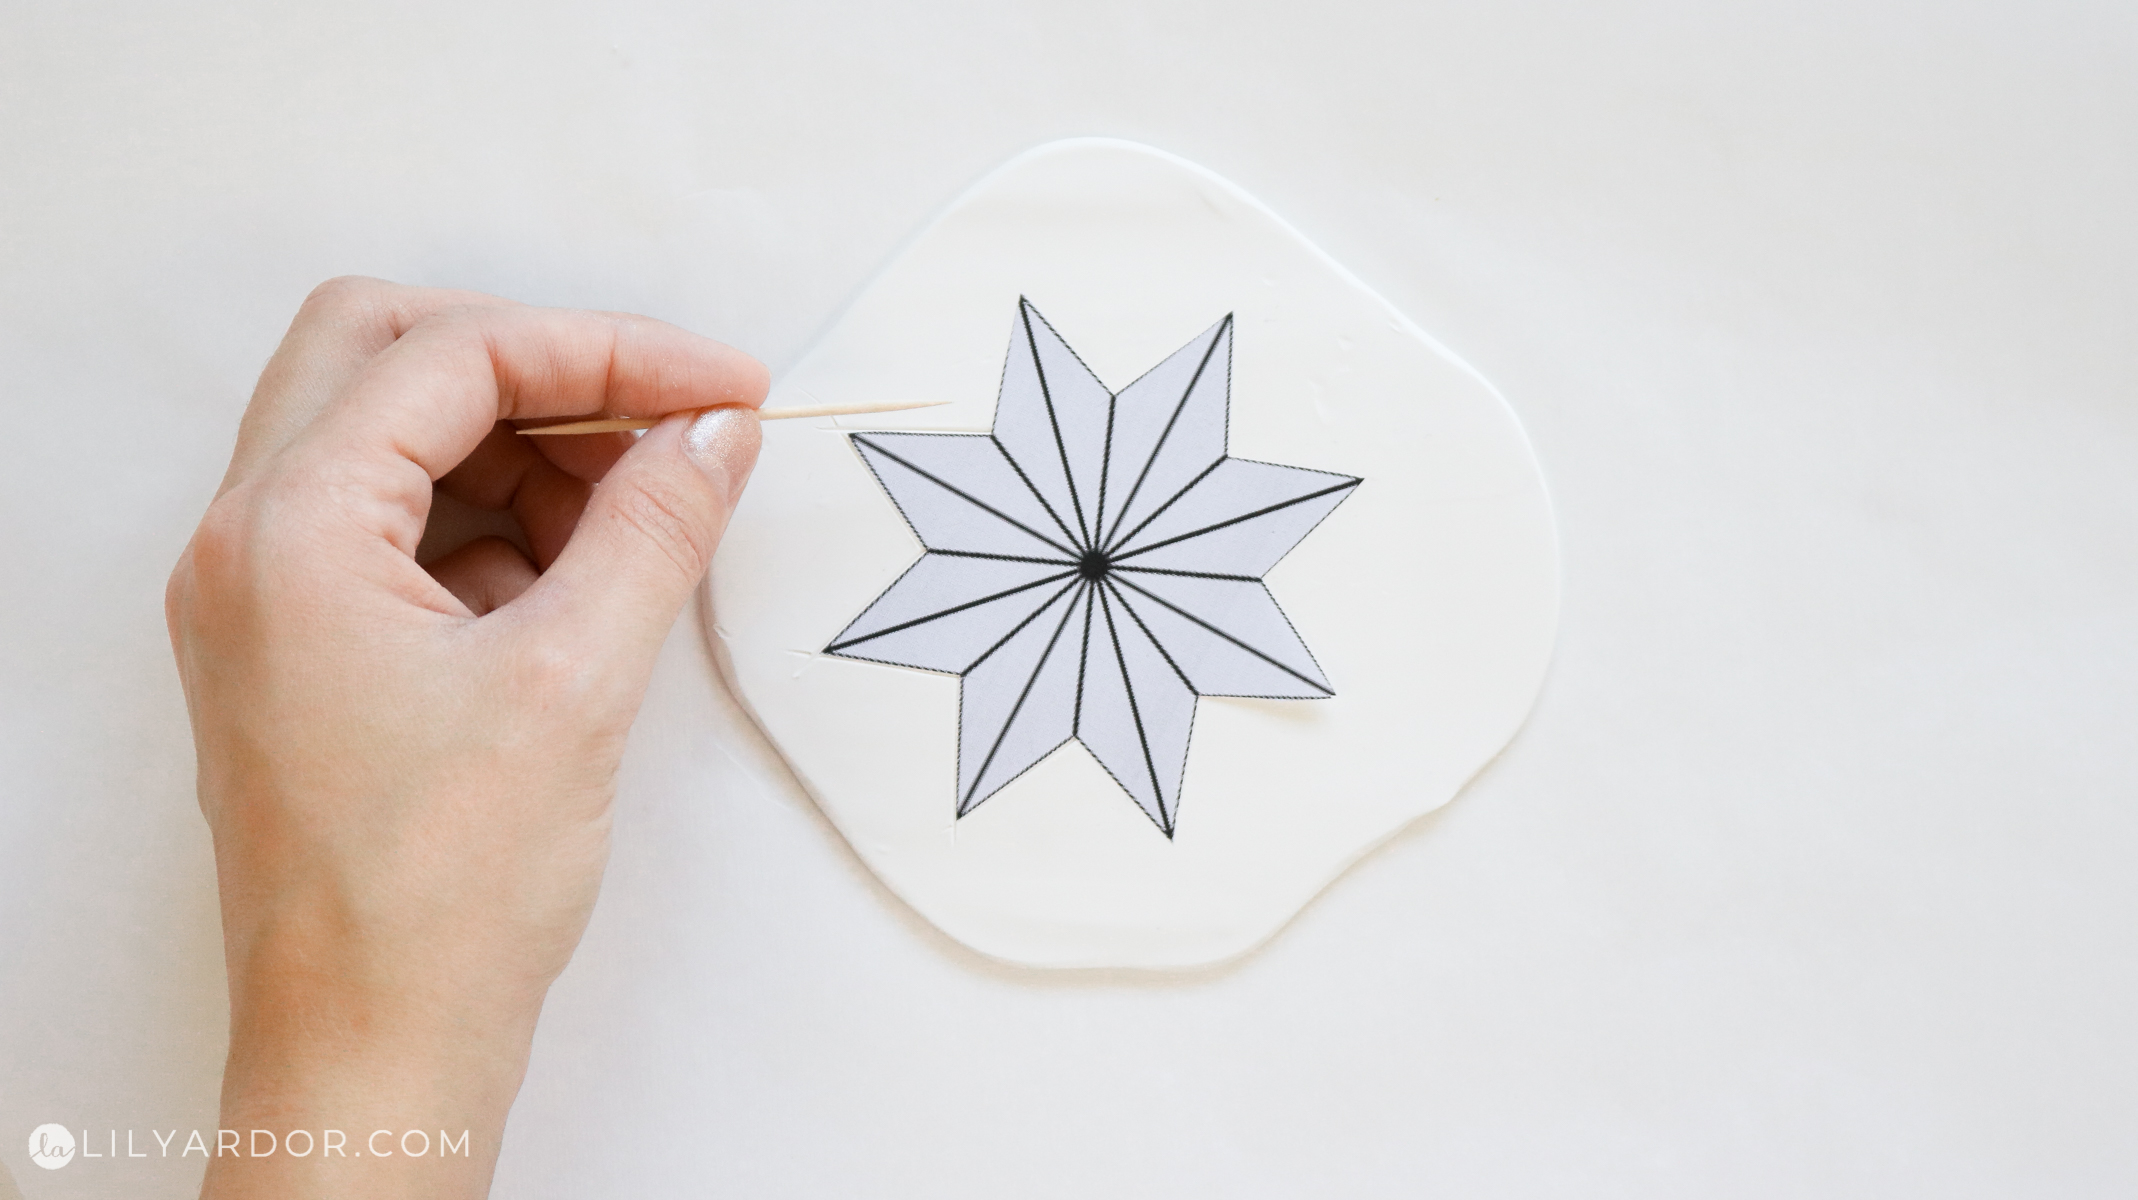
Making The Star Candle Holder Base – Printable Version
The printable version takes a little longer to complete but, it’s not hard. Start off by cutting out your star shape from paper. Than lay it over your rolled out polymer clay. It should slightly stick to the clay. Use a toothpick to trace the shape of the star and remove your printable.
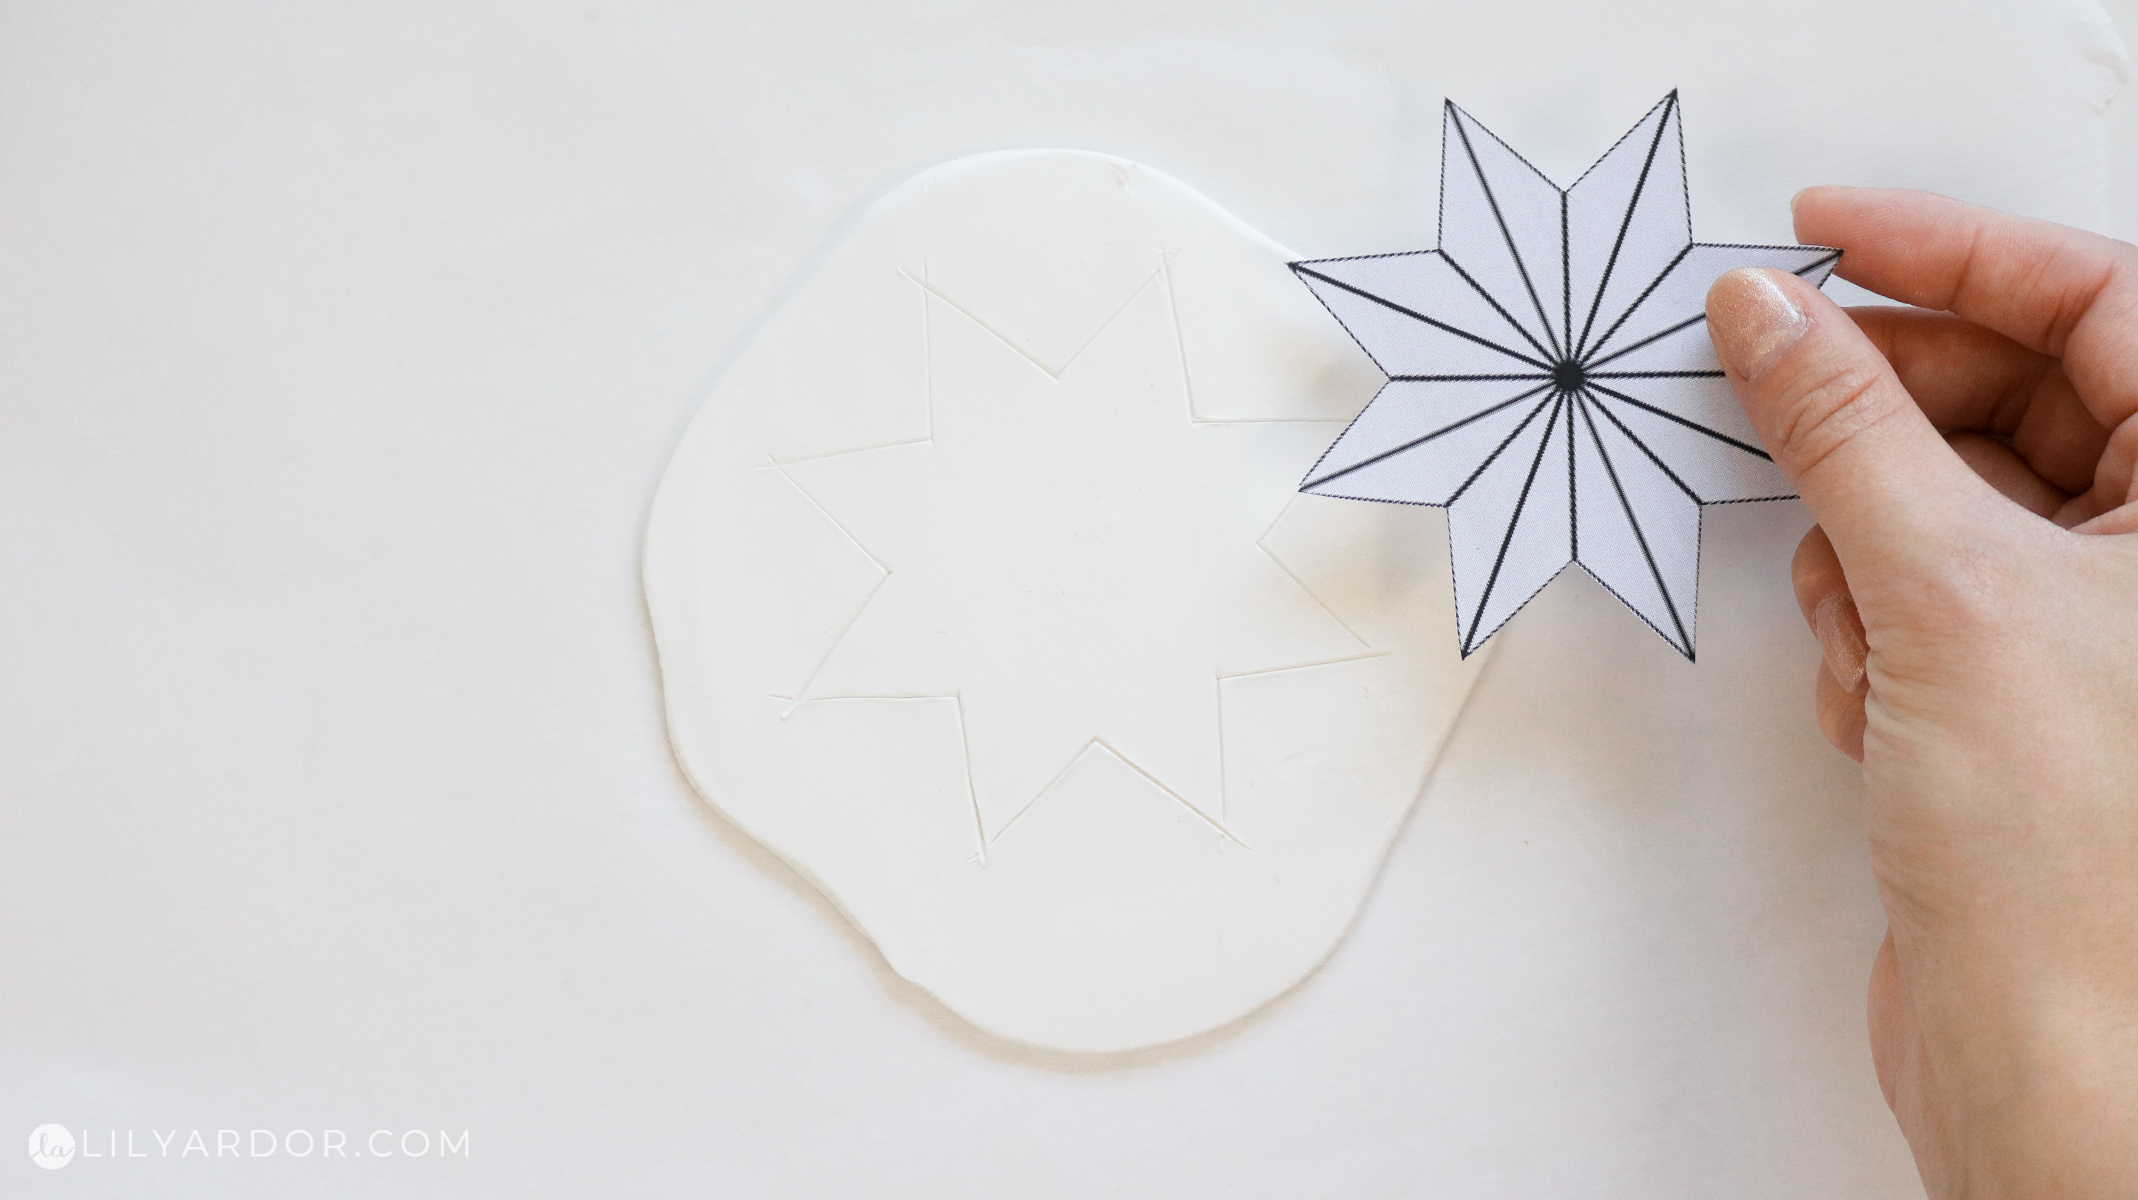
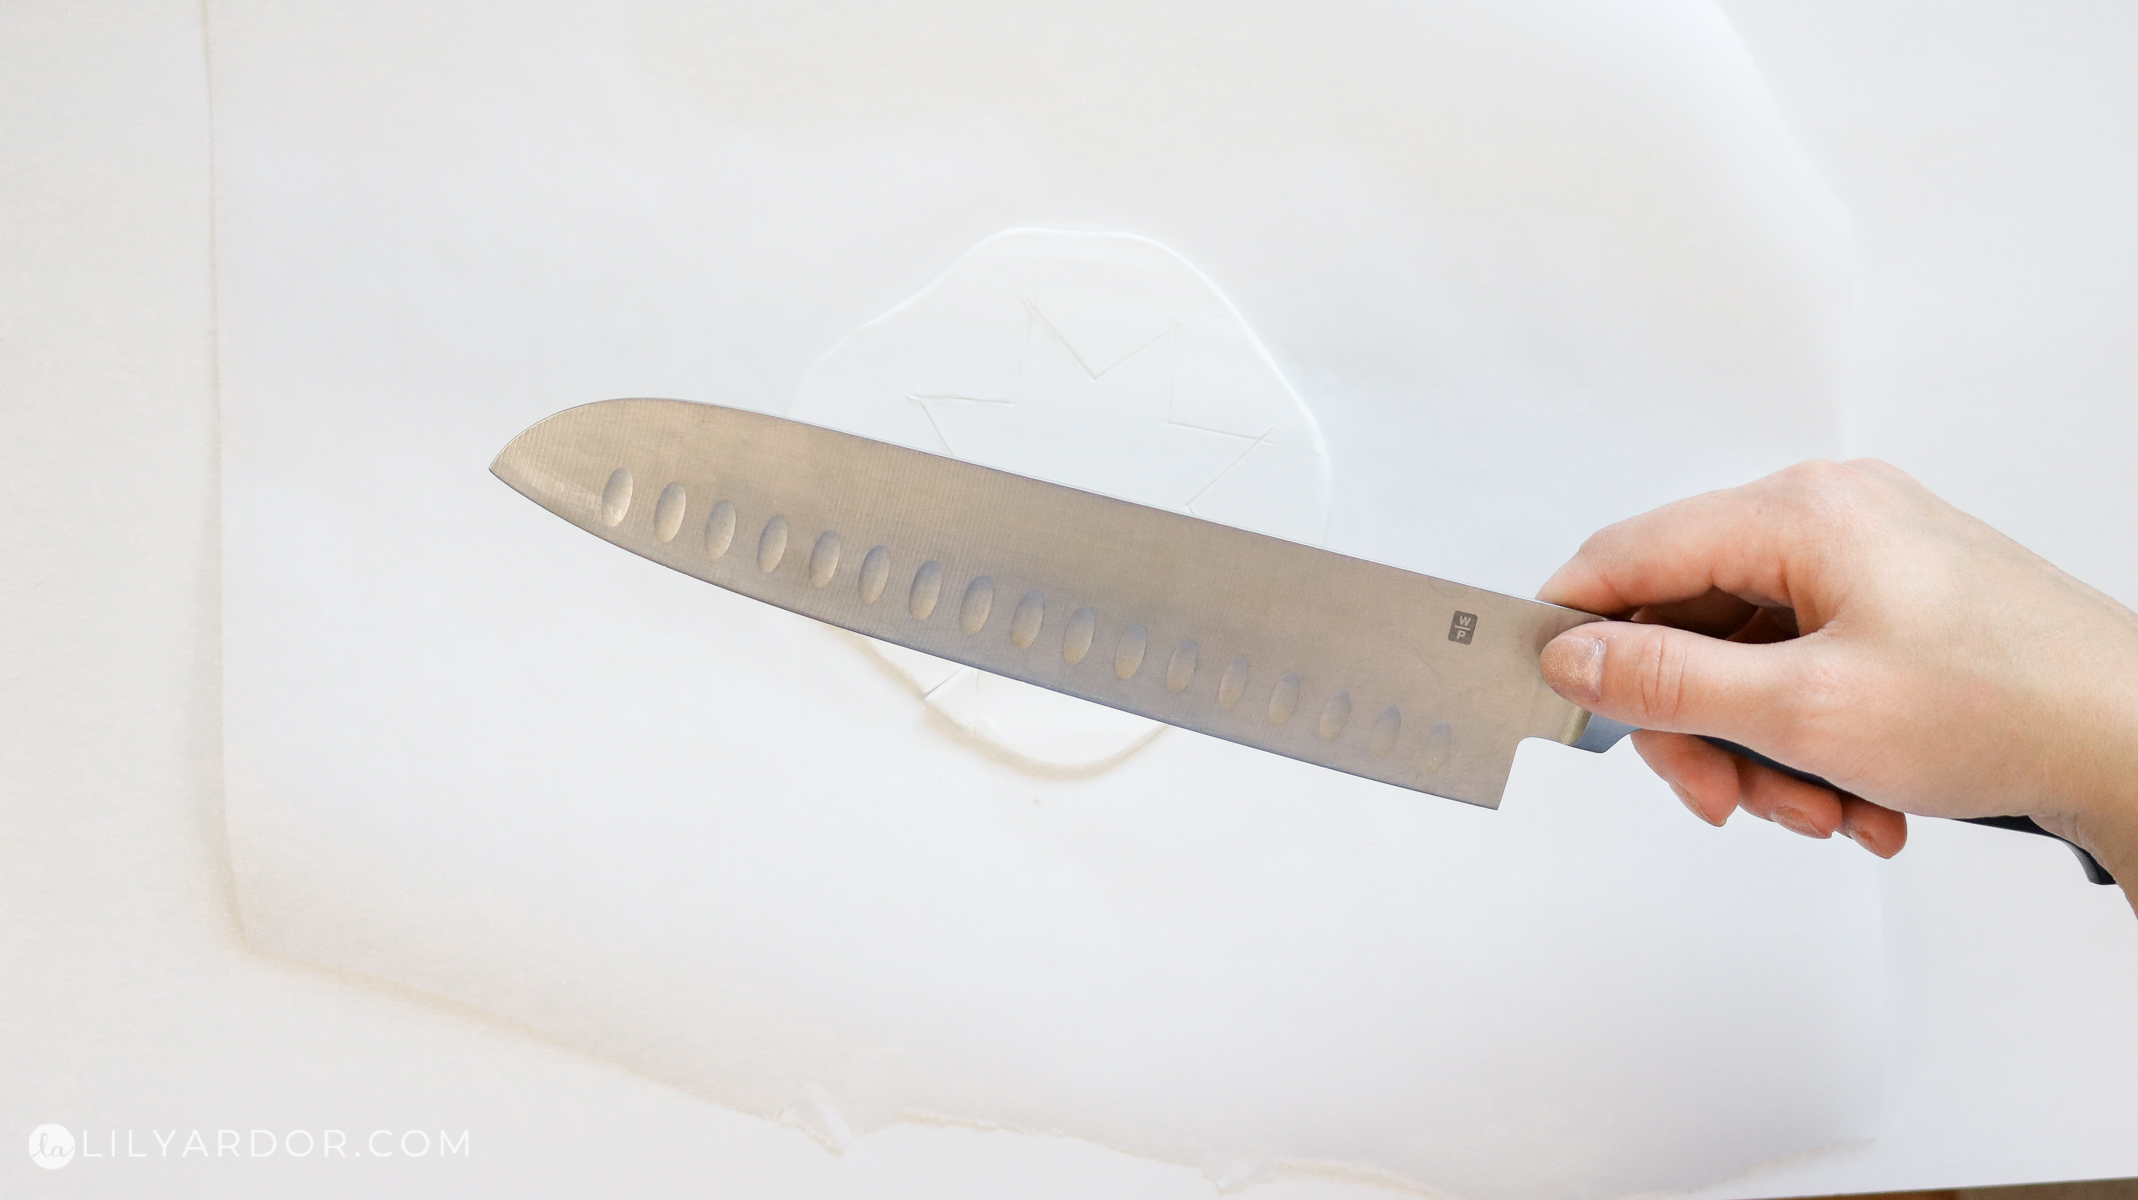
Next use something sharp to cut out your star shape. I used a smooth sharp knife.
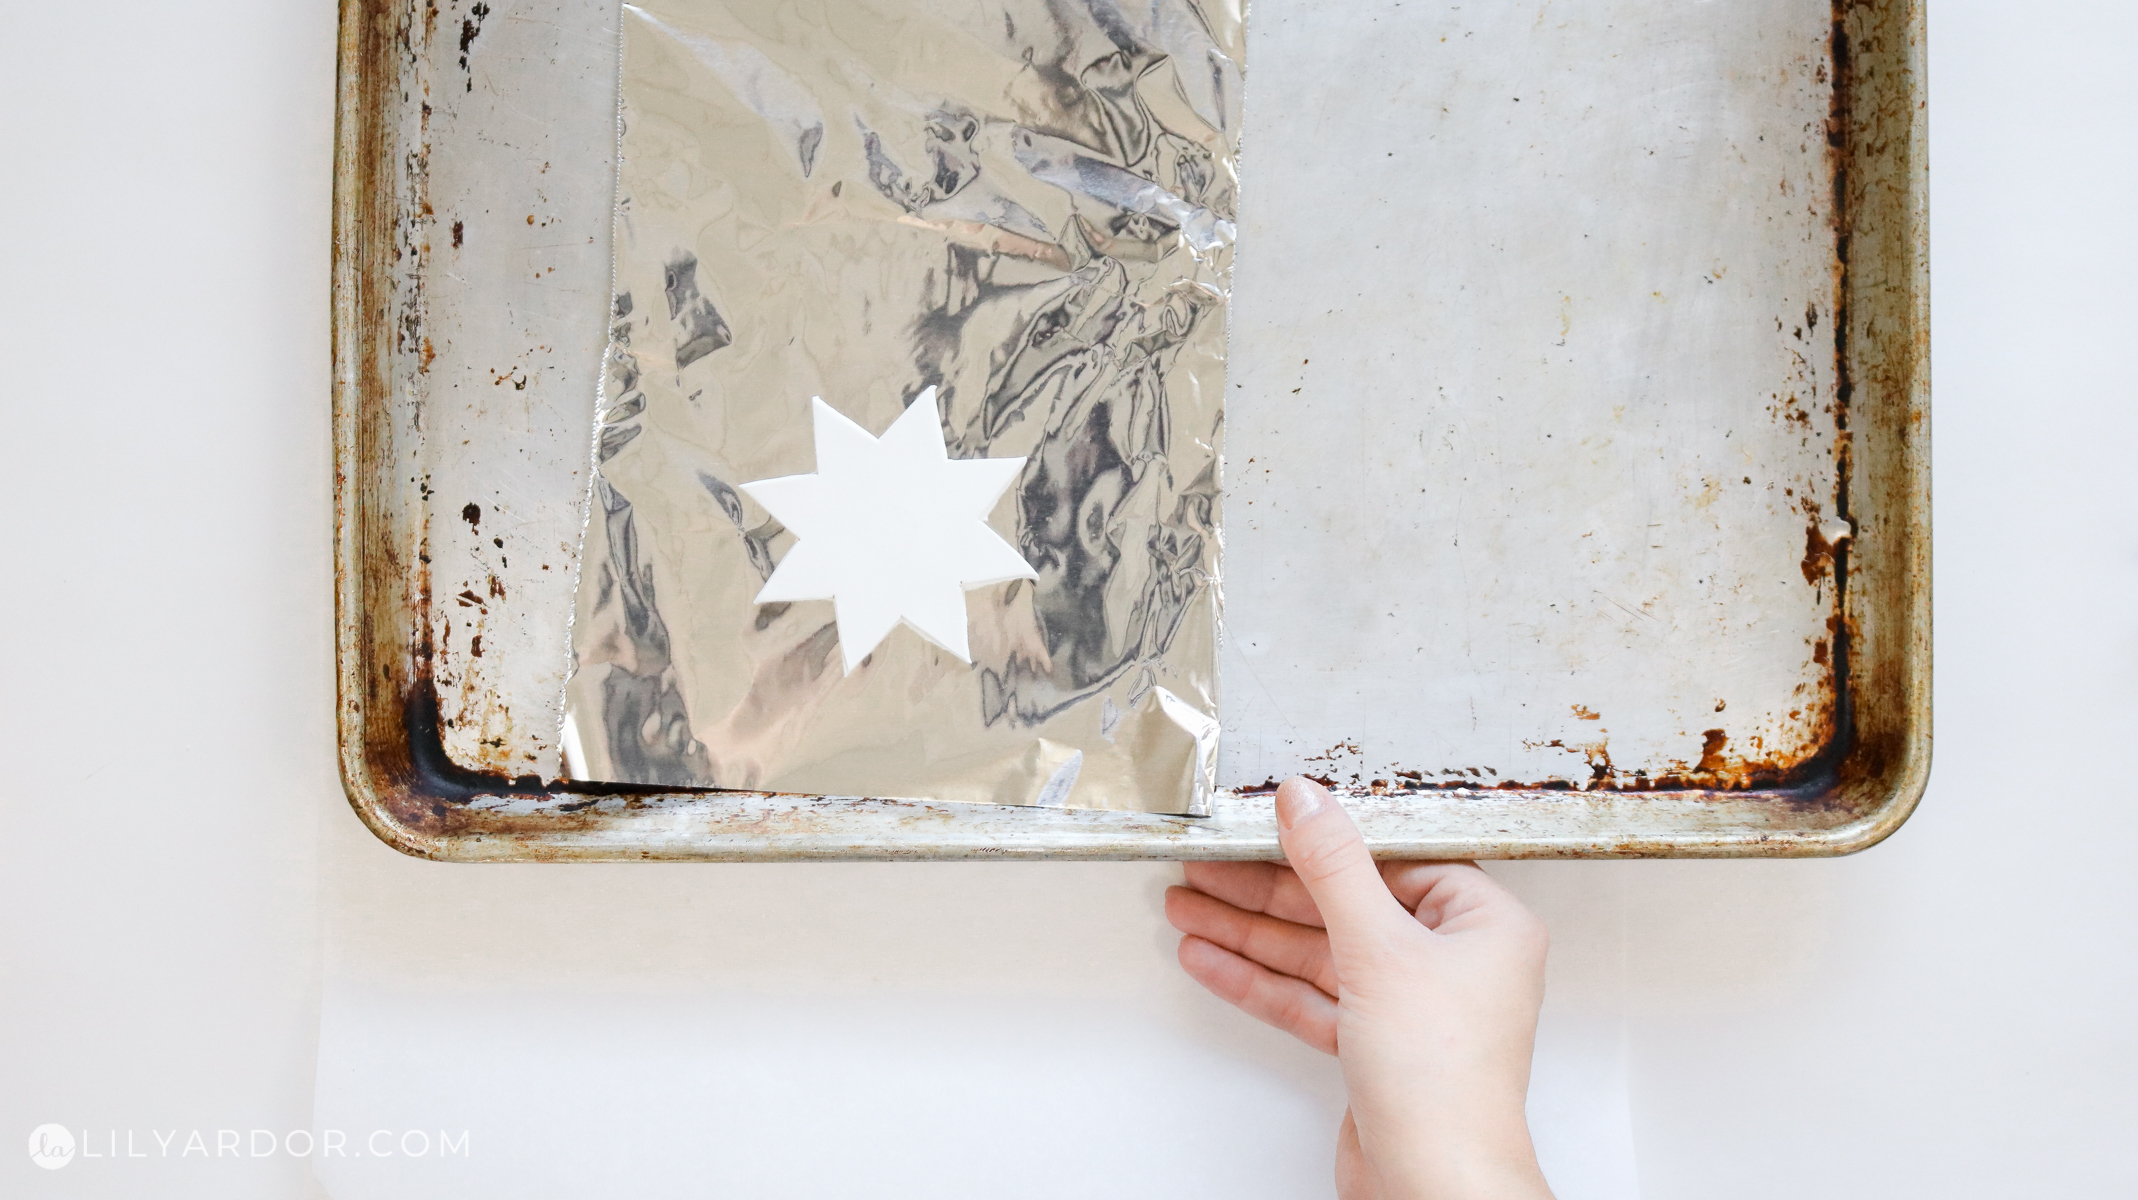
Baking Your Star Candle Holder Base
Preheat your oven to 250 F and bake your star for 25 minutes. I baked the star on the middle rack and made sure to have foil under it. I also made sure my edges were nice and smooth on the star before going in the oven. A razor blade comes in handy to additionally cut and smooth them out. Once it’s done baking remove the star from the foil while it’s warm and let it cool off before the next step.
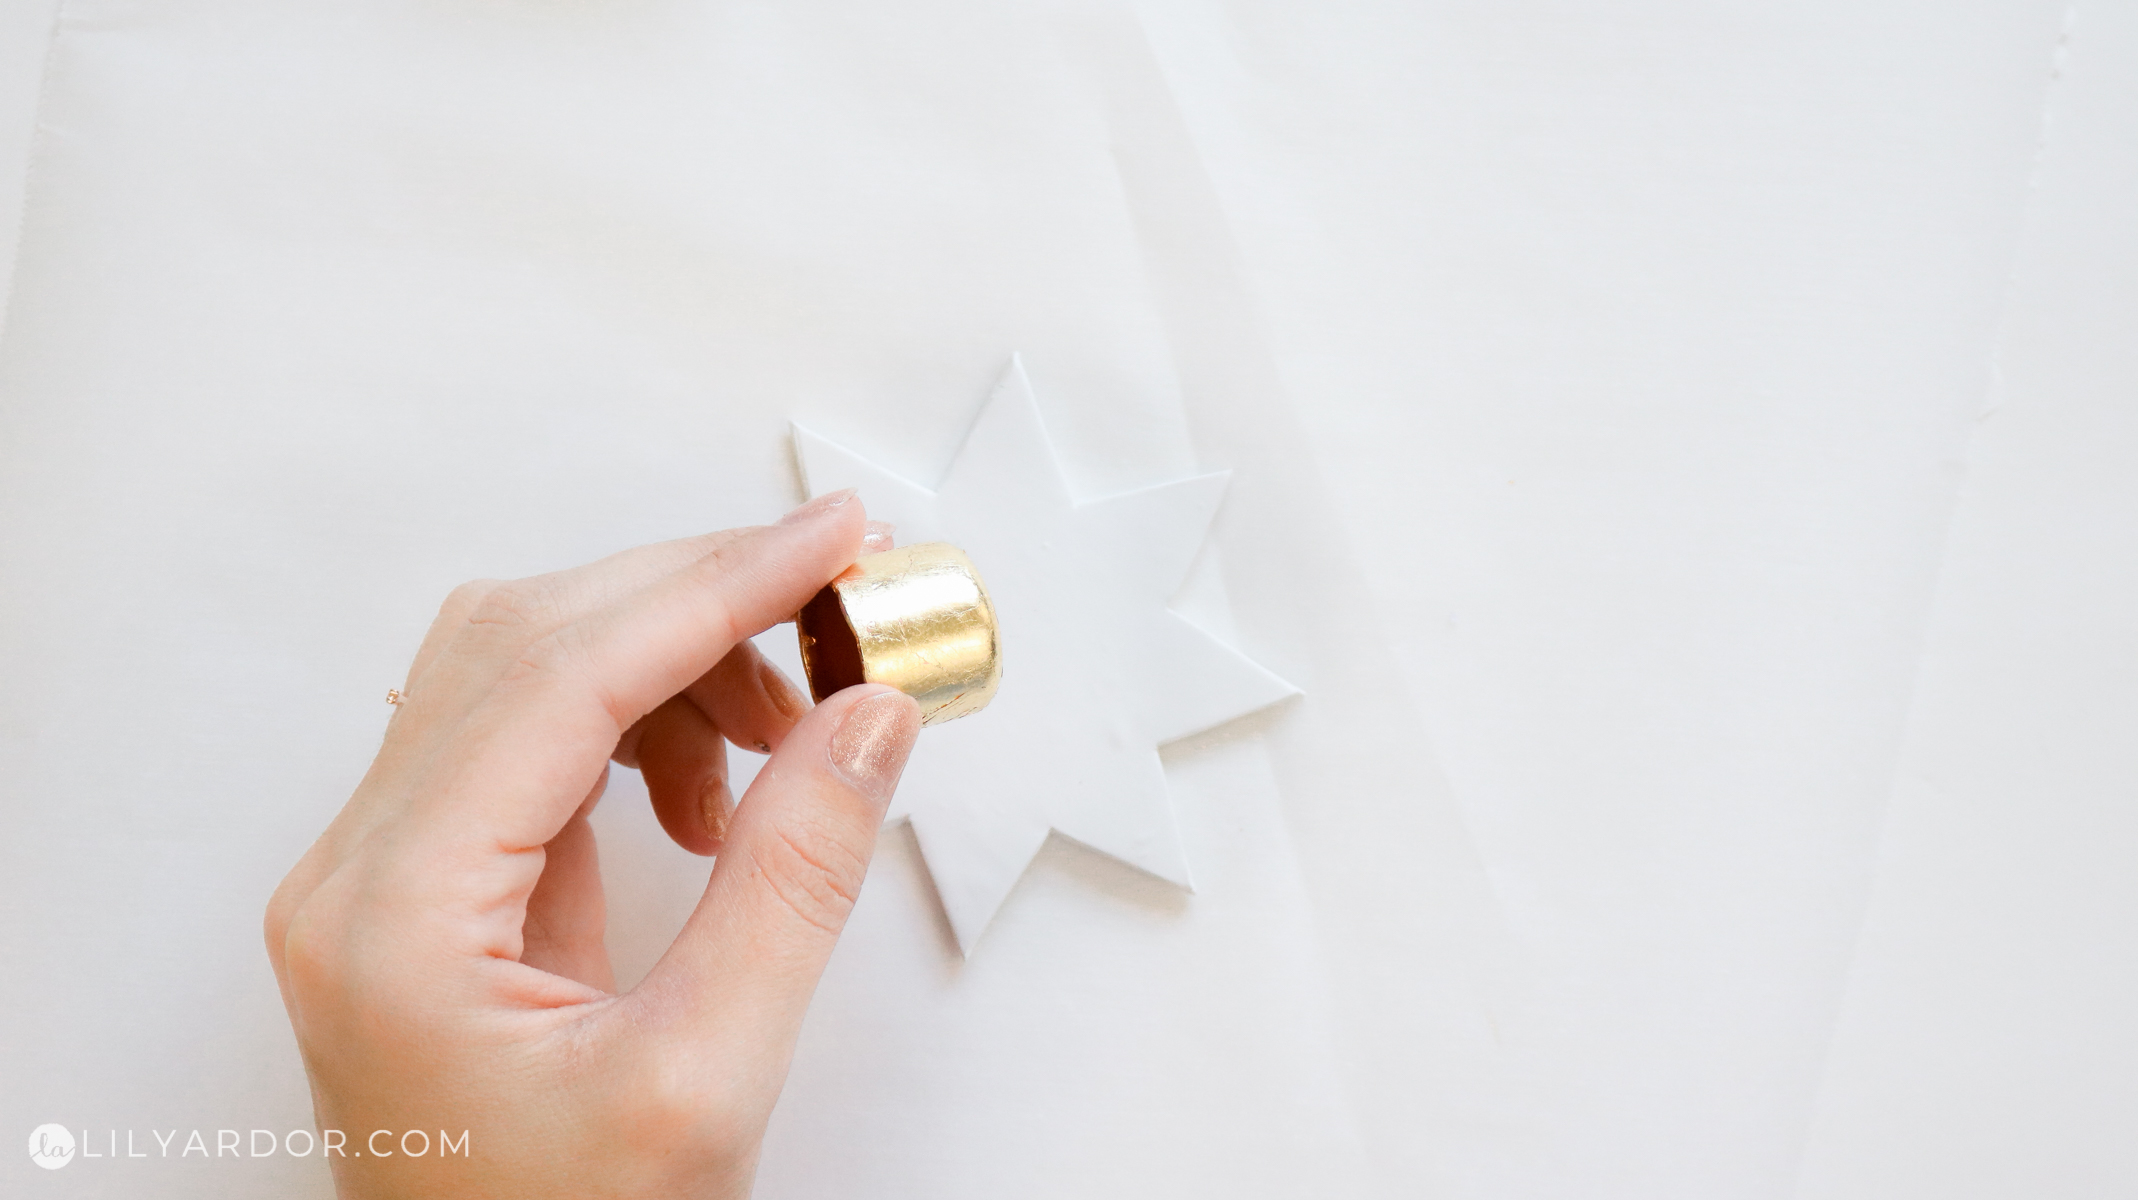
Turning The Star Into A Holder
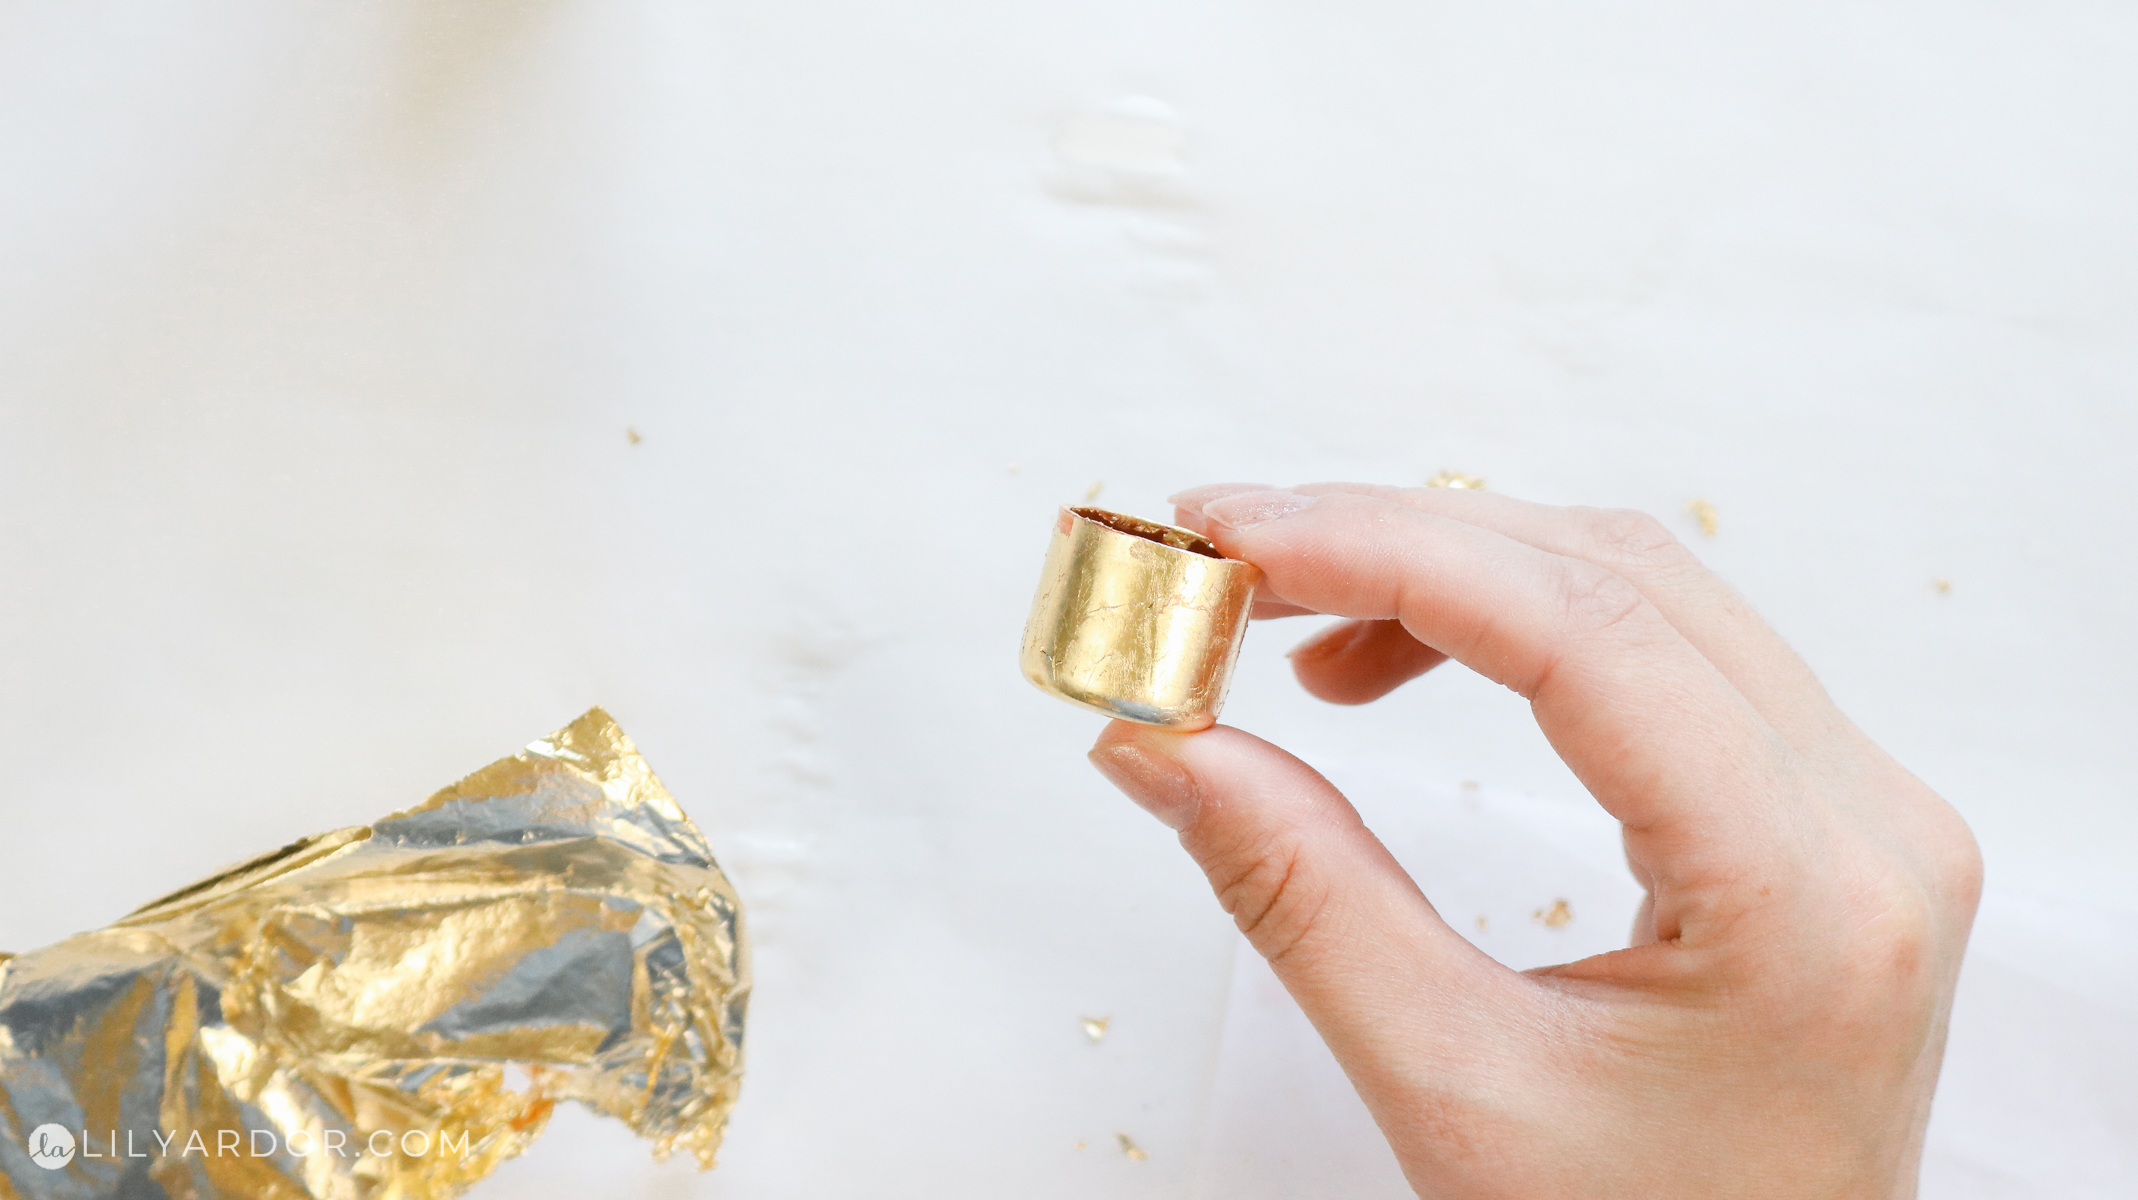
I came across these copper metal tube caps a few years ago and have been wanting to use them for a candle related DIY for quite some time now. I’ve had so many ideas for these but never really got around to making anything from them. The possibilities are truly endless! You can pretty much attach them onto anything to create candle holders 😀 . You can find them at homedepot in the plumbing section.
Okay since they were copper and I was going for a gold look I went ahead and gold leafed them. If you’re not familiar with gold leaf you’ll need gilding adhesive to attach the thin sheets of gold paper. Gilding adhesive is a type of liquid glue that dries tacky and helps your gold stick on nicely. I get all my gold leaf on amazon. It’s super affordable. Last time I check it was $5.99 for 100 sheets. Here’s where I get it.
To attach your metal caps use a drop of E6000 glue and adhere them to the stars. This glue takes a little longer to dry but it’s super strong. I wouldn’t recommend using hot glue for this step as it might not hold your candle #firehazard . 
Here’s a quick video tutorial
The complete Star Candle Holder!
That’s it! Here’s how they look! I had the most fun with this photoshoot at my friends house. She’s the founder of munchkintime.com ! She makes amazing recipes and her photography will make you drool 🙊😋!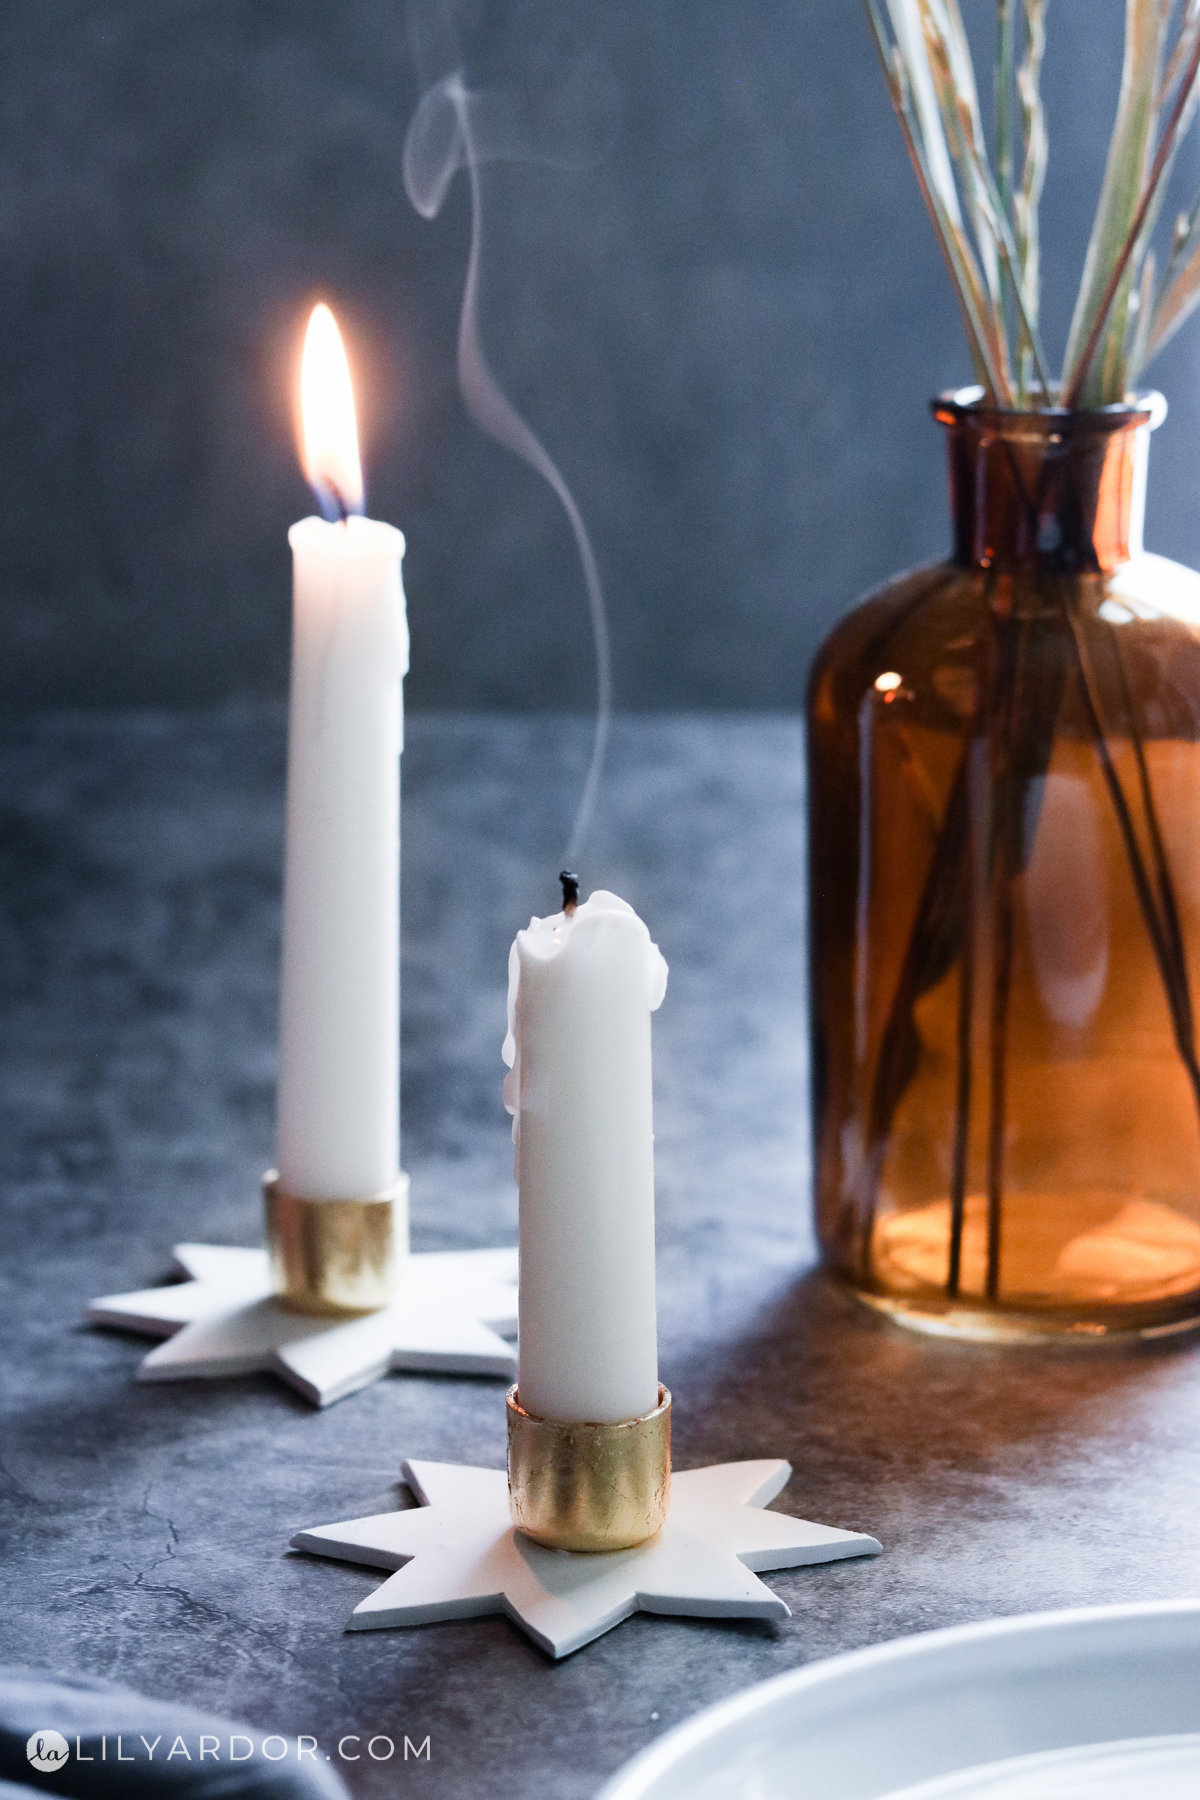
If you’re going for something more simple you can do a round base instead of the stars.

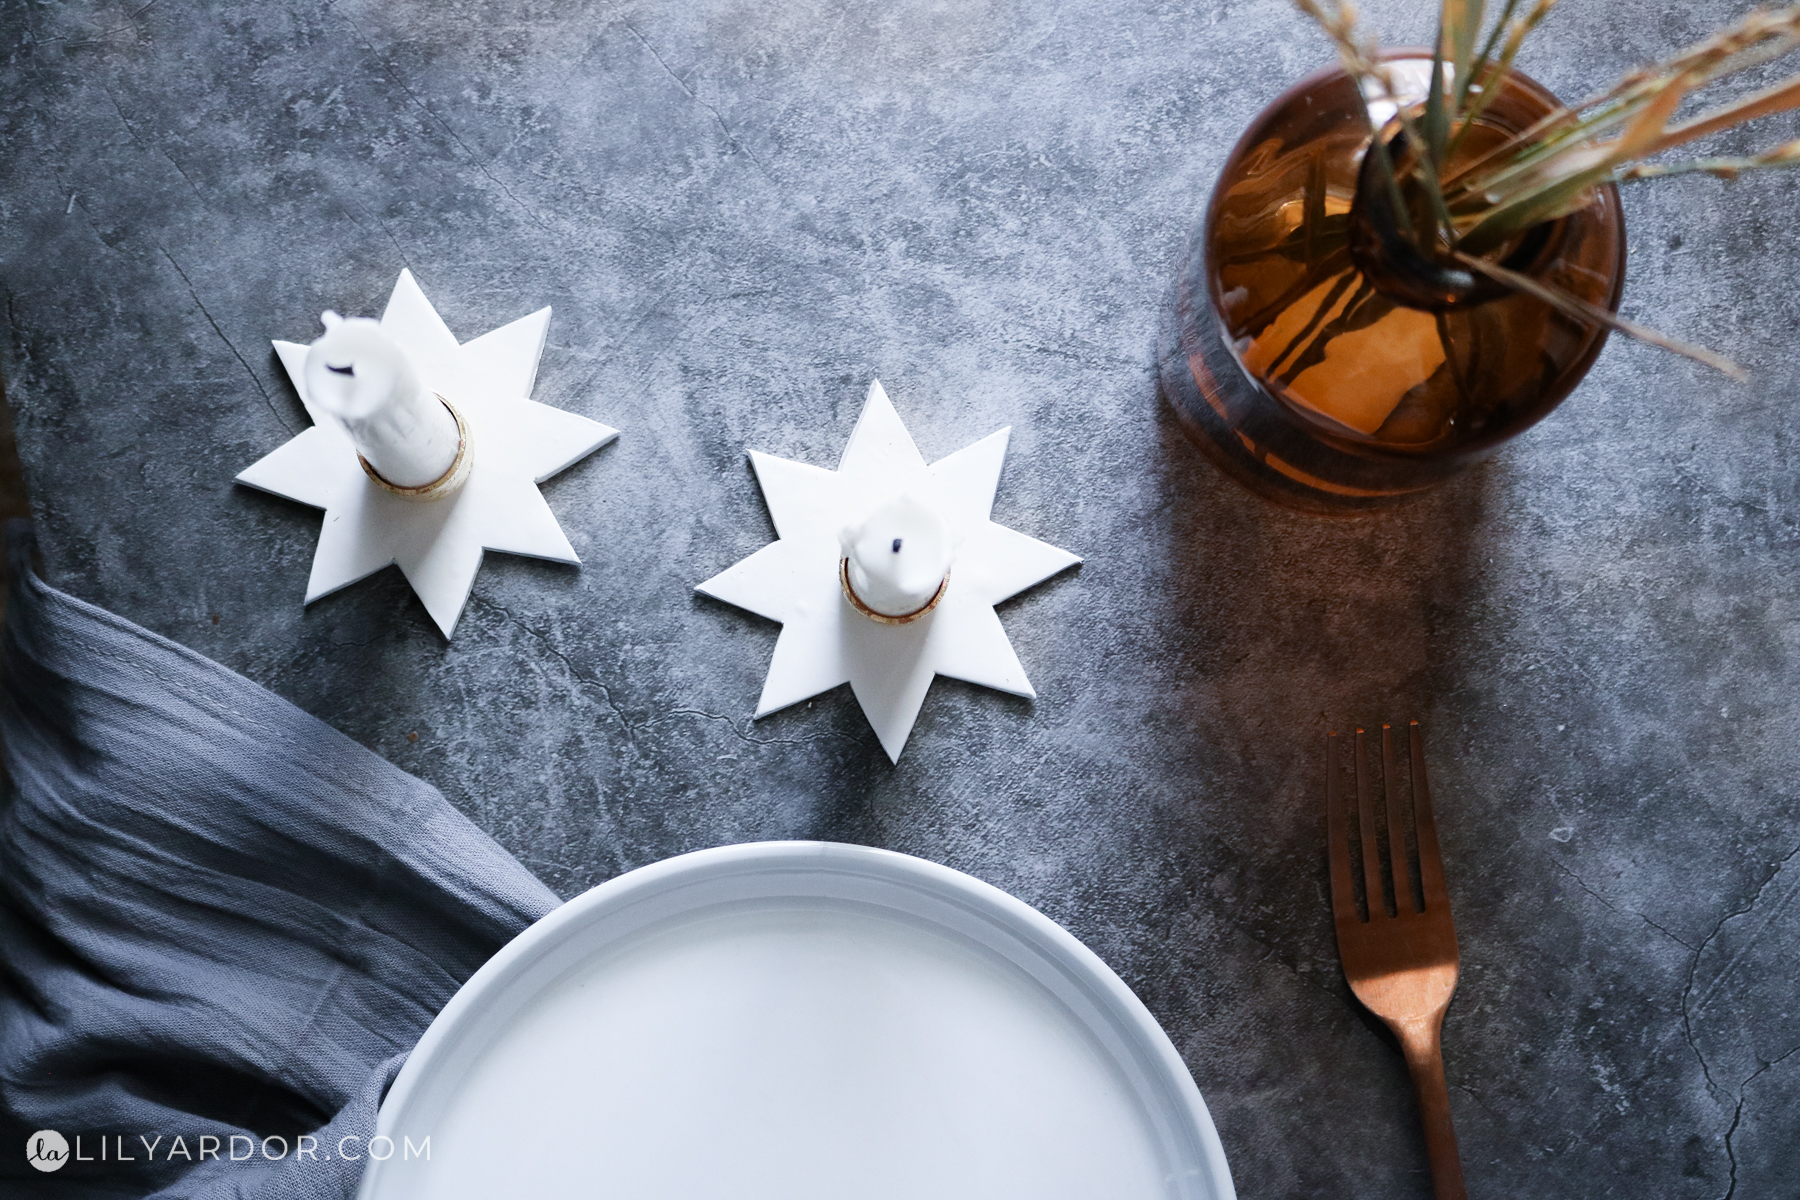
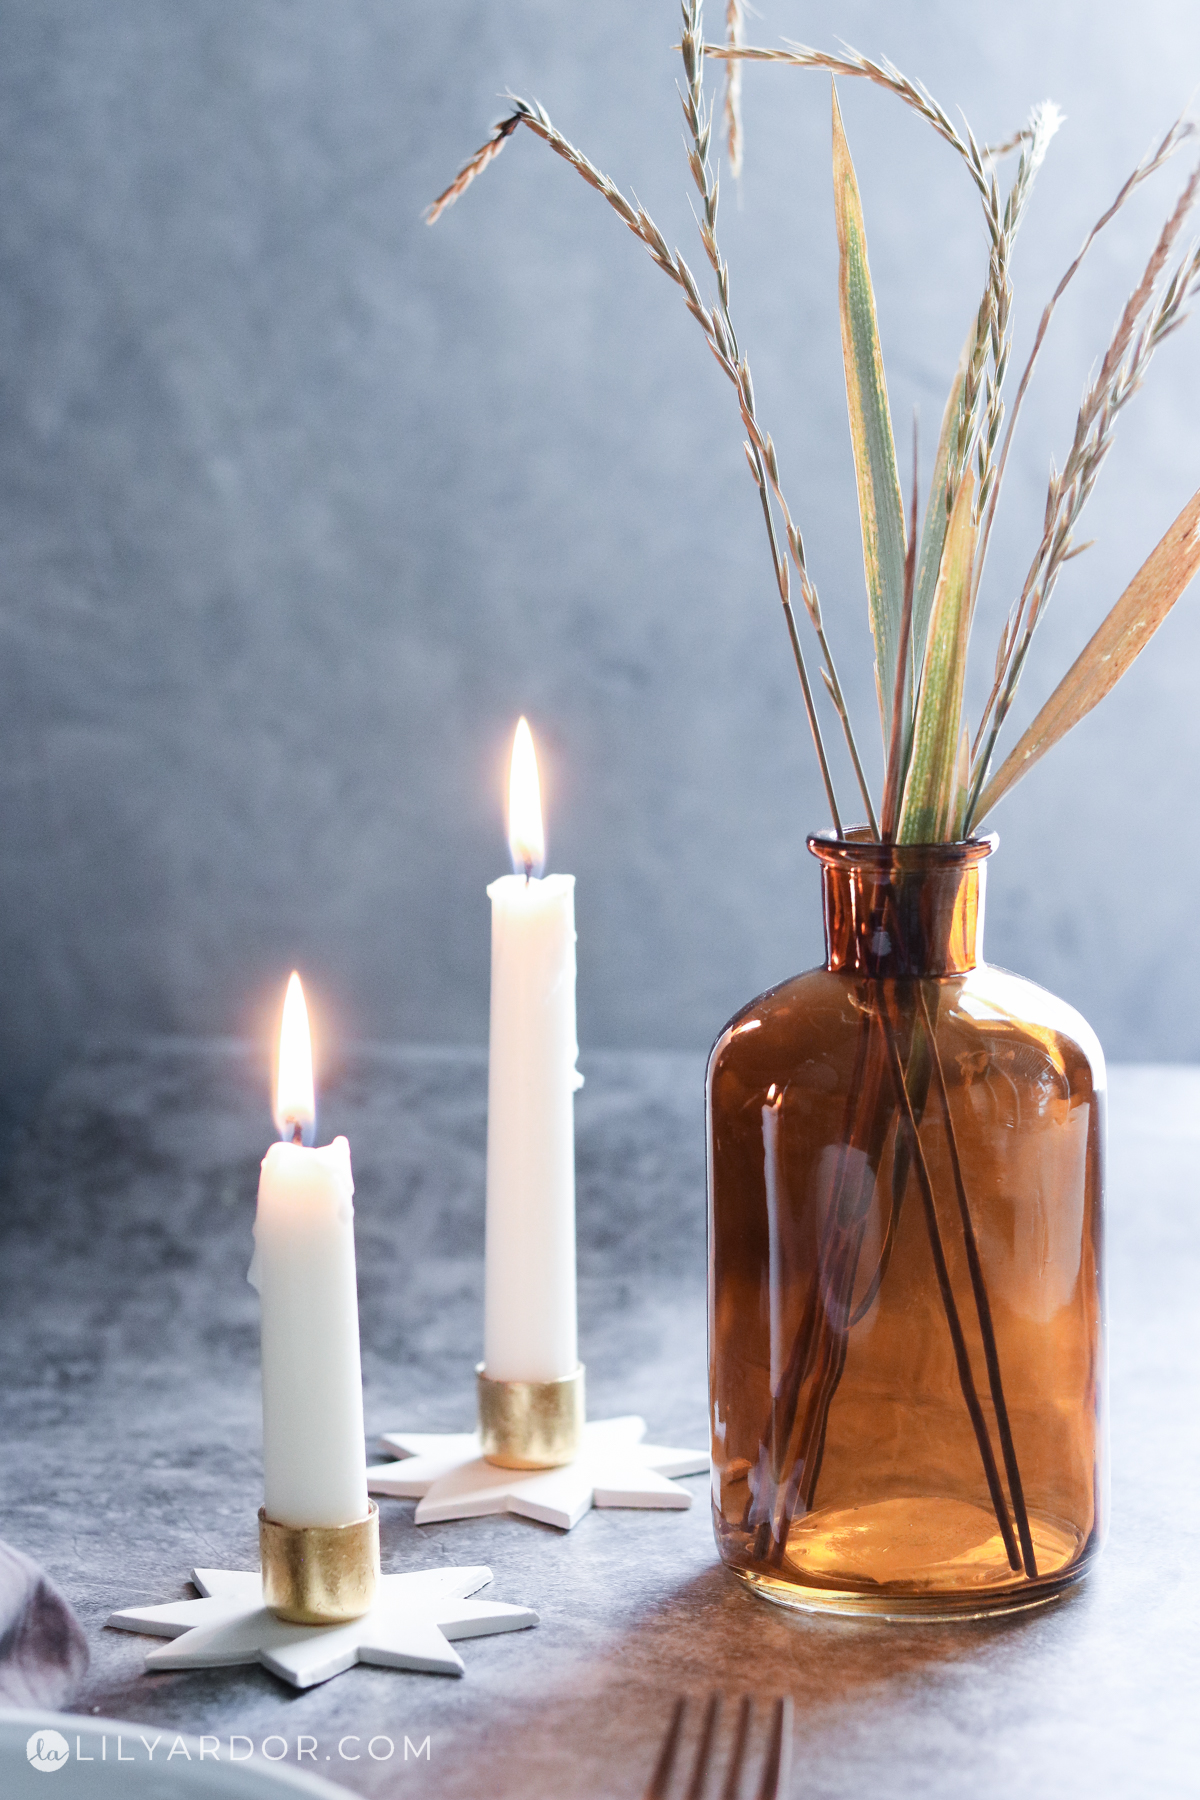
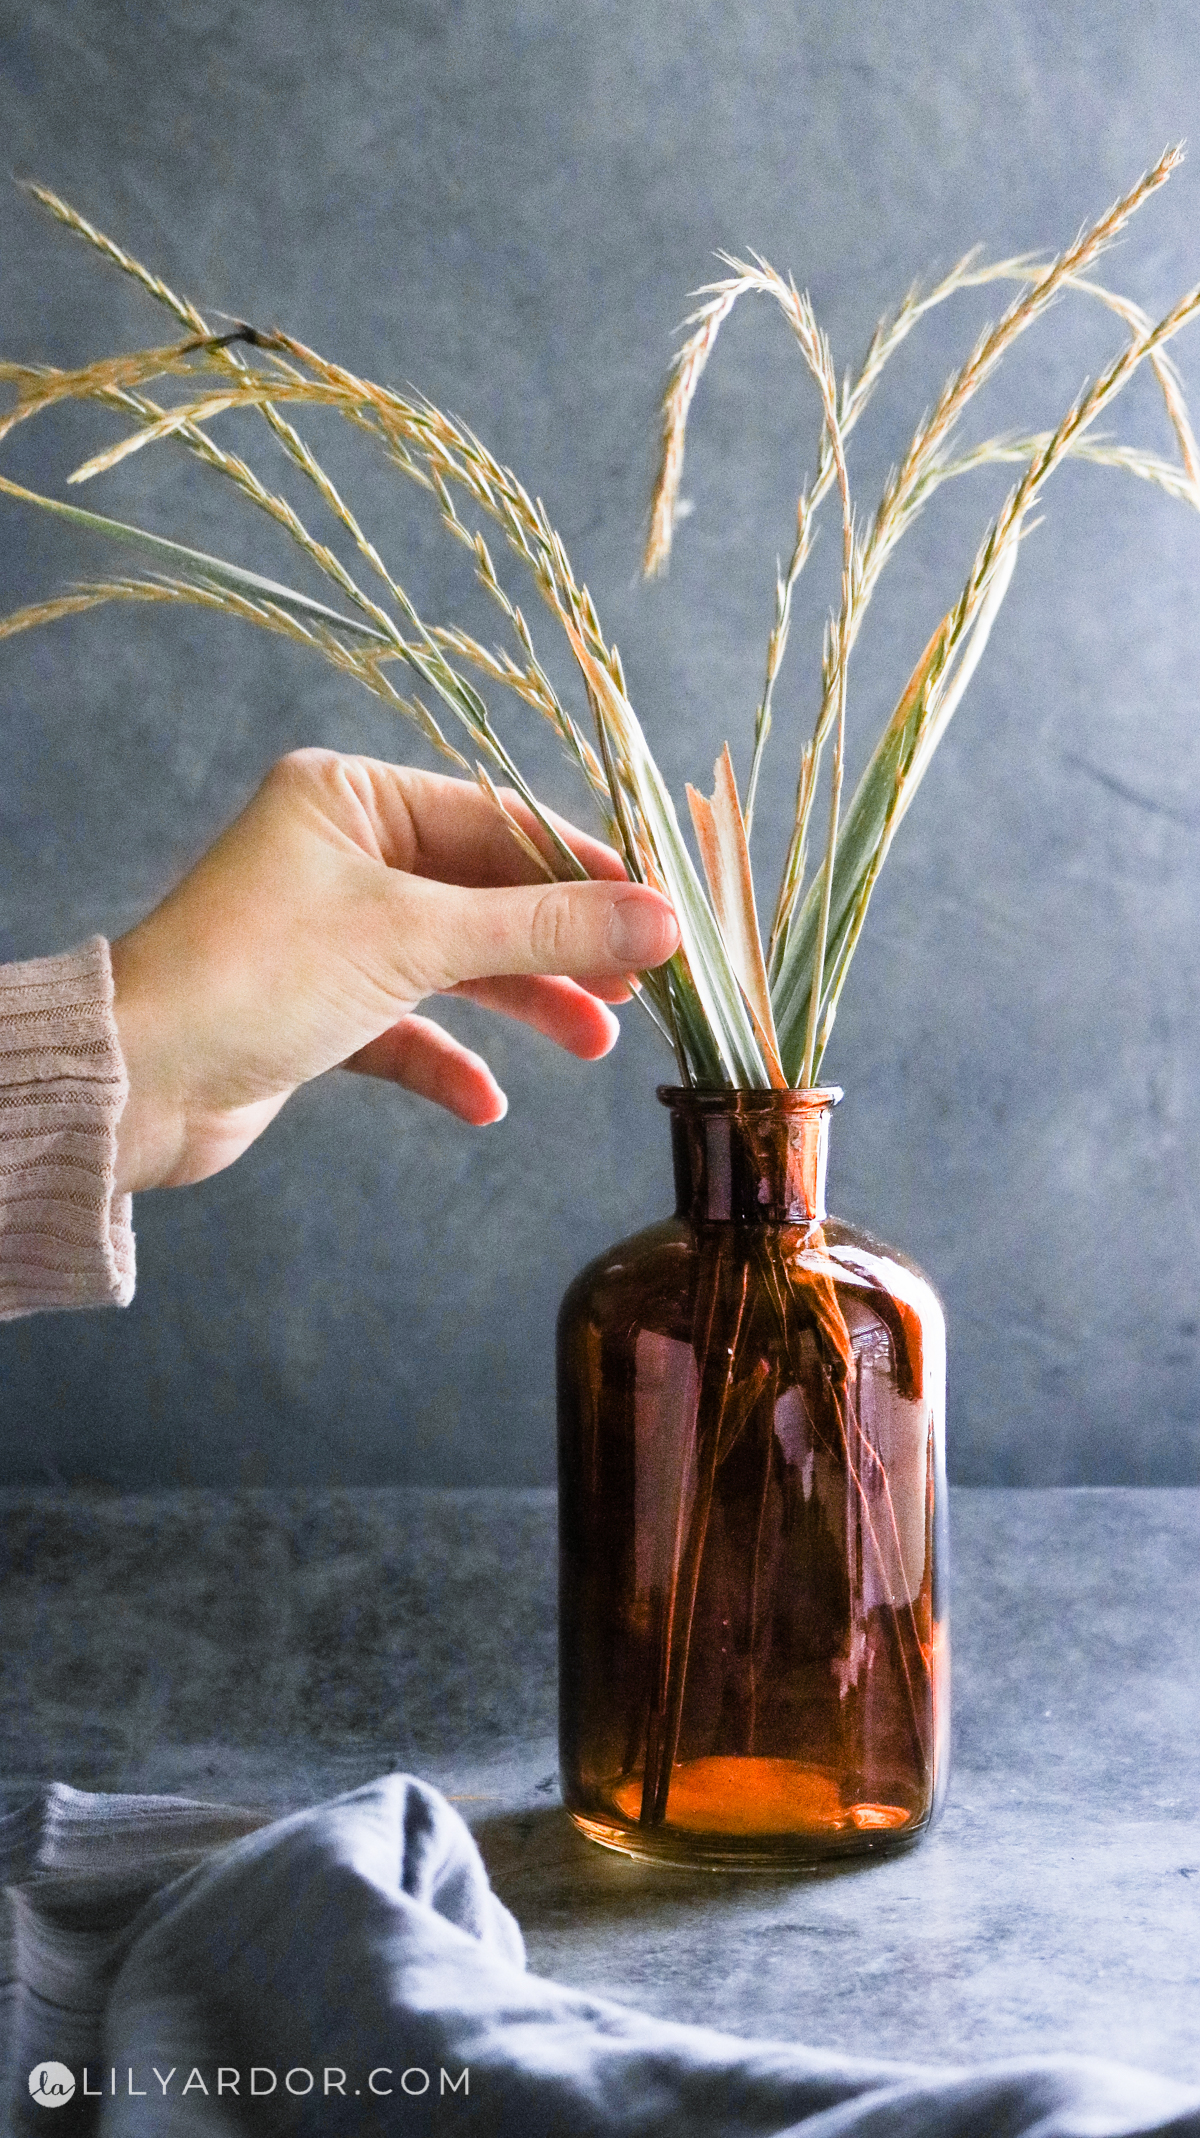
Let’s talk about this glass vase. I was at hobby lobby the other week and usually I avoid the decor aisle however, this vase caught my eye and I couldn’t help but get it because it was only $5.99 . I LOVE LOVE LOVE the color and love how it’s lights up in the sun!
That’s all for now! I’ll be sharing the other candle holder DIY soon so stay tuned! I hope you have an amazing weekend!
xo,
Lily
Hi Lily! I made 12 of these and they are beautiful. Thanks for explaining so clearly! I left mine copper so I just pushed the cap right into the clay and baked it. No need for gluing after! They are so elegant!
Hi Mel! I’m so glad this was helpful! WOW I love the idea of just pushing them into the clay and letting it bake all together. Makes it even easier! So cool!