Wall Decor
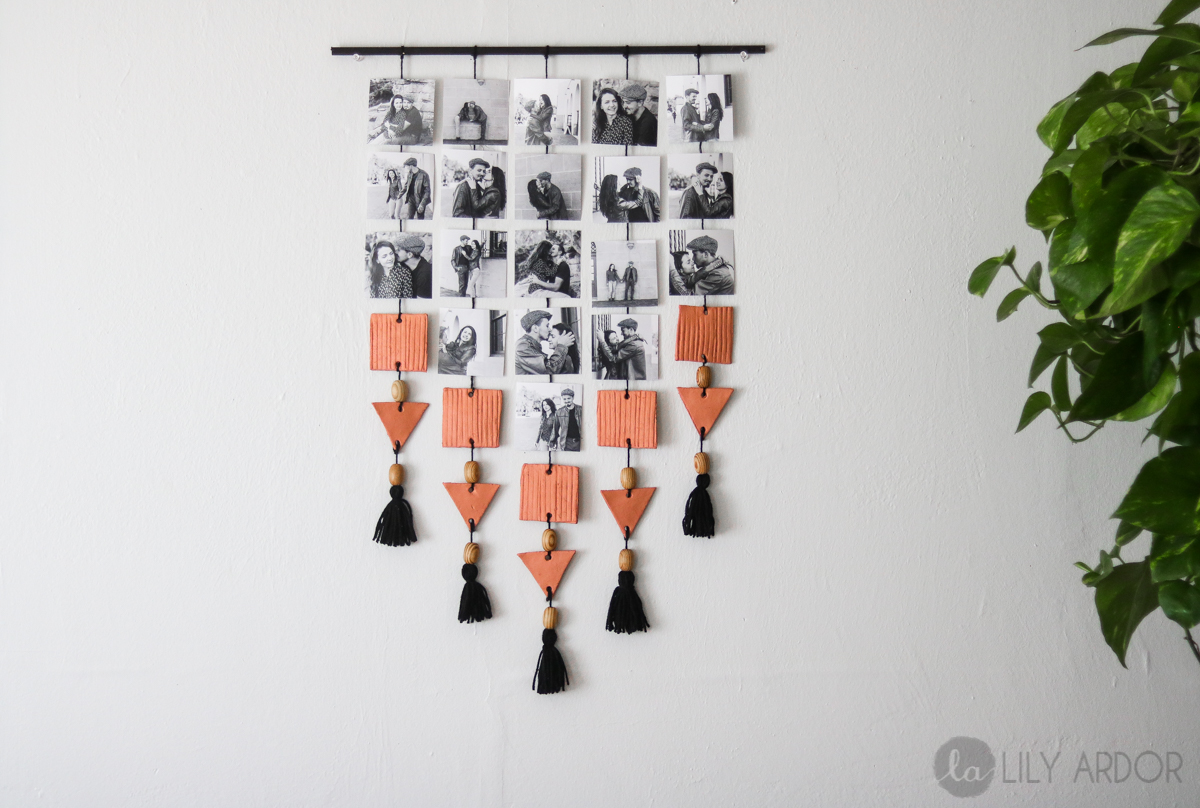
We didn’t have many professional photo-shoots while growing up, so most of our pictures were displayed in albums hidden on shelves. After getting married I’ve realized how important it is to have them displayed on your walls. At least in my house it is!! 😀 My hubby is all for having pictures on the walls. WHY? Because he says it feels homey. I couldn’t agree more!! 😀 I can’t count how many times I’ve planned a trip to the store to get my photos enlarged and printed but unfortunately it’s the last thing on list because it’s a bit pricey. This project however was the perfect fit with price and style because of the subtle color pallet and 5×7’s are a lot cheaper then 16×20’s. 😀
What you’ll need
-
- Yarn
- Fork
- Black paint
- 19 photos
- dowel
- Air Clay (in terracotta)
- Tape
- Poster board
- Wood Beads
- Straw
- Glue gun
- Knife
- Bobby pin
- Rolling pin
Instructions
Sorry I didn’t take many pictures during the process although I did make a descriptive video for you guys to enjoy. (scroll down for video)
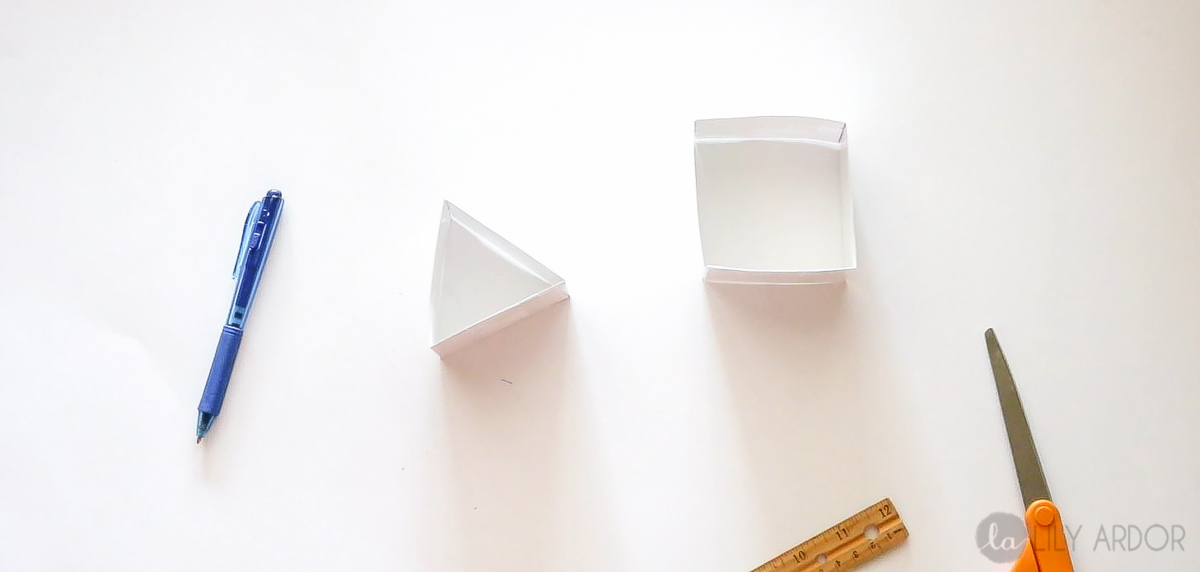
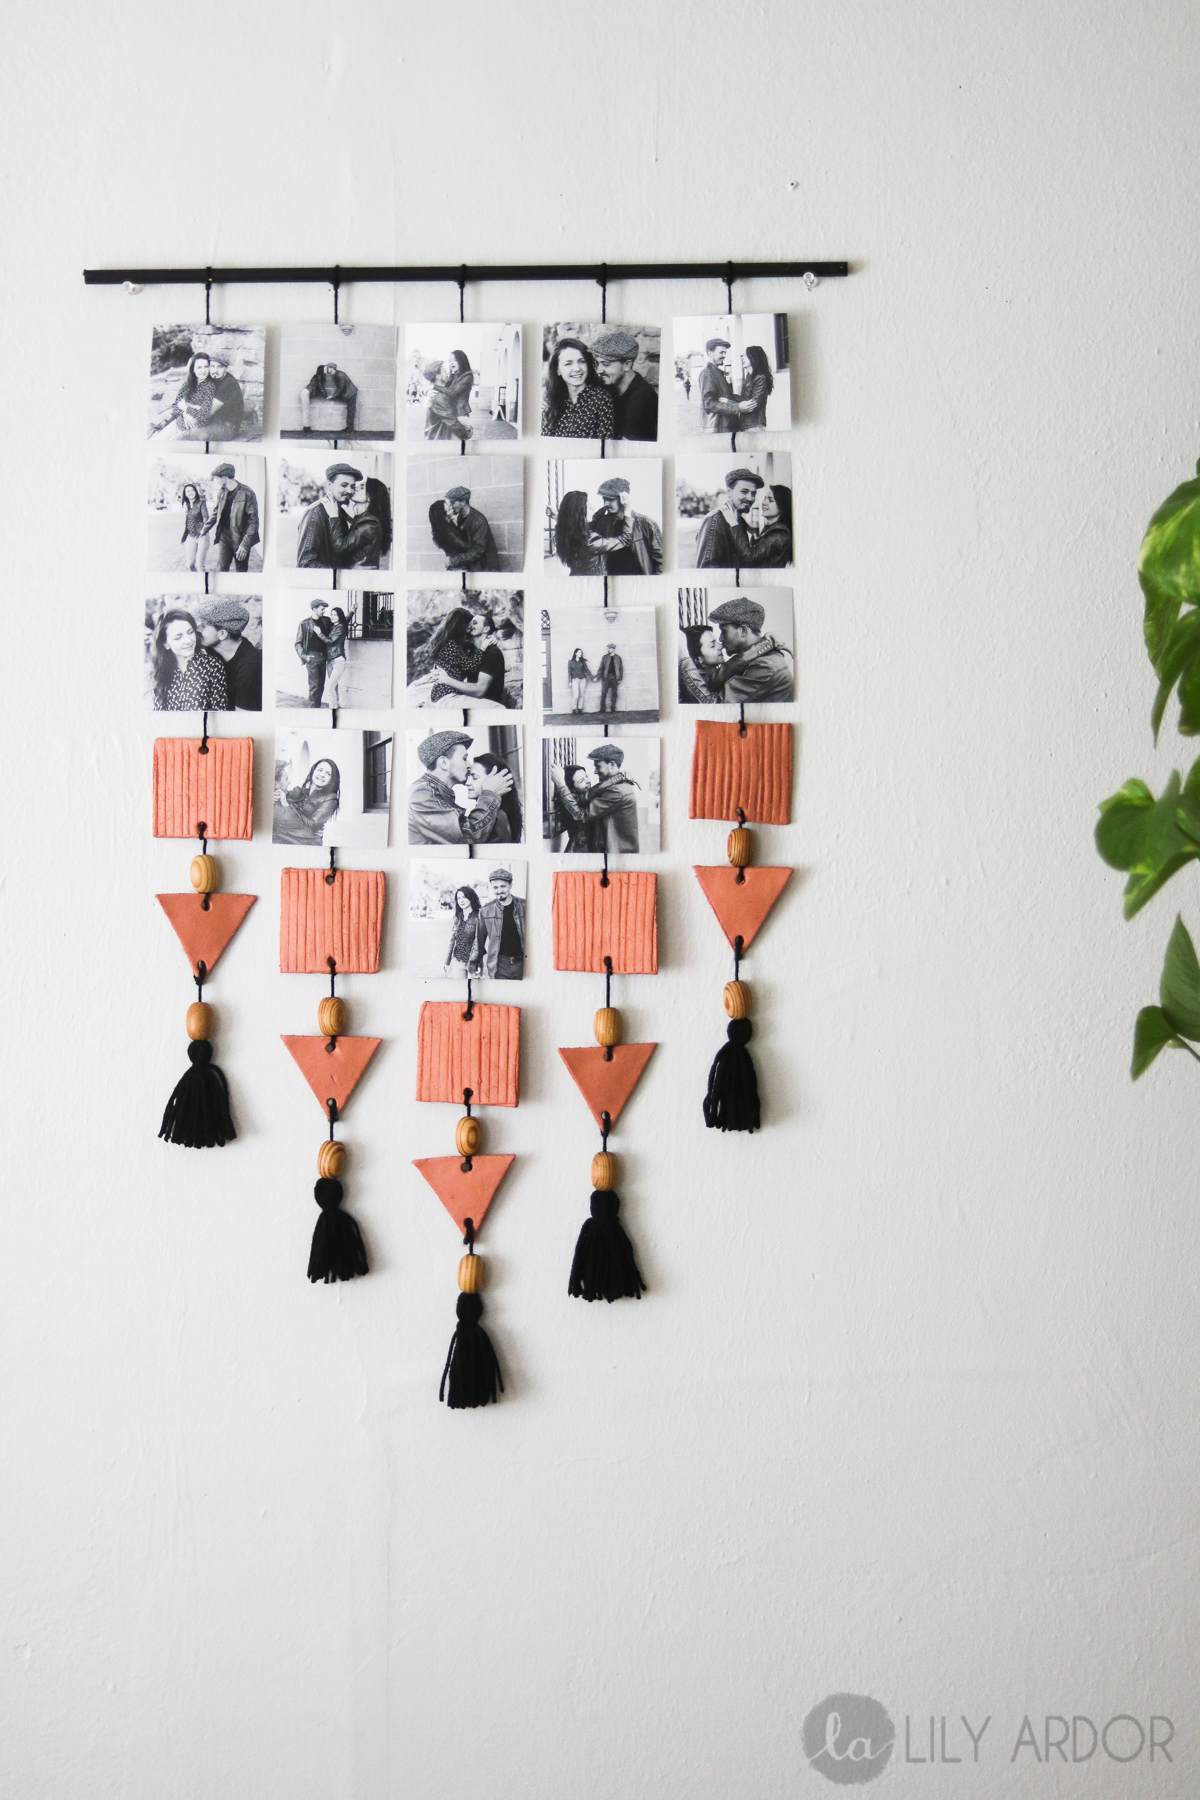
To start off I painted my dowel black and set it aside to dry. I then made my square and triangle out of the poster board. These aren’t as strong as cookie cutters. I only used them to mark the approximate shape to go over with my knife.
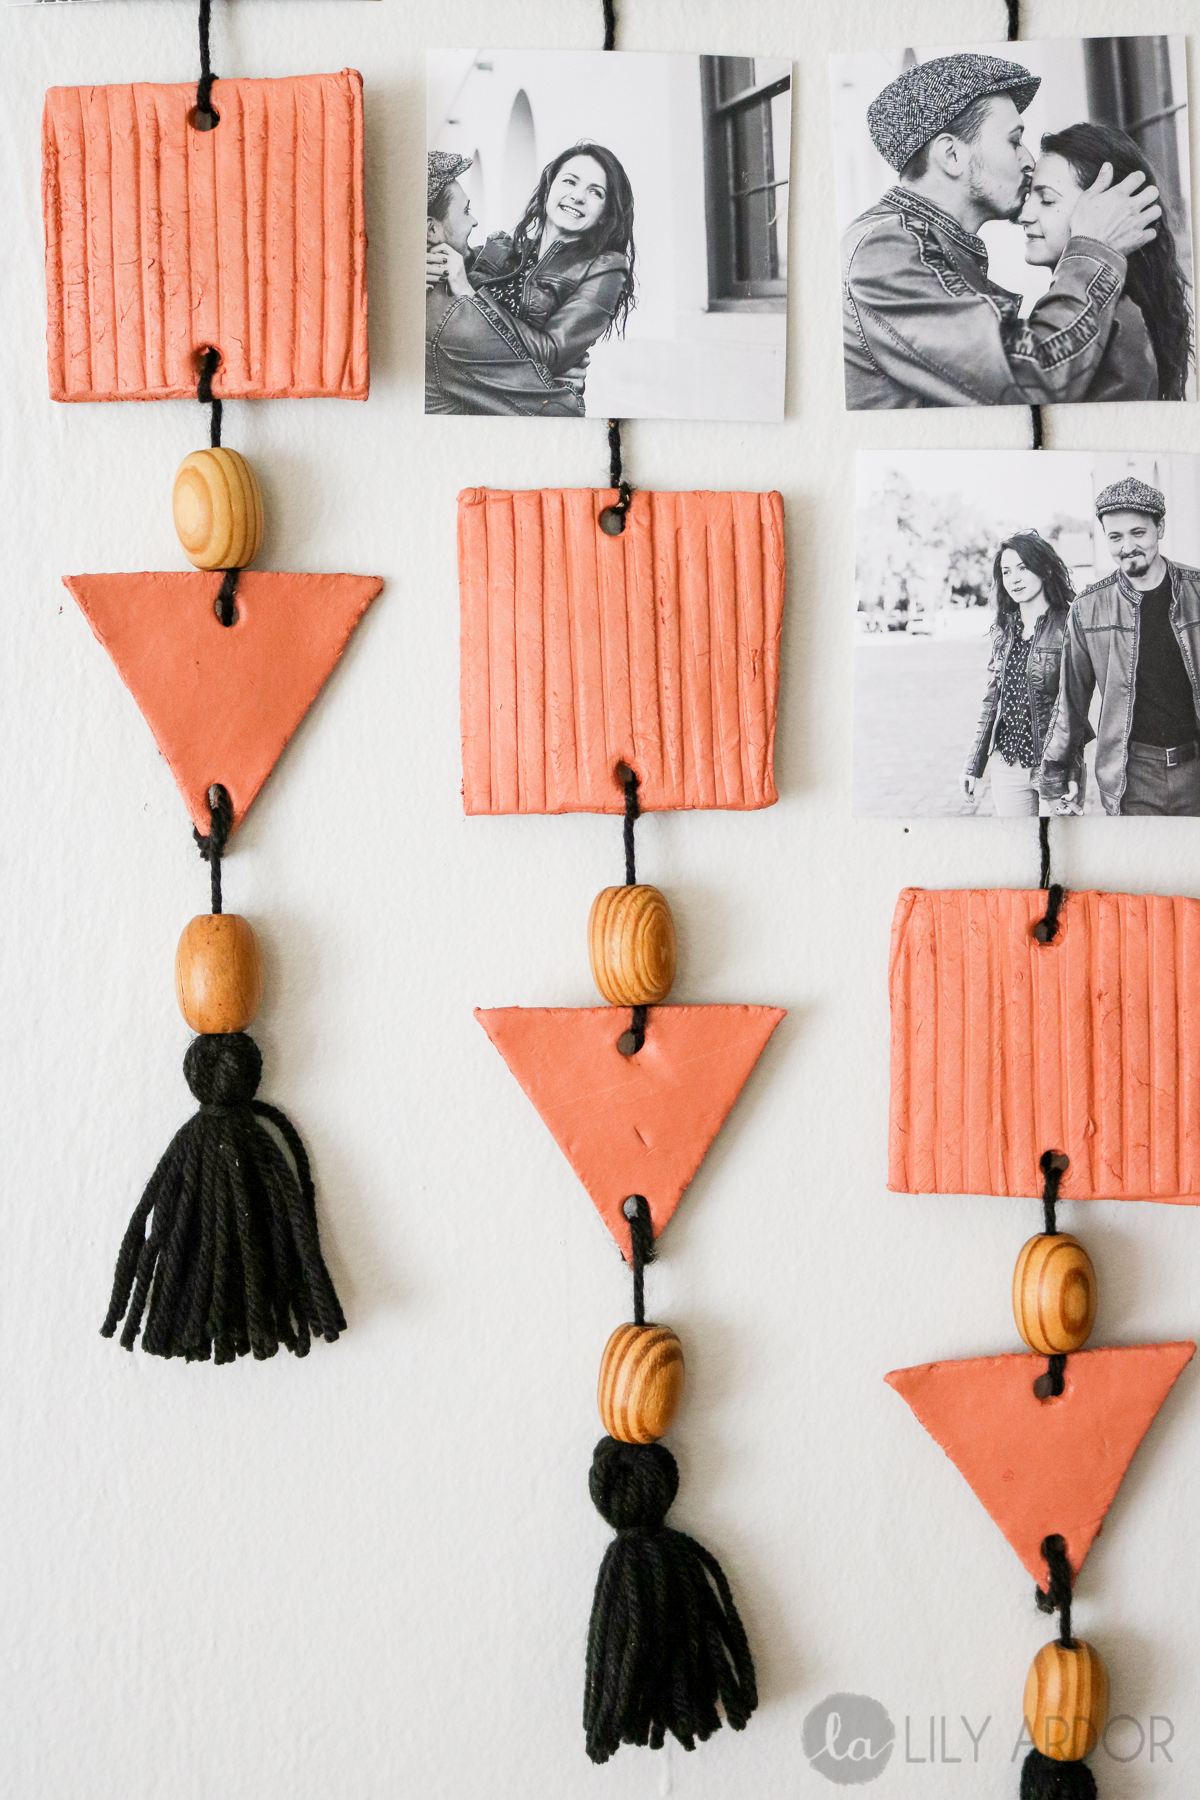
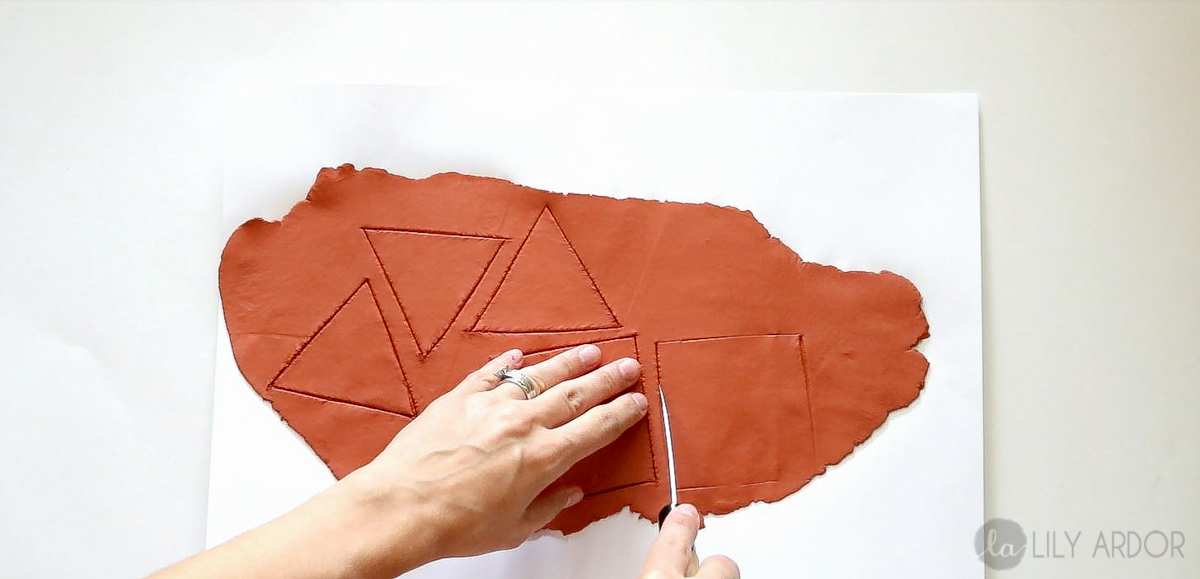
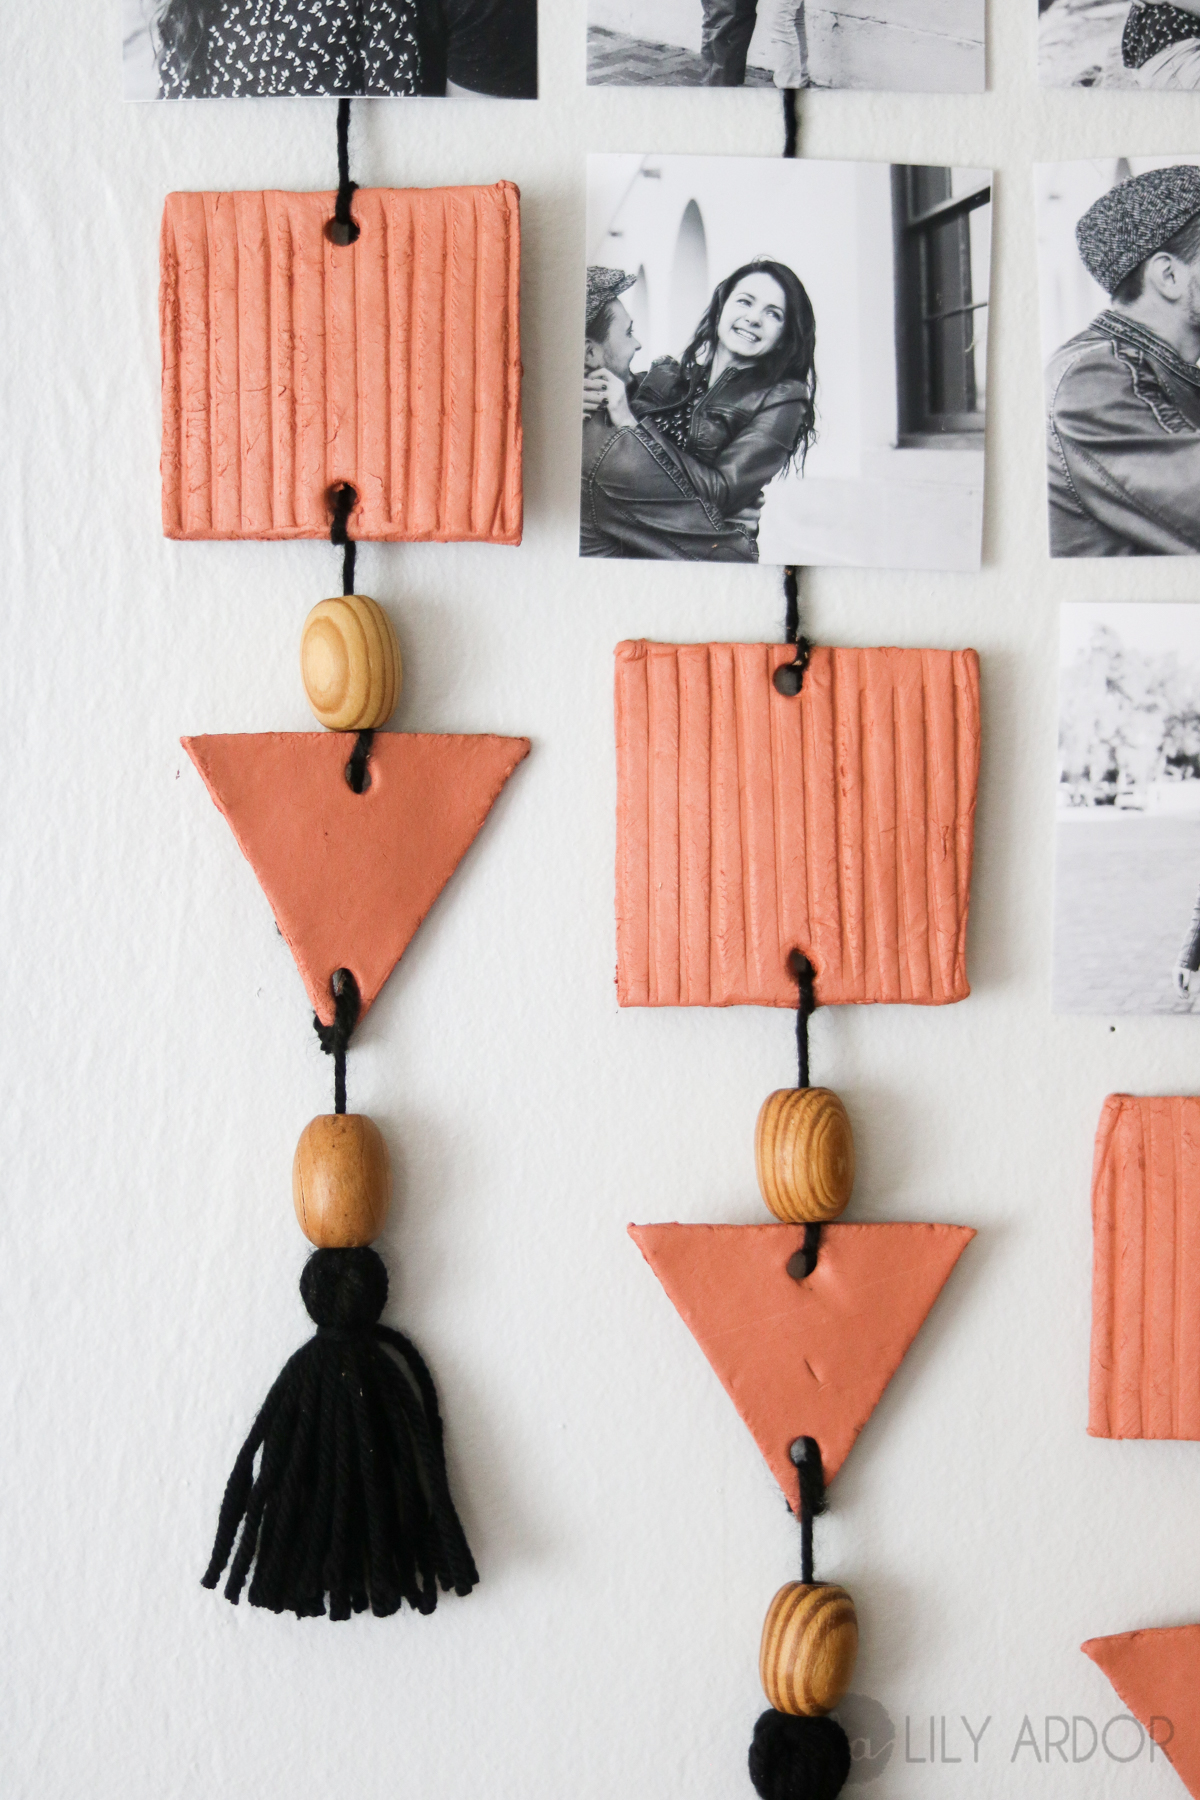
Then I rolled out my clay. It needs to be just a tad bit thicker then 1/4 of an inch. Just like tile. Mark your shapes and cut them out with your knife. For my squares I did stripes with a fork. Following that I made holes with a straw in all of them. Keep in mind if your clay is rolled out too thin making stripes on it won’t work.. At least it didn’t for me! The first time I rolled out my clay it was to thin and it just warped my square. Although this was air clay I baked my clay for 20 minutes at 200 degrees. It’s a lot quicker that way.

To square off my pictures I made a square out of the poster board as well. Then I used that square to mark where to cut each picture. Don’t forget to pic up each picture in front of some light to see if your markings are accurate before cutting.
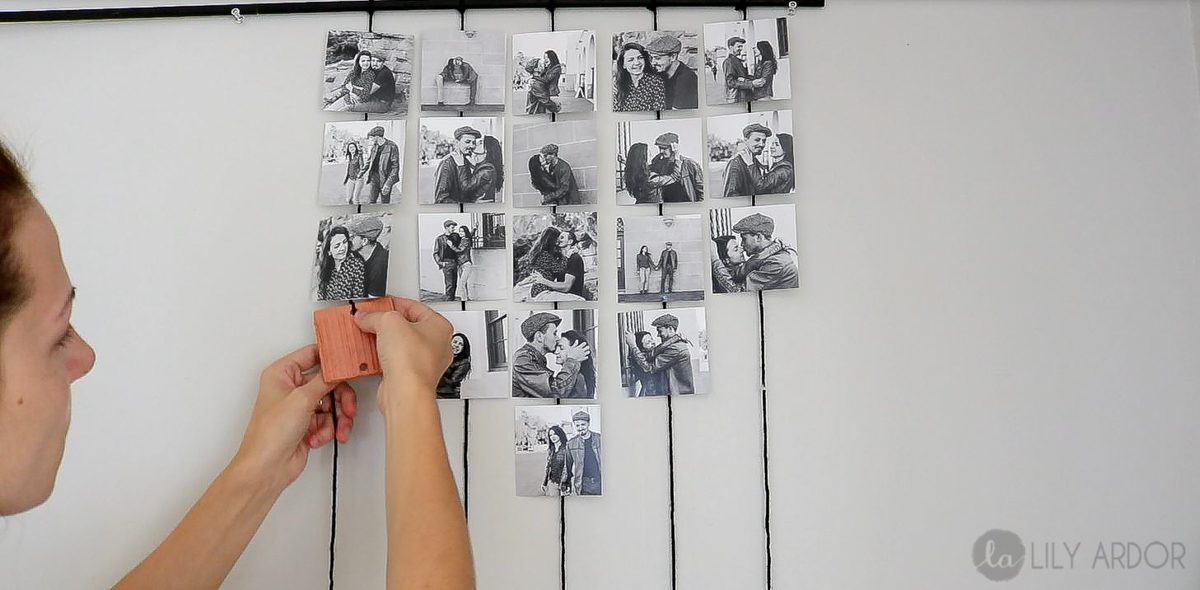
After that I tied 5 strings onto my dowel. I then hot glued my ends to the back side and cut off any excess yarn. I then hot glued my pictures one by one. Before doing thing I drew out a diagram to have a better idea of how I wanted the overall shape to look like. I was going for a giant arrow shape so I stuck to making it pointed at the bottom. Once your pictures are on start threading your squares and triangles. I added beads in between and tassels on the bottom. The bobby pin came in handy for this step. That’s it!! Simple and easy!! Here’s a video for you guys to enjoy. Let me know what you think in the comments below!! 😀
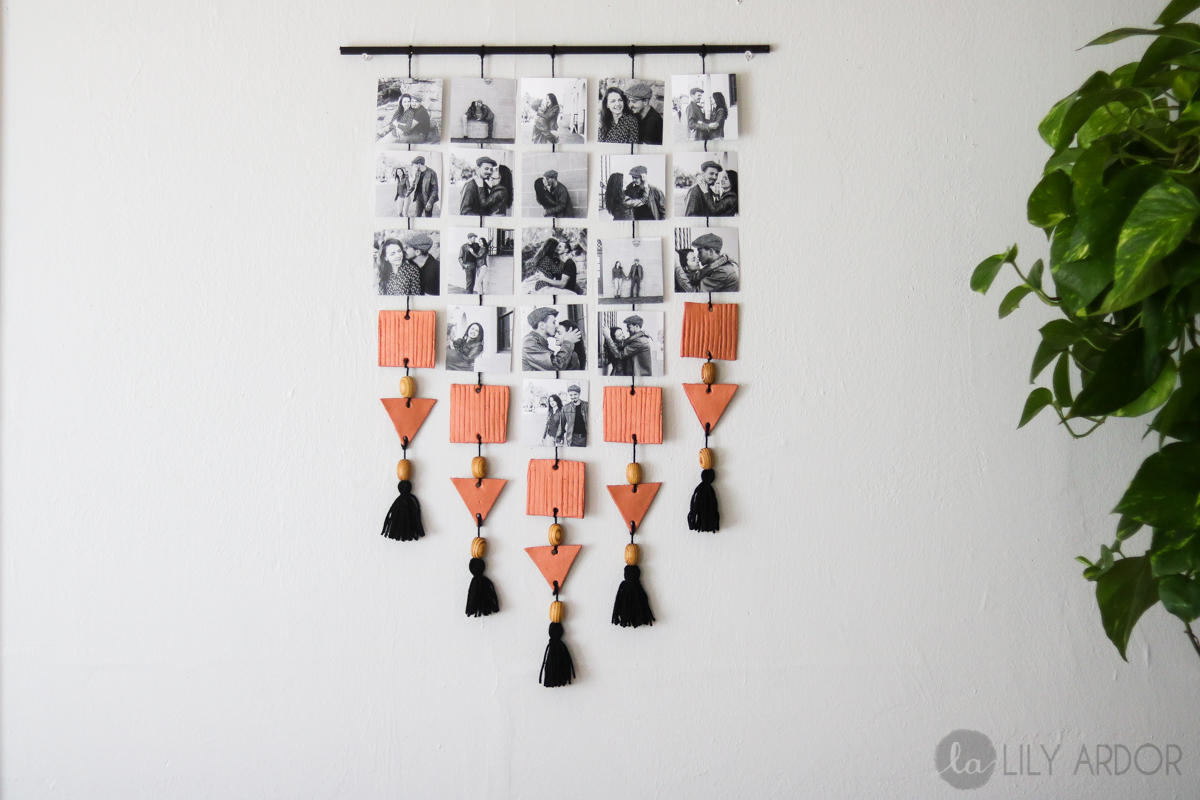
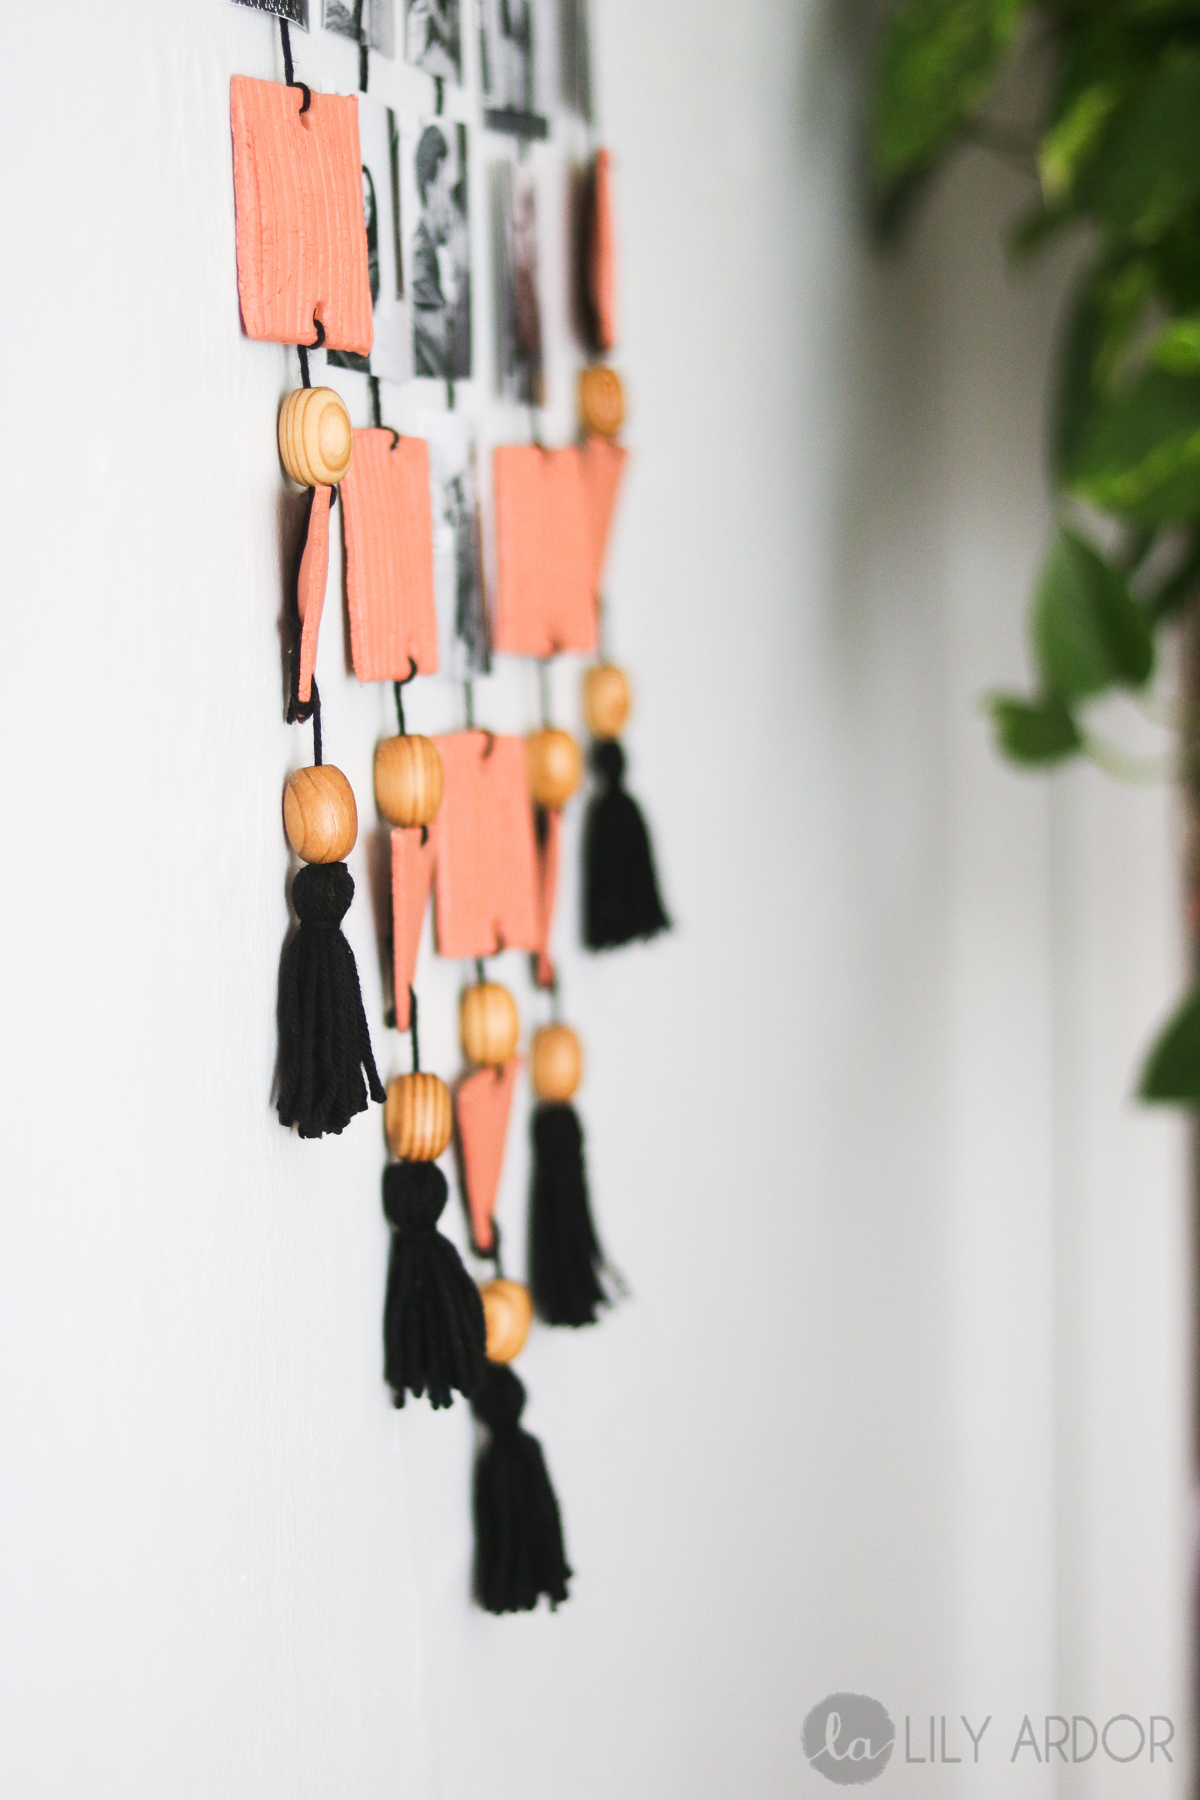
I love this combination of beads and clay.
I hope you guys enjoyed this DIY. Don’t forget to have fun and play with colors. That clay is paintable and so are the beads.. Have fun!!
Tell me in the comments down below what colors your making yours?
Photo projects are one of my favorite gifts to give, they’re just so personal! This is going on my to-do list, I can think of a few people who would love it as a Christmas present. Two will be for my sister-in-laws – one in deep blue, the other in coral and they will LOVE them! Thank you for sharing at Designing You!
What a great Idea to make these as gifts! 😀 😀 So glad to hear you liked this Trudy. 😀 Those colors sound lovely!! I think they’ll be delighted to have gifts like these!!
What size is the dowel?
1/2 inch in thickness and 20 inches long. 🙂
could u tell dimensions of the square (for photo)
Sure 🙂 My photos were 3″ by 3″ inches.
could u tell dimensions of the square
What kind of yarn? And what is the name of that style bead? Just wood? Do u know where to buy?
I used just regular yarn. Nothing special. Yes just wood beads. I think I got both at Michaels crafts store.
What size of wooden dowel to use?
the wooden dowel is about 20 inches in length.