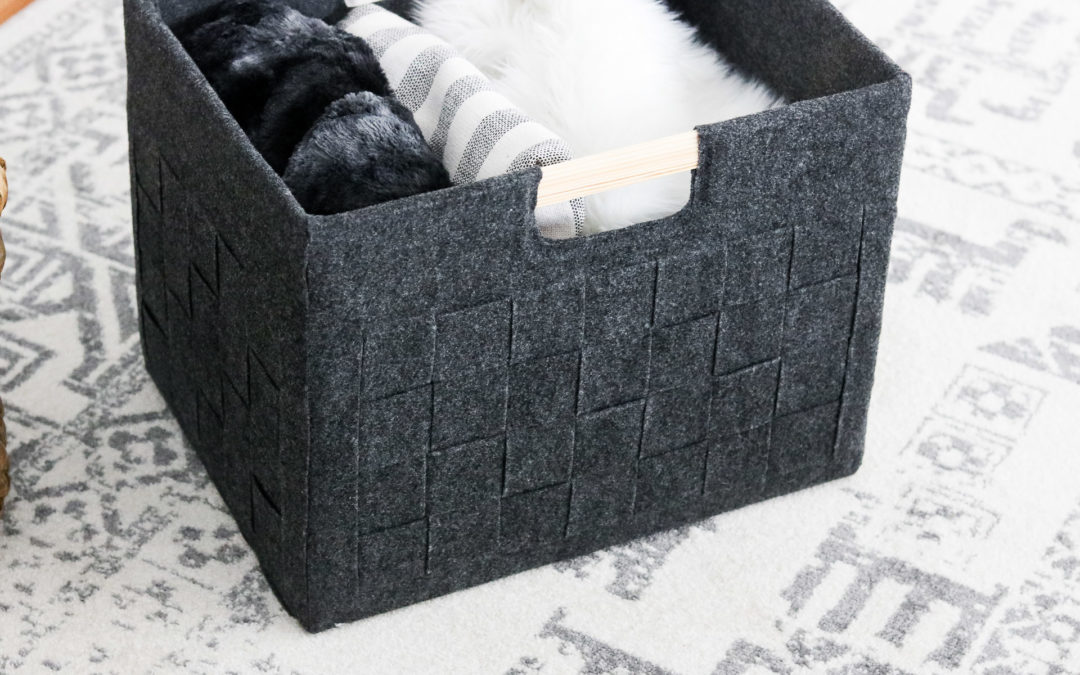
OH MY! How I’ve missed DIY’s!!
Okay, I was overly excited to make this felt box. As much as I loved my organizing series I’ve been missing DIYing and crafting way to much!! So, this week a little detour before we get back on track with the rest of the organizing series. To be honest with you I think I was a bit burned out with all the cleaning and no DIY fun. LOL 😁! Don’t worry I’m not flaking out on the the organizing series! I am actually currently working on editing my office video. I should have it up within the next few days. This quick weaving technique I’ll be sharing today might even help you organize. 😀 I chose to cover a cardboard box because I loved the clean lines and it’s exactly the shape I was looking for. However if you have a plastic bin or a wire basket you can totally attach this awesome felt weave to it as well!
TIME NEEDED:
About two hours. It also really depends on how big your box is and if you choose to make the same handles.
Cost: $7 -$10
This felt box cost me around $7.
Supplies:
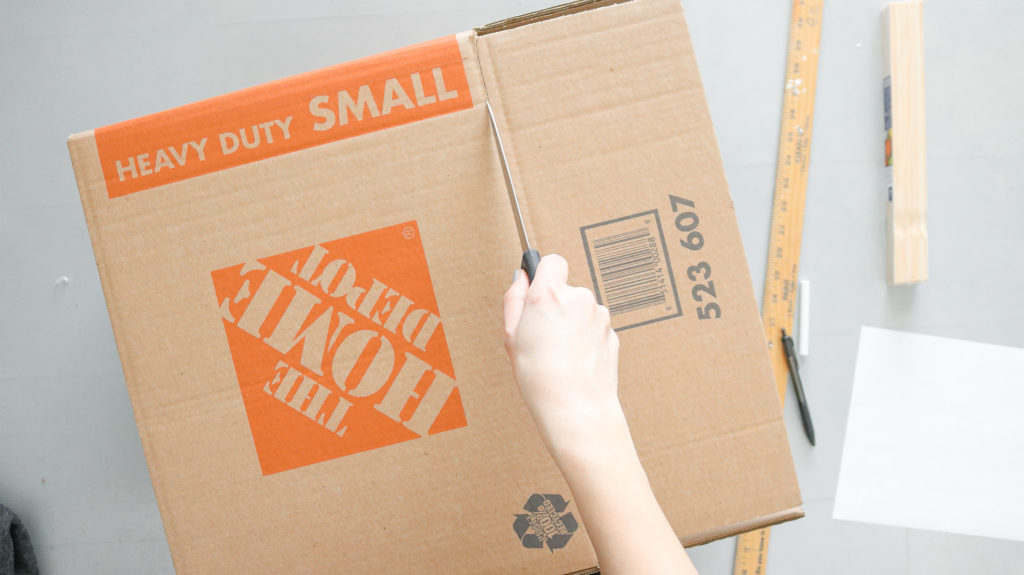
- box (card board box or plastic) The size of my box was 12 1/4 width ” by 16.5 length ” (inches) and 13 1/4 inches in height.
- yard stick
- box cutter or knife
- pen and chalk
- scissors
- felt fabric. ( I originally purchased a total of 3 yards but only used about 1.5 yards for this box at the most) I got my felt at Joanns Fabric.
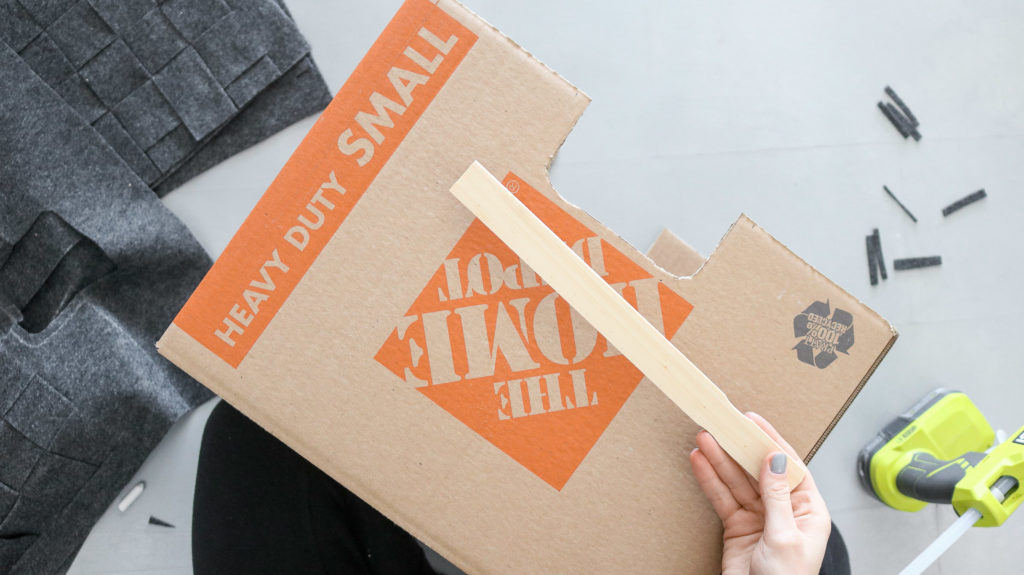
- paint stirrers
- paper ( for the template)
If you’re using a card board box I recommend getting a heavy duty box. It’s be more durable and last longer. Also great if you’re planning on making a handle like I did.

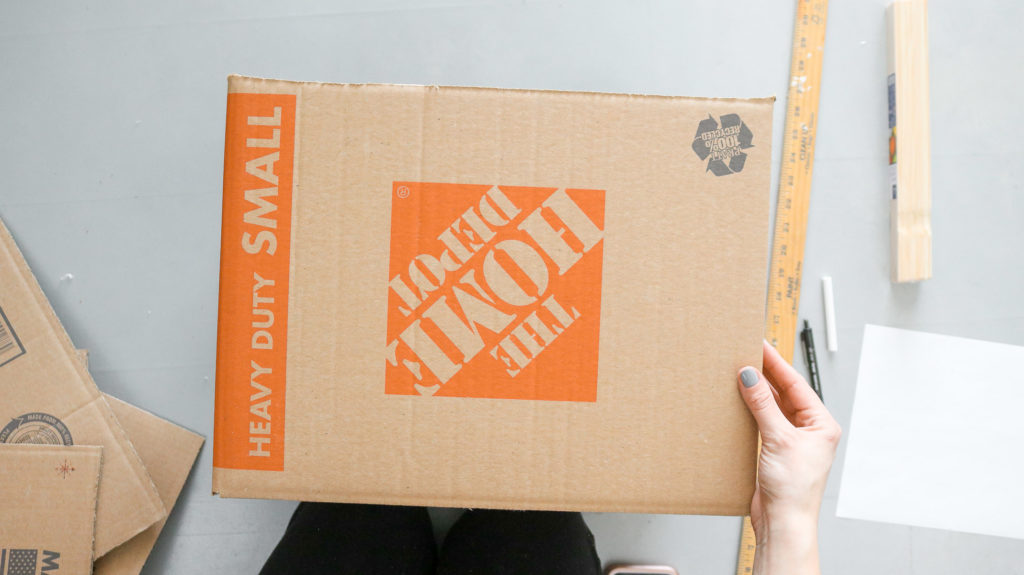
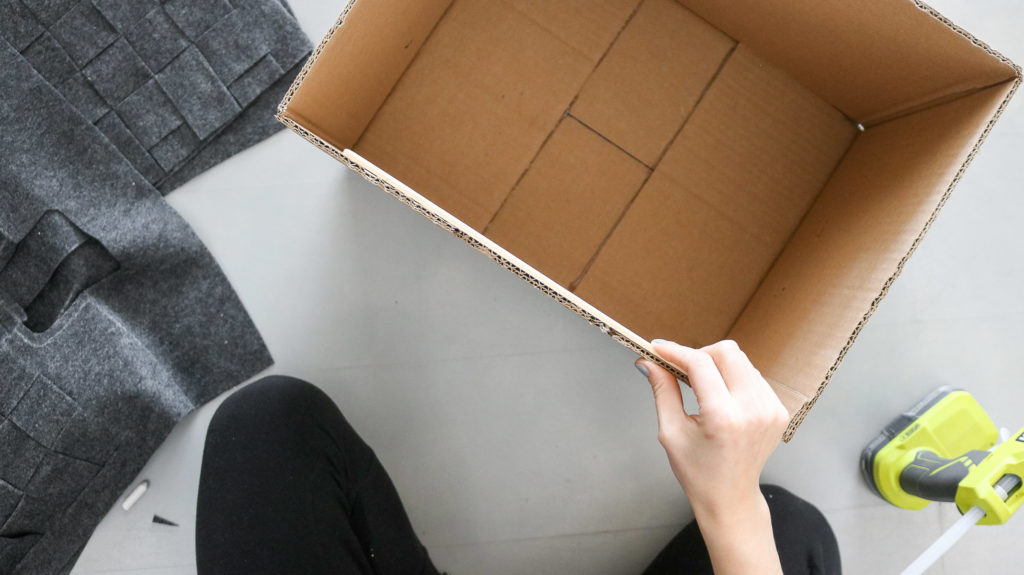
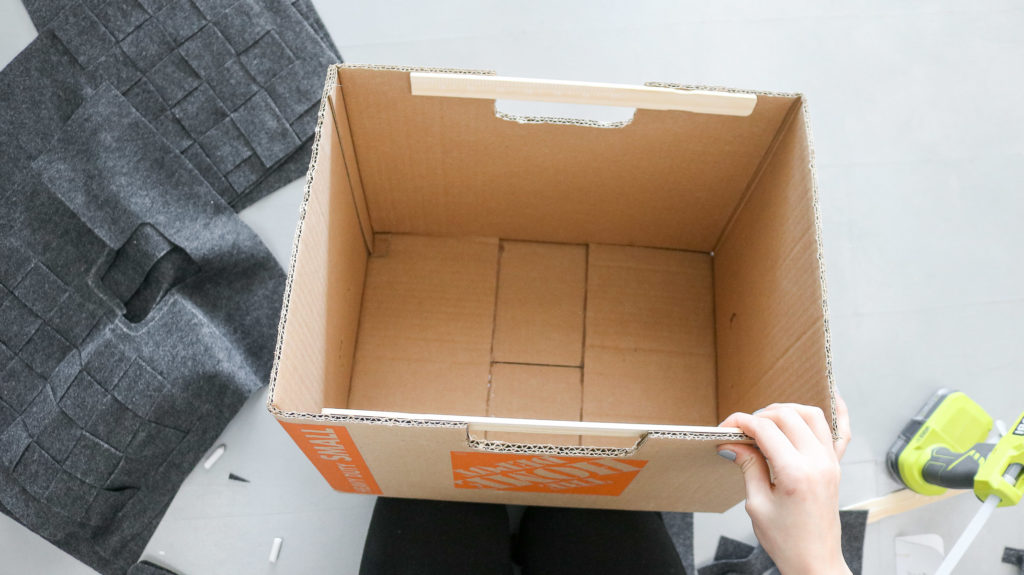
STEP 1 : Prepping Your box!
Start off by taping the bottom of your box. Next cut off all 4 flaps at the top of your box. Cut the flaps off as straight as possible because these will be the edges of your DIY storage box. Then find the center of your box and mark it at the top.
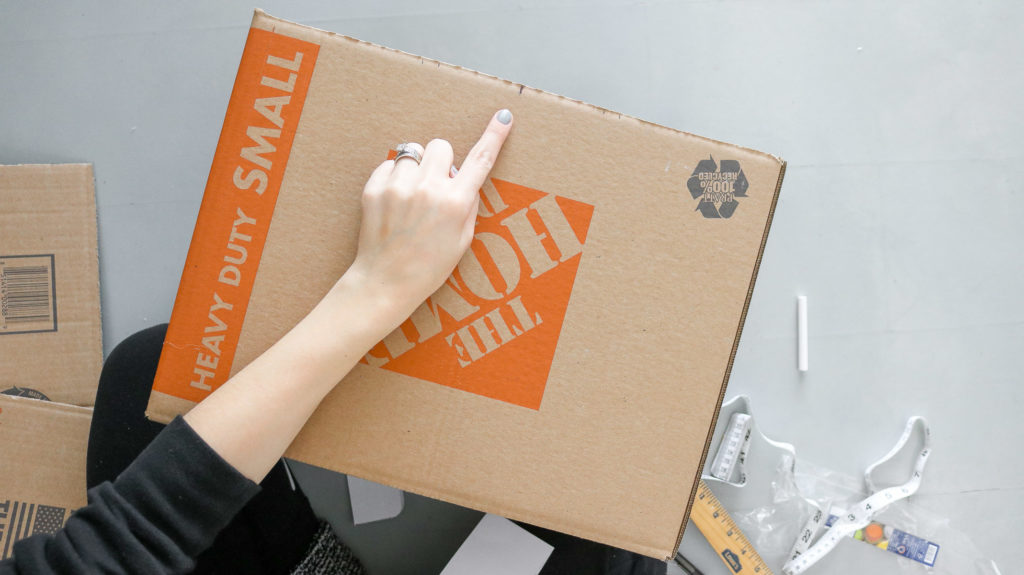
Step 2: Prepping your handles!
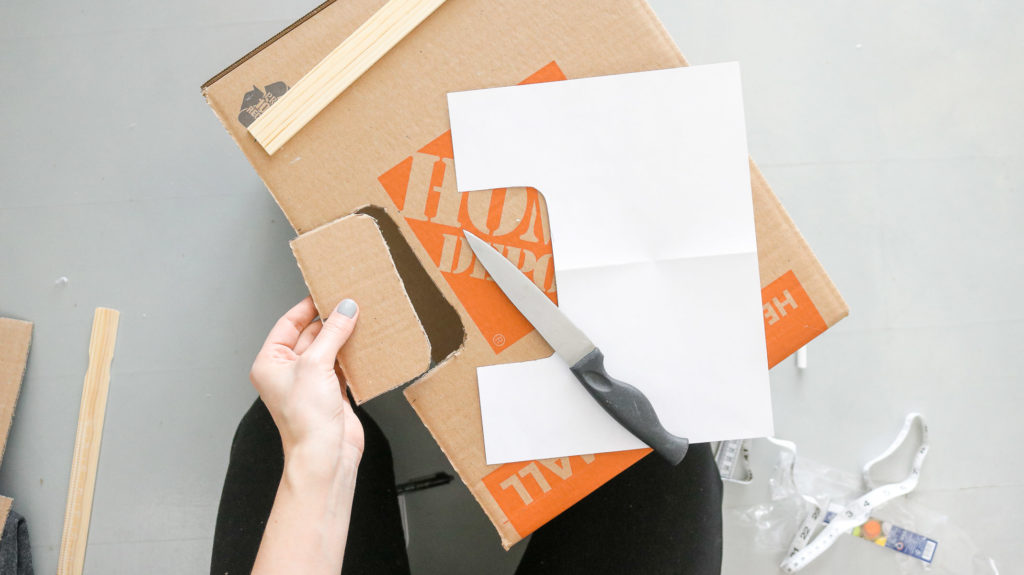
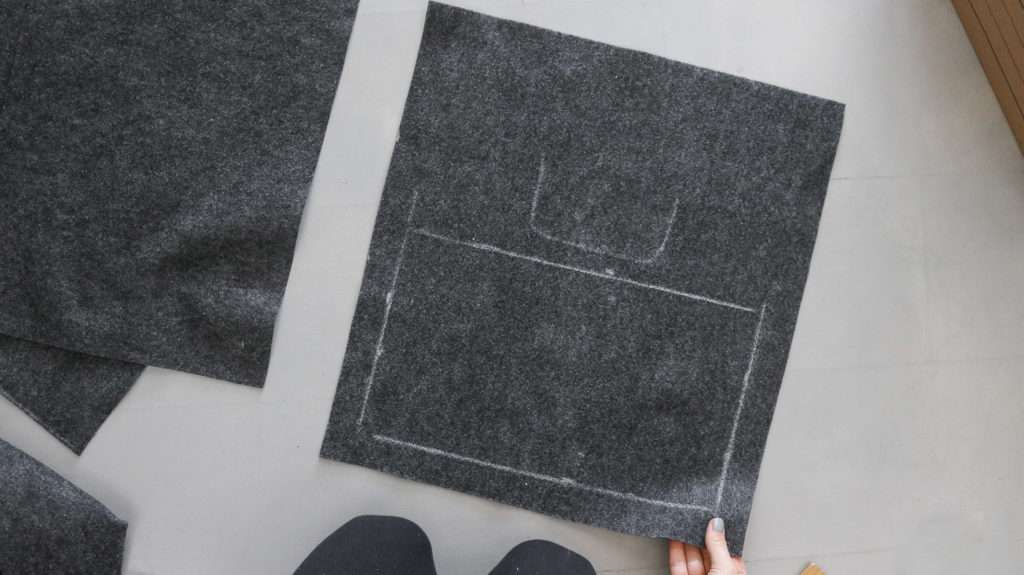
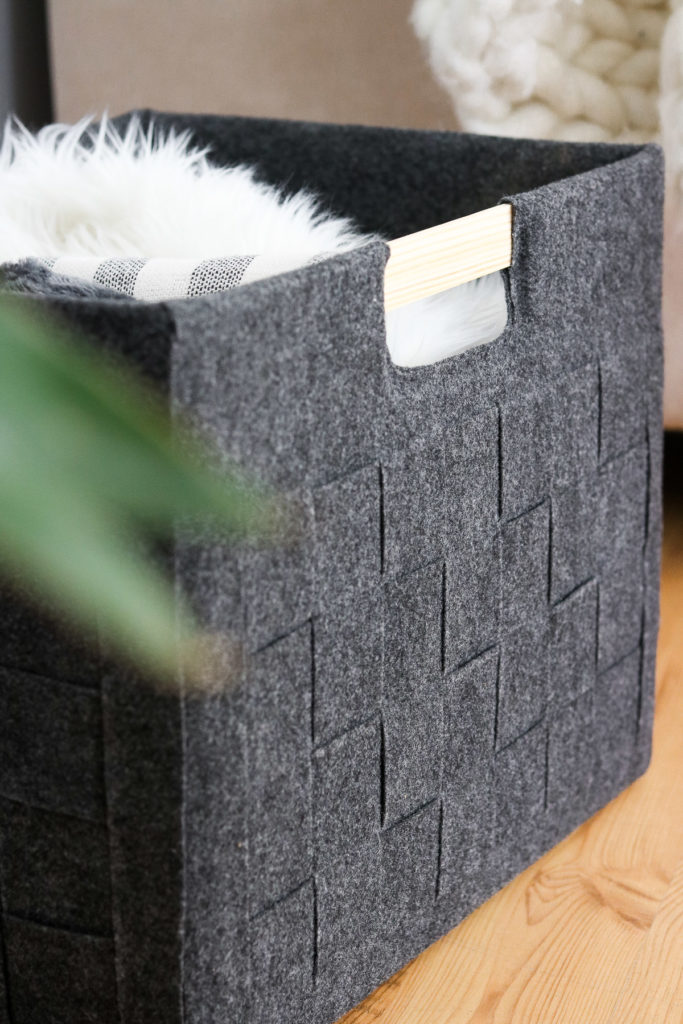
Next use a piece of paper to create a template for your handles. Fold your paper in half and sketch out your handle shape. Then cut the shape out of your paper and trace it onto your box. To make sure it’s centered line up the fold on the paper with where you marked the center on your box.
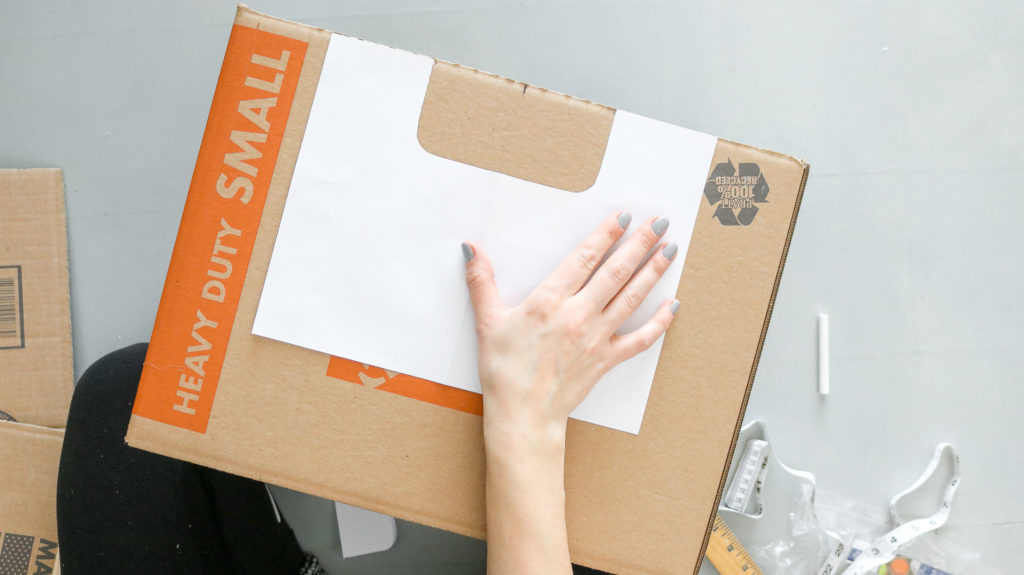
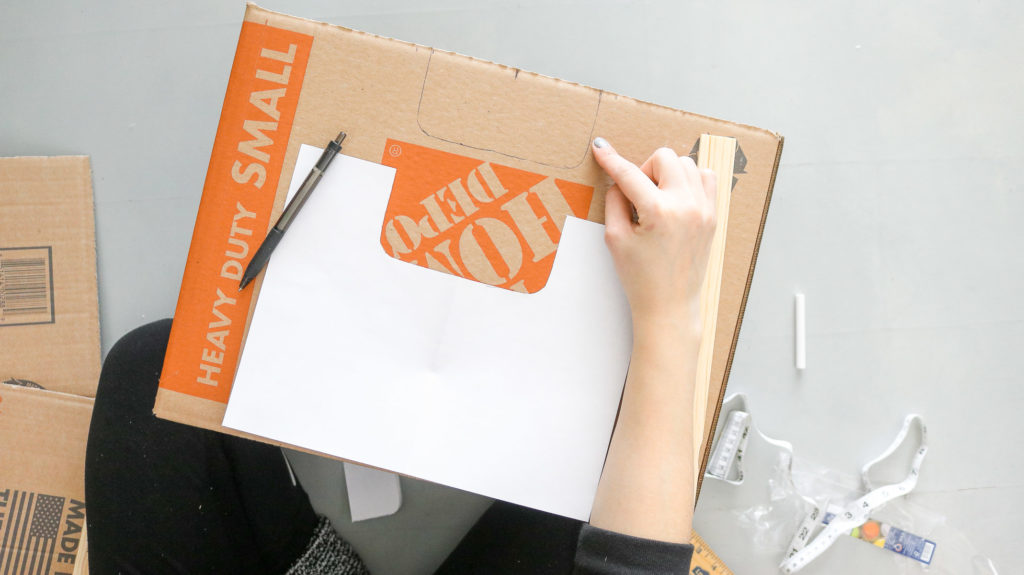
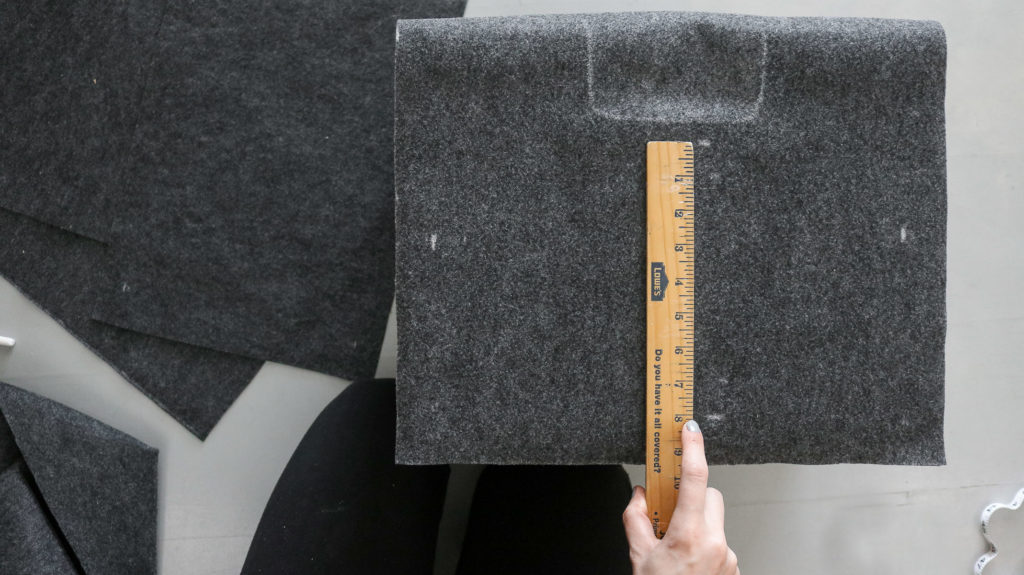
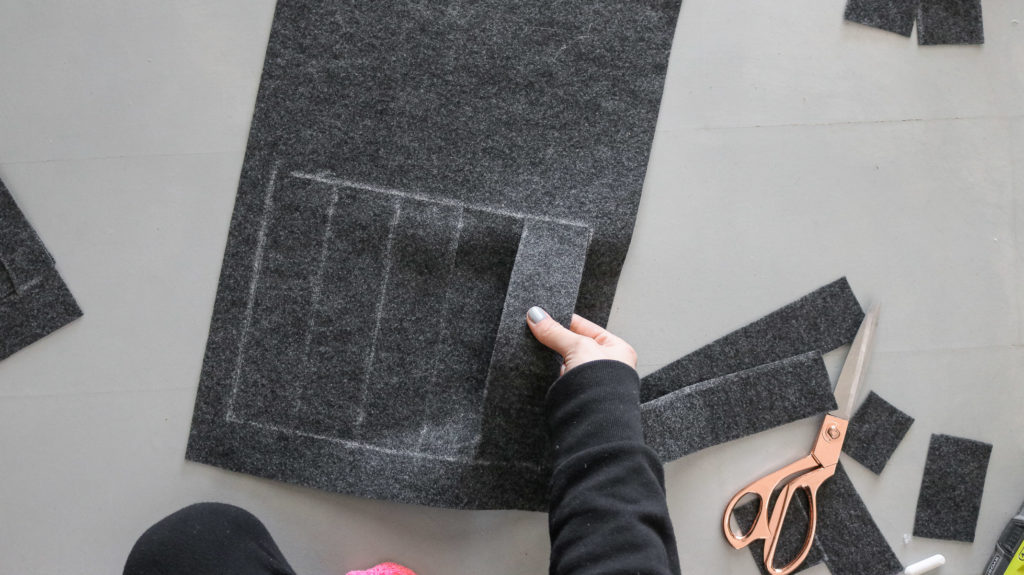
Step 3: How to align your weaving area!
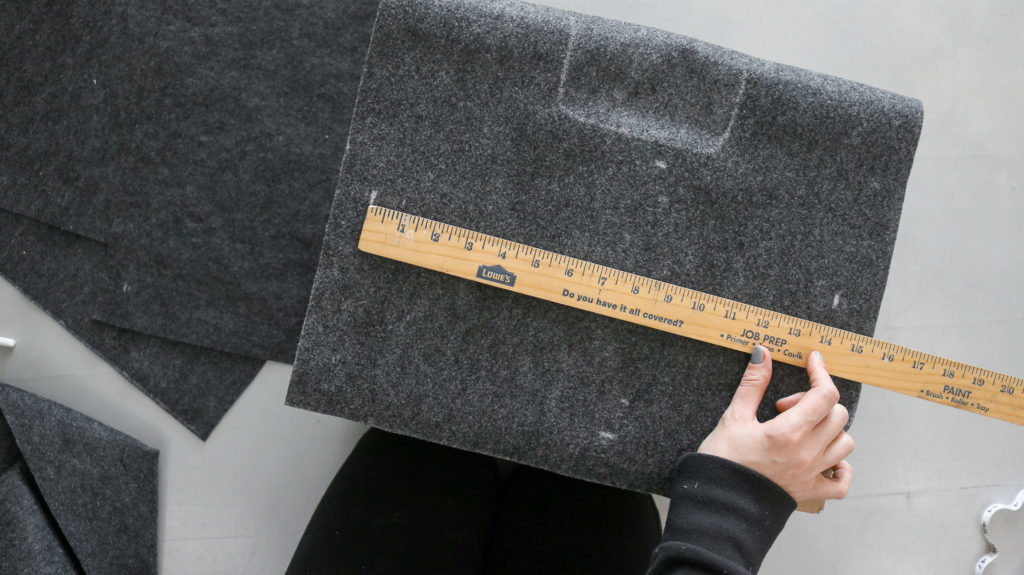
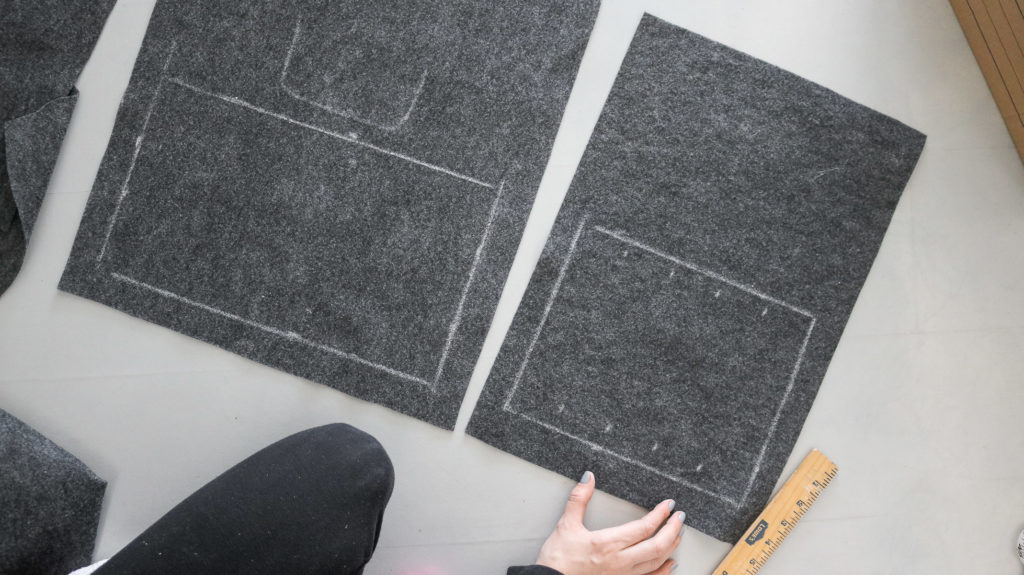
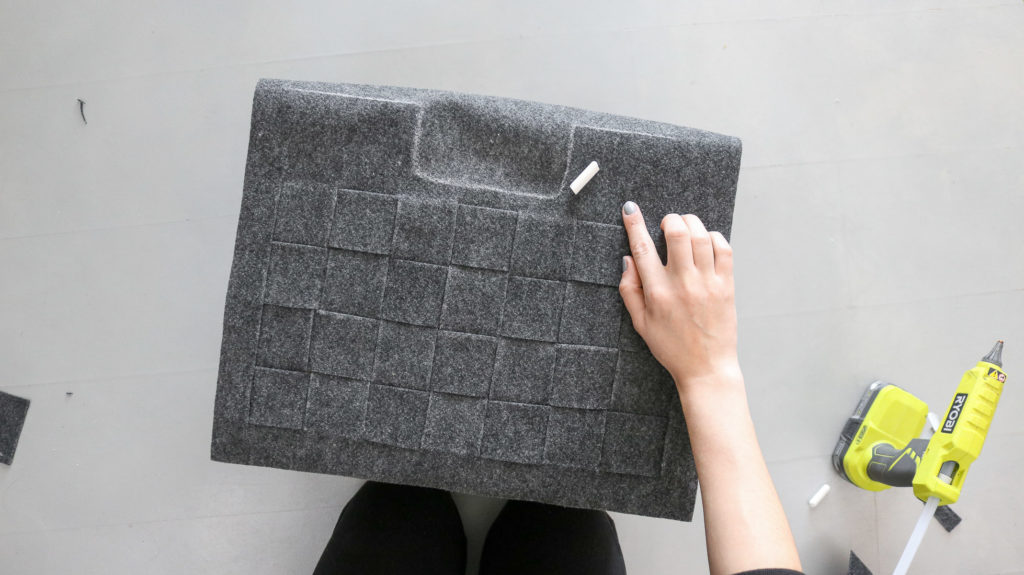
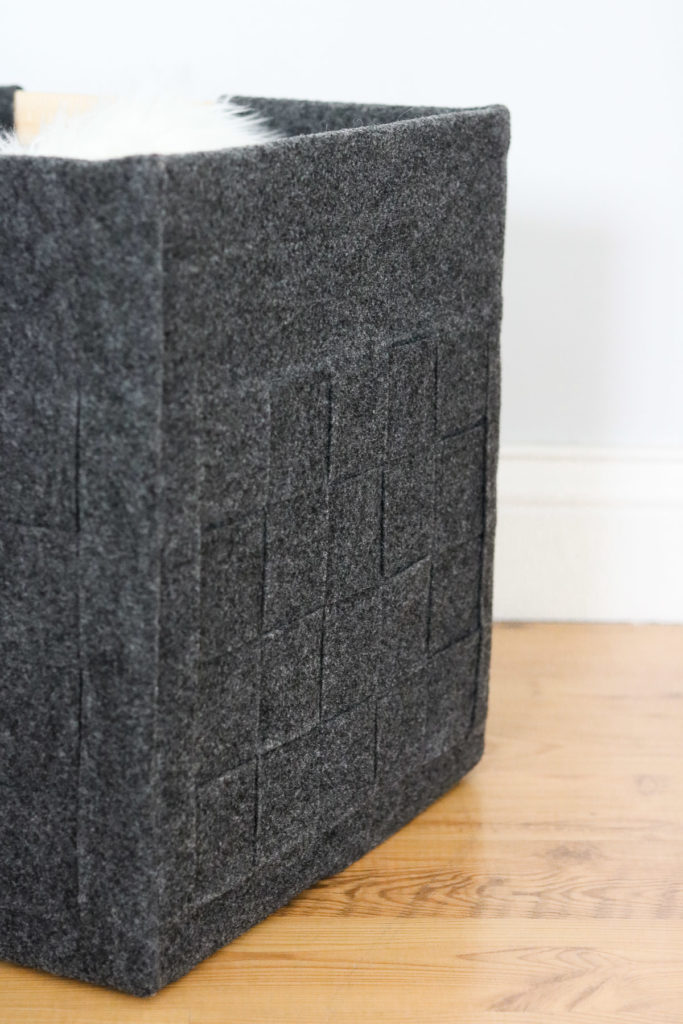
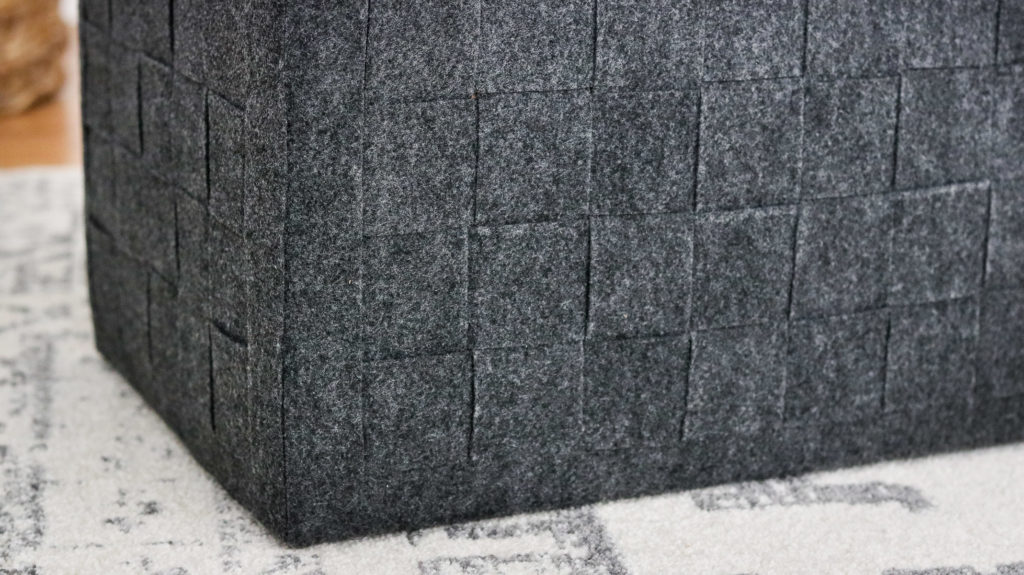
To create an even weave pattern you will need to draw out a rectangular area for the weave. If you’re making handles you’ll need to mark those felt panels first. Keeping in mind your weave pattern doesn’t come to close to the edges as well as your handle. To mark your handles lay your felt on top of your box as if you were to glue it and lightly trace with your chalk around the cut of the handles. It should reveal the shape of your handles and where they’re located. Than mark your rectangular shape making sure both the length and height of your rectangle measure at an even number. ( note the photos below are showing the length of my box which measures 16.5 inches) So my marked rectangle measured at 14″ by 8″ inches. The reason you’ll need even numbers is so you can create even squares with your weave. I made my weave pattern with 2″ squares. If you choose to go with an odd number on one side and an even number on the other side of your rectangle note that your weave pattern might not have even looking squares.
Mark off solid lines for your rectangle.
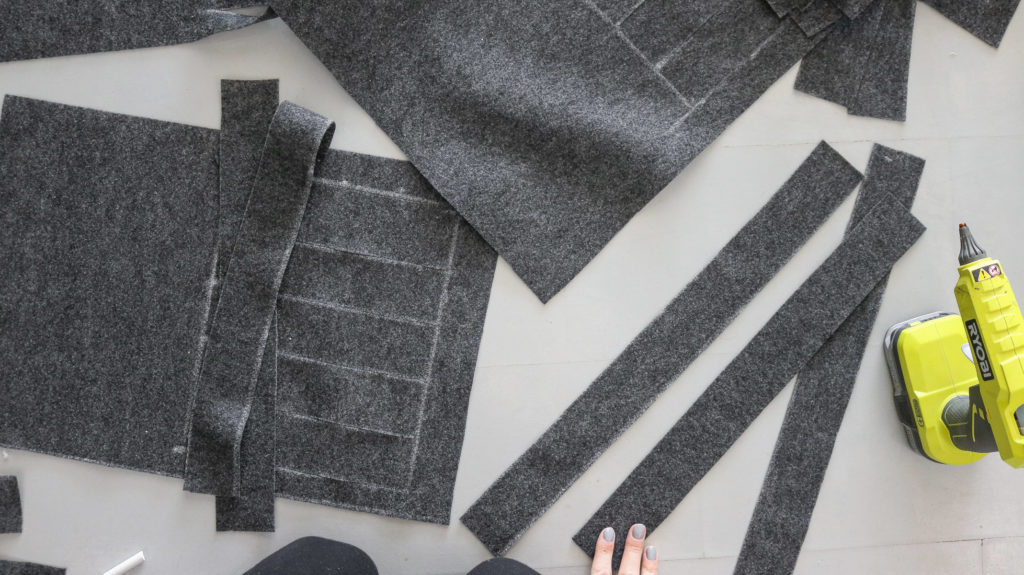
Step 4: Dividing and Weaving!
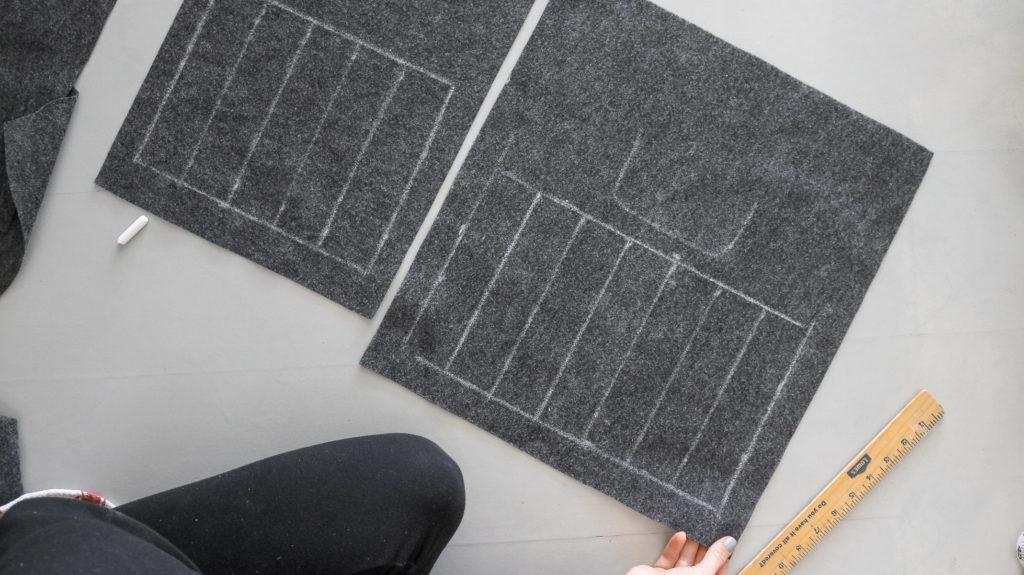
Okay now that you have your panels marked with where you’d like your weave pattern start by dividing your rectangle by 2″ inches and marking it to create vertical lines across your rectangle (photos below). Also make sure your side panels (which might be smaller ) have a marked rectangle that also measures at an even number both height and width. My smaller panels had a rectangle marked 8 inches by 10 inches. Use a ruler to mark vertical lines on your rectangle and use scissors to cut each vertical strip. Do not cut the horizontal line on your rectangle or cut past it when cutting your vertical lines.
Next cut strips measuring 2″ inches in height and long enough to go across each panel. Than start weaving them through the vertical cuts you’ve created in your panels.
To create your weave pattern insert your loose strips and skip every other vertical strip (photo below) 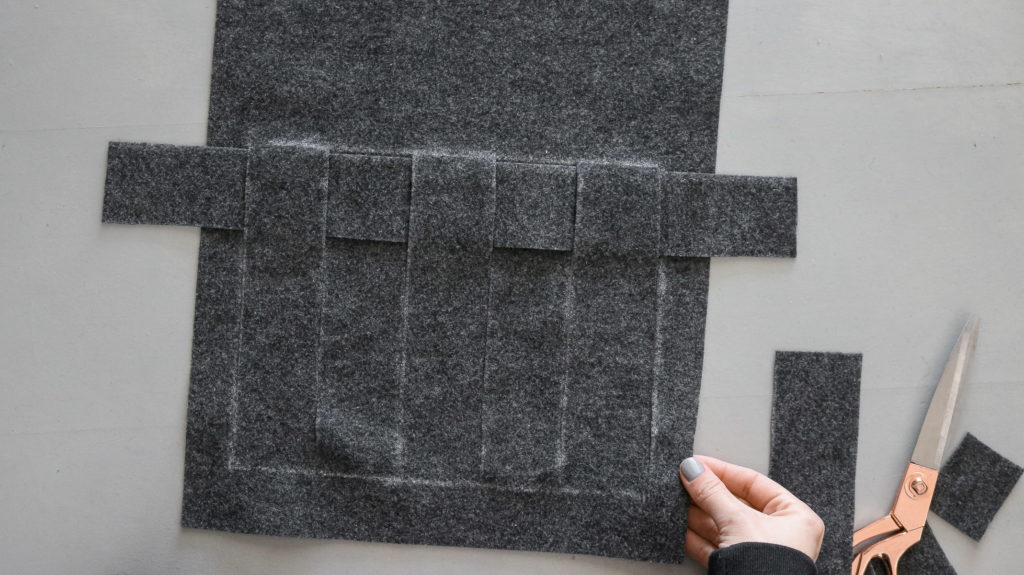
When attaching your second row skip the opposite of what you’ve skip in the row above. ( photo below) For example if you see your loose strip above your vertical cut this time feed your loose strip under your vertical cut. Keep repeating this pattern until you’ve completed weaving the whole panel. 
To finish off your weave feed all your loose strips trough the last vertical cut on the edges of both sides of your panel.

And use some scissors to cut off what’s remaining making sure it’s not visibly sticking out over the panel. 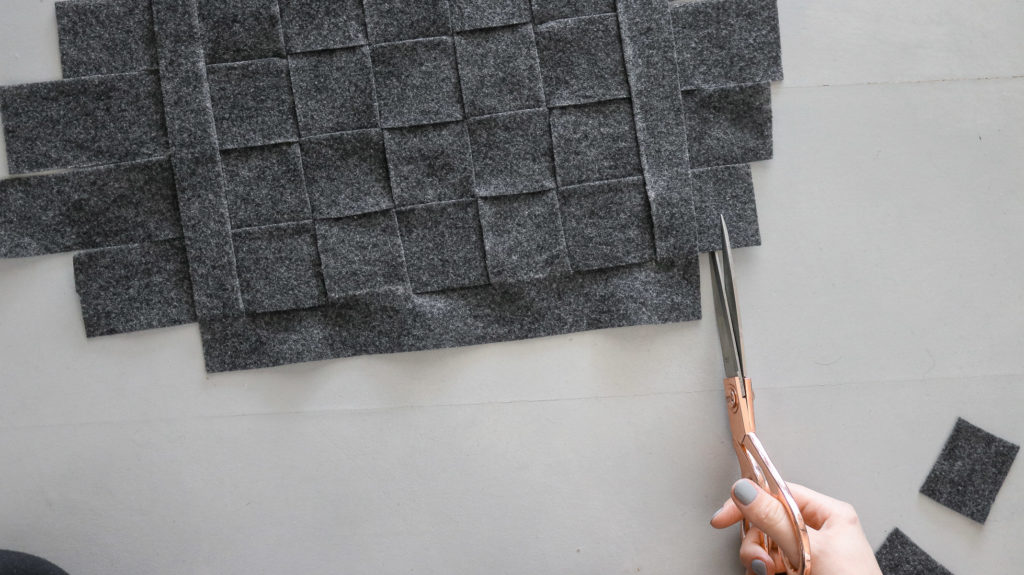
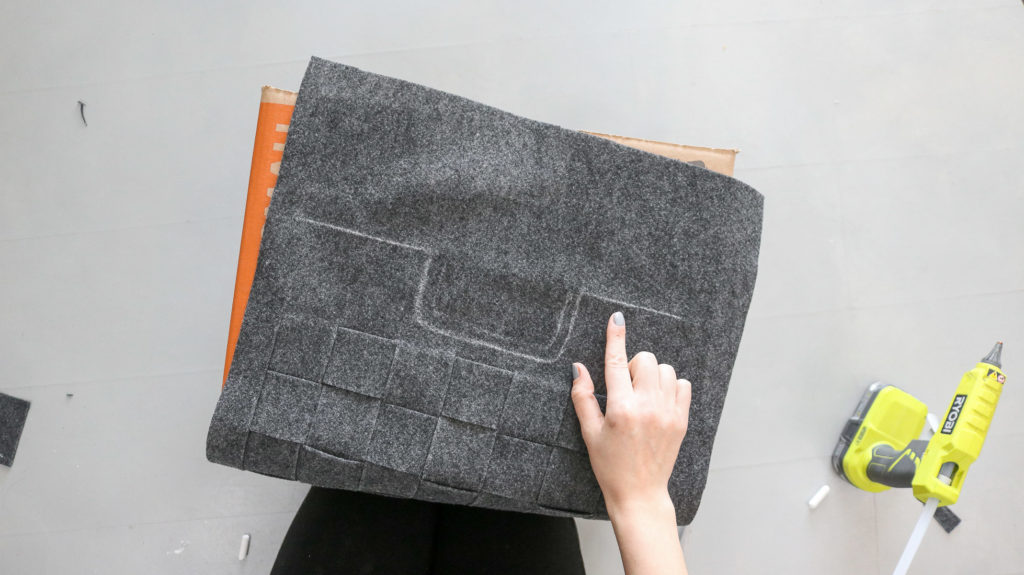
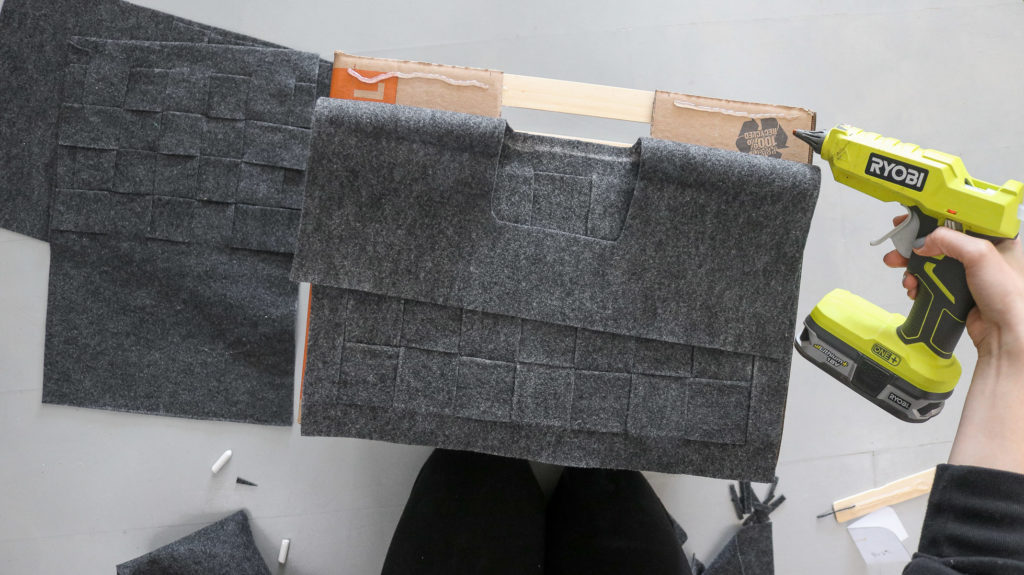
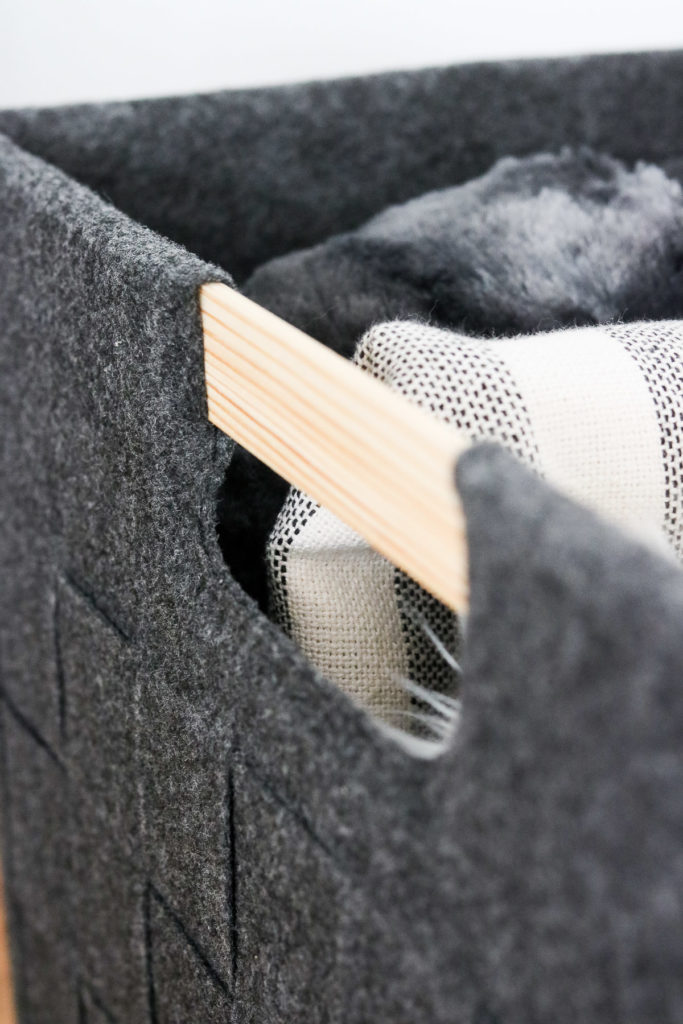
Step 5 : Creating your handles!
To make your handles you’ll need to first cut out your felt. Lay your panel onto your box once again and this time mark where the edges of your box. Than fold your fabric down at the lines you’ve marked and cut out the shape of your handle. Leave about 1/2 inch room for gluing later on.
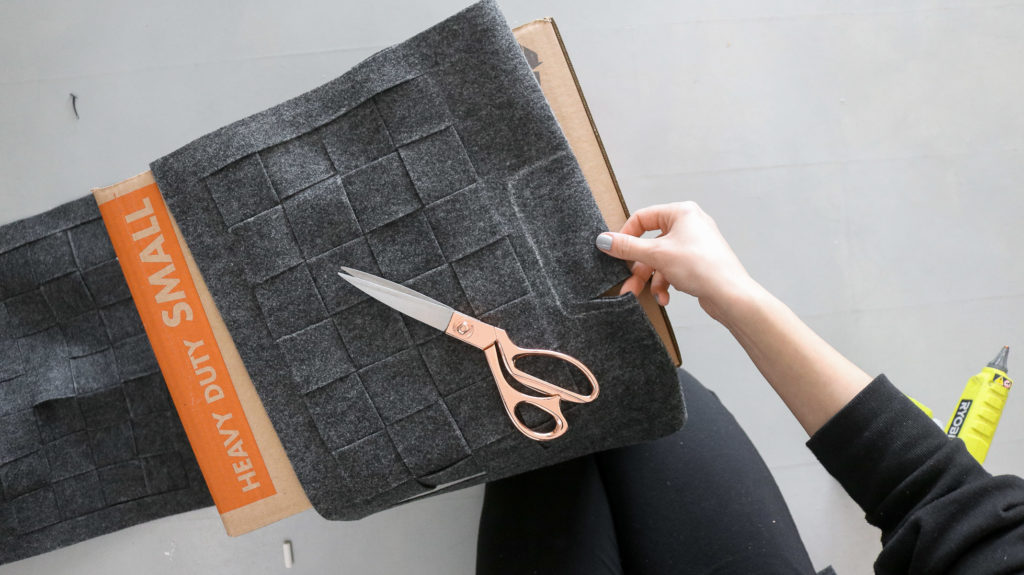
( photo below shows the half inch I left for gluing the felt together)
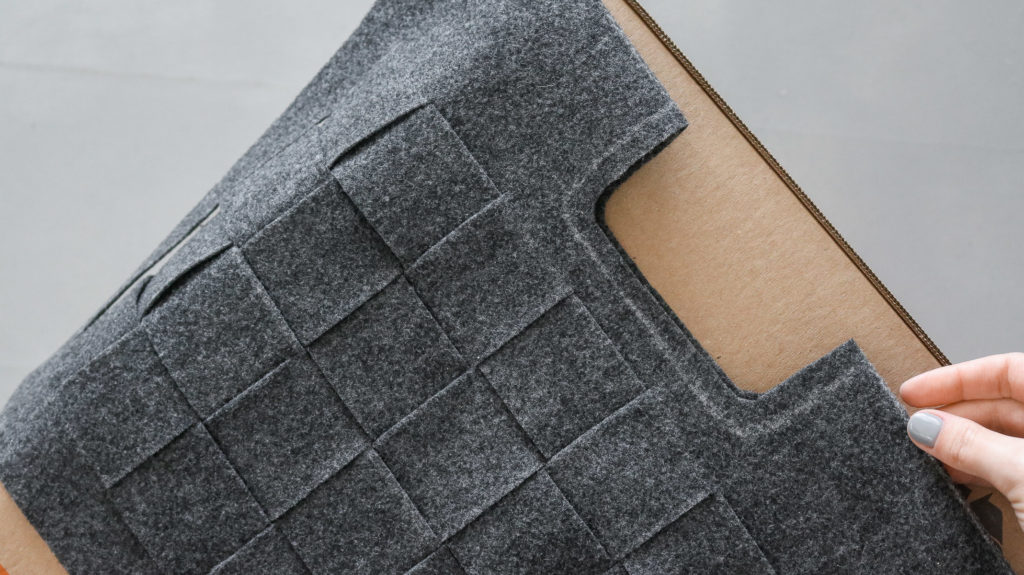
Here’s what the handle hole should look like once you’ve cut it out. 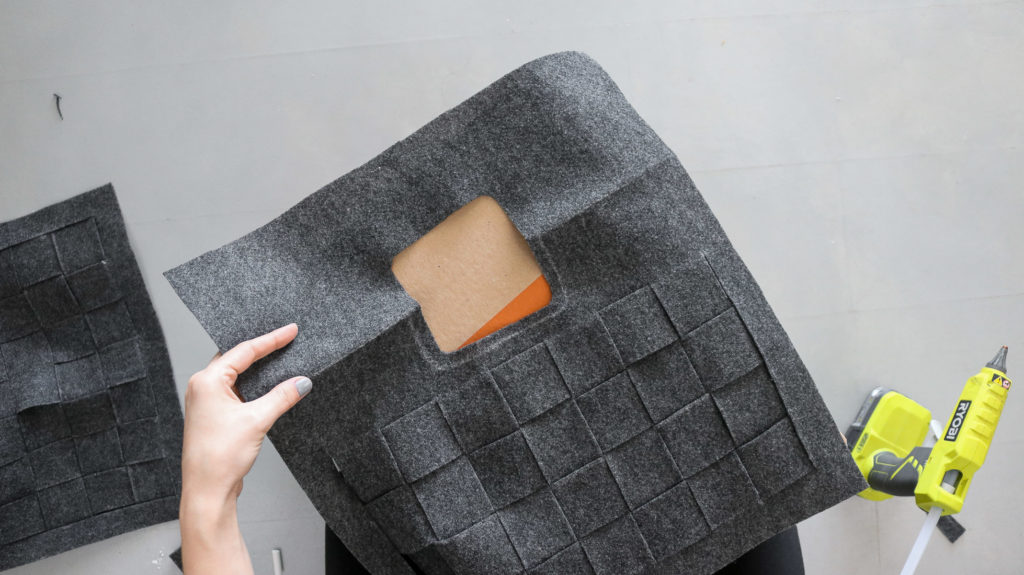
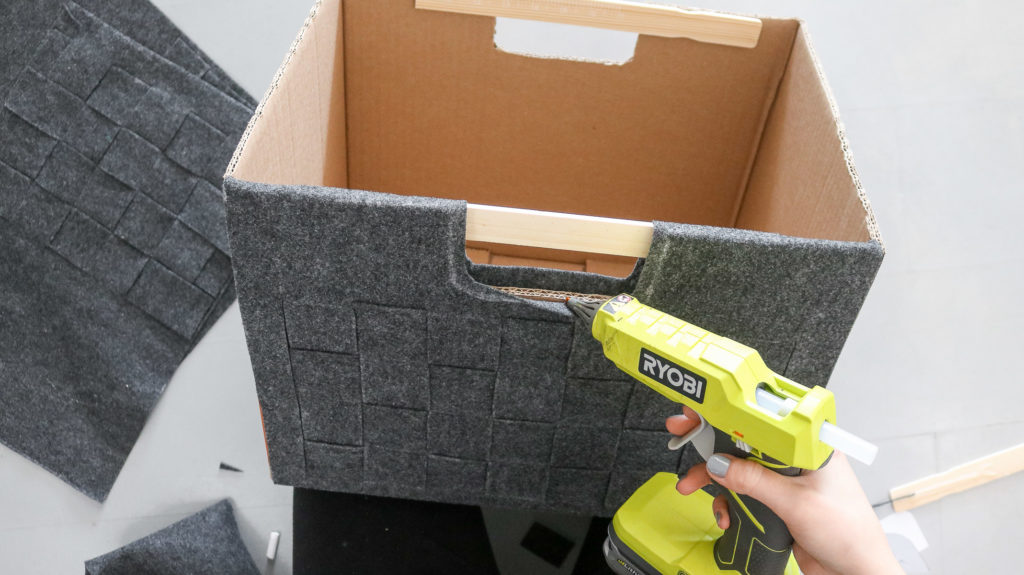
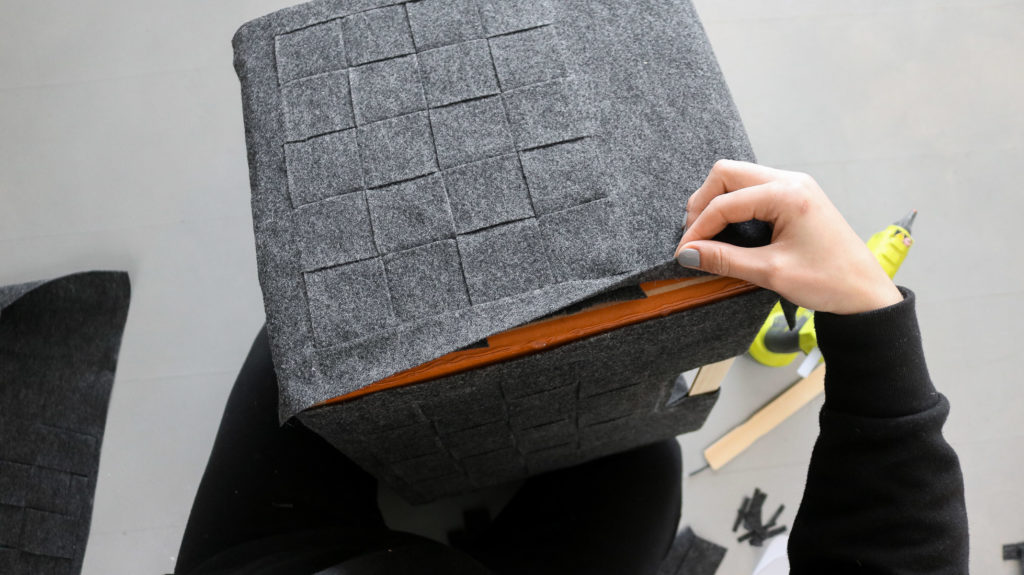
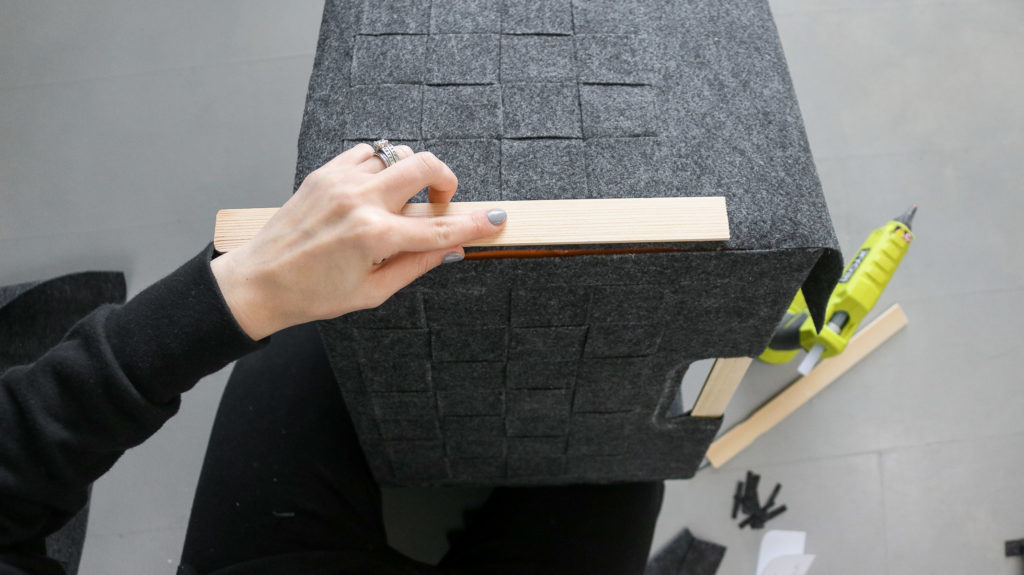
Now glue your paint stirrers on the inside of your box. I used my ryobi glue gun to glue it. It’s definitely more heavy duty then the mini glue guns.
Step 6: Attaching your felt!
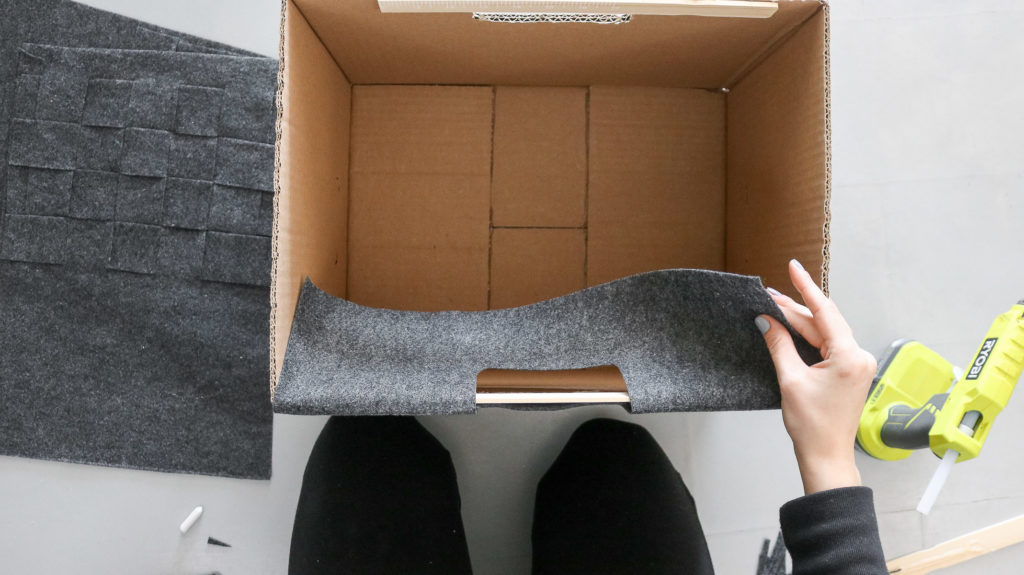
I used hot glue to attach my felt. It’s super easy to work with. I applied some glue at the top of the box by the edges working my way to the bottom of the box. Following that I secured the felt that went inside the box. I also glued the felt together that’s around the handles. Keep attaching your panels until you’ve come to the first panel you attached.
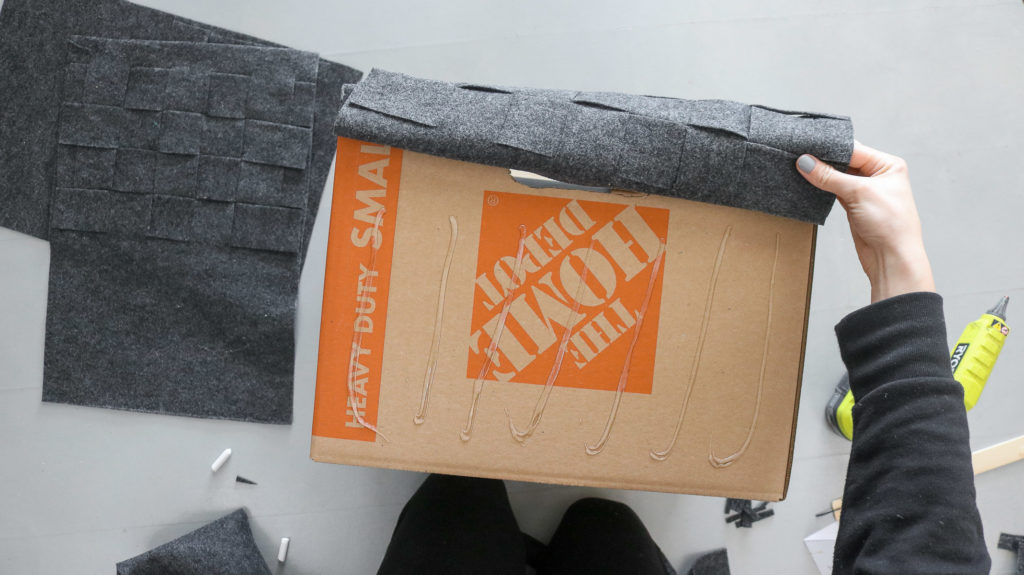

To help me get a cleaner finish on the edges I applied a strip of glue across the edge on the box and used a paint stirrer to help push down the felt. This applied even pressure and helped avoid finger burns 😀 !
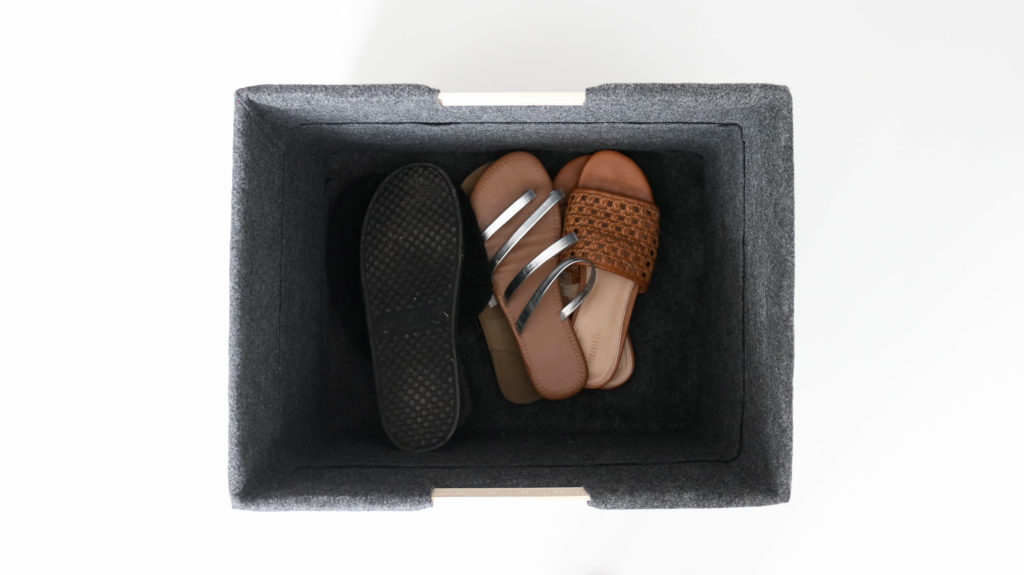
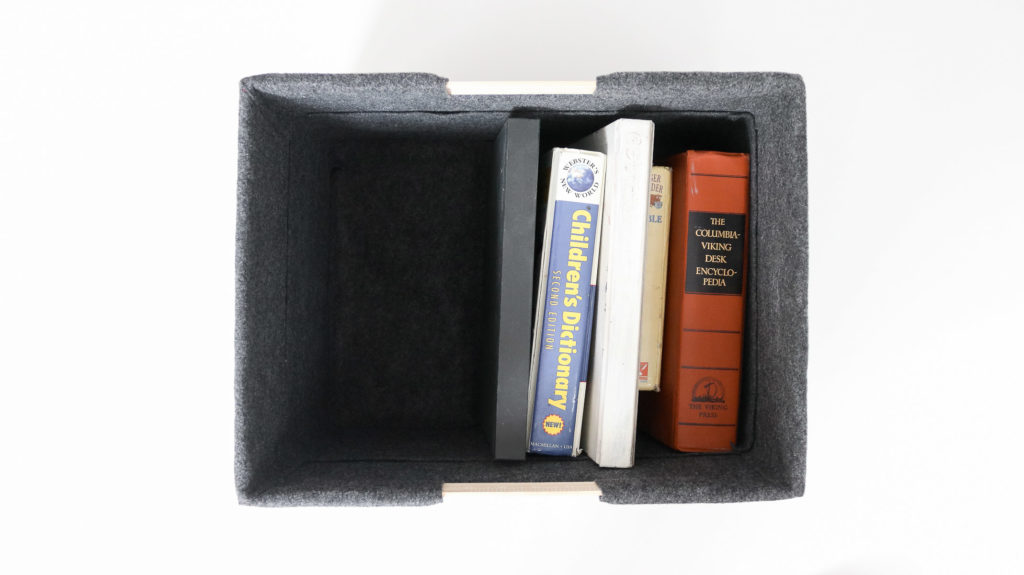
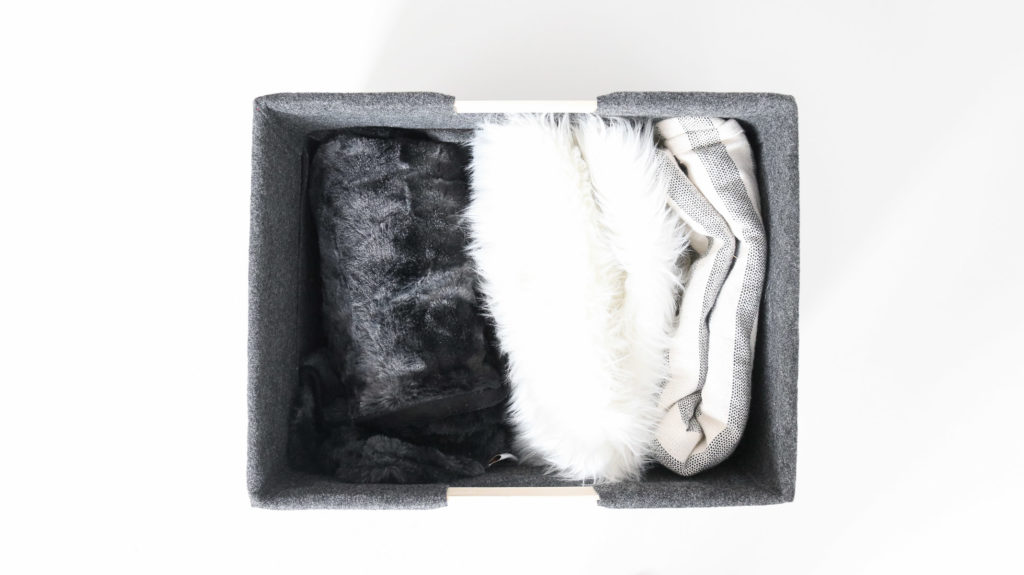
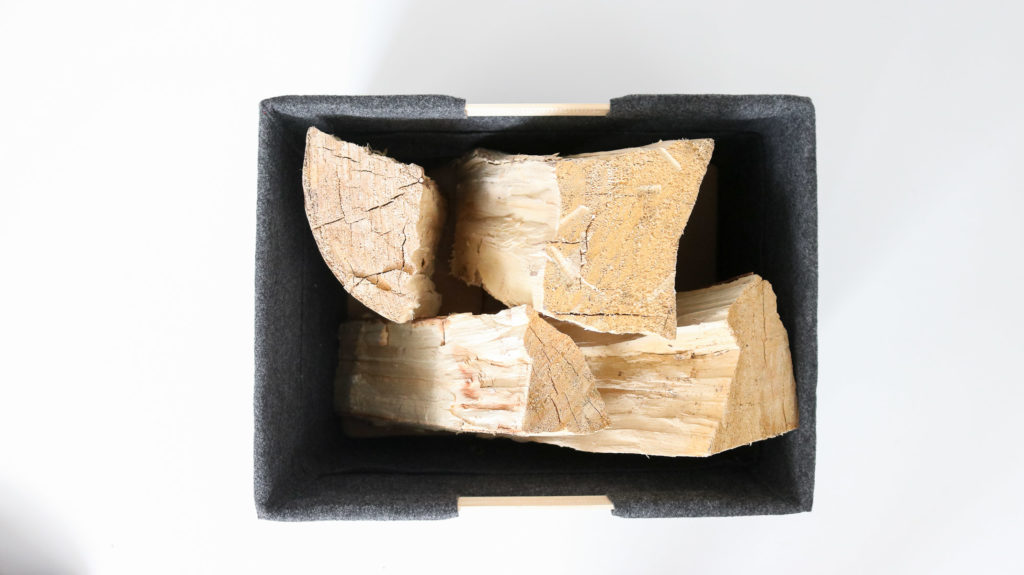
Here’s some ideas for what you can store in your DIY box. Slippers, books, throw blankets and maybe even firewood. I wouldn’t line the inside of the box for firewood though. Felt tents to catch things quick.
I am loving the clean look!! I originally made one without a box as the base thinking the felt was strong enough to hold up on it’s own! BIGGEST Mistake ever! Even with iron on sturdy backing the felt was flopping around making the weave pointless.
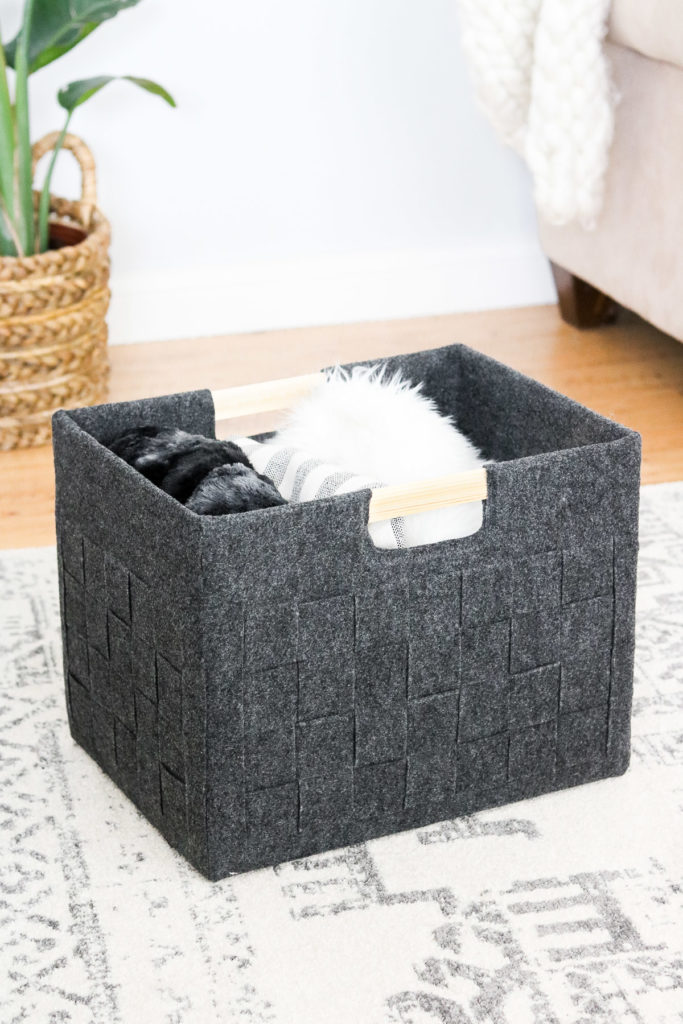
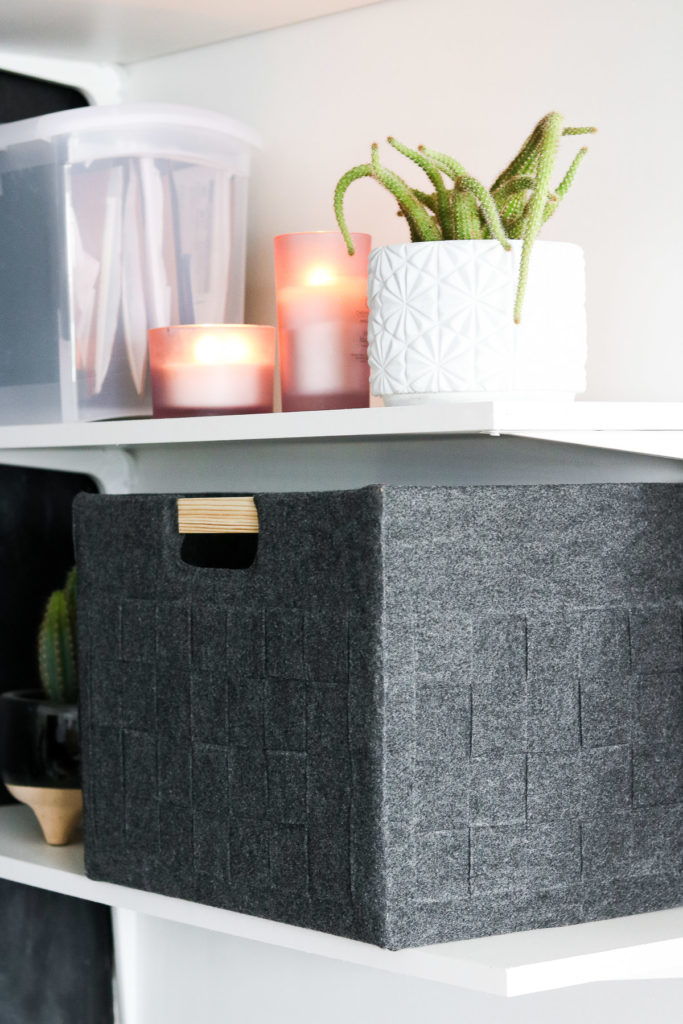
Currently situated in my living room storing all my throw blankets. You know🤔, I actually wanted to use this as my firewood bin but, since I couldn’t find a plastic bin that didn’t taper in I decided to scratch that idea. I don’t think this weave pattern will compliment a tapered box shape. Maybe when an Idea sparks for a plastic bin transformation I’ll have another DIY to share 😉.
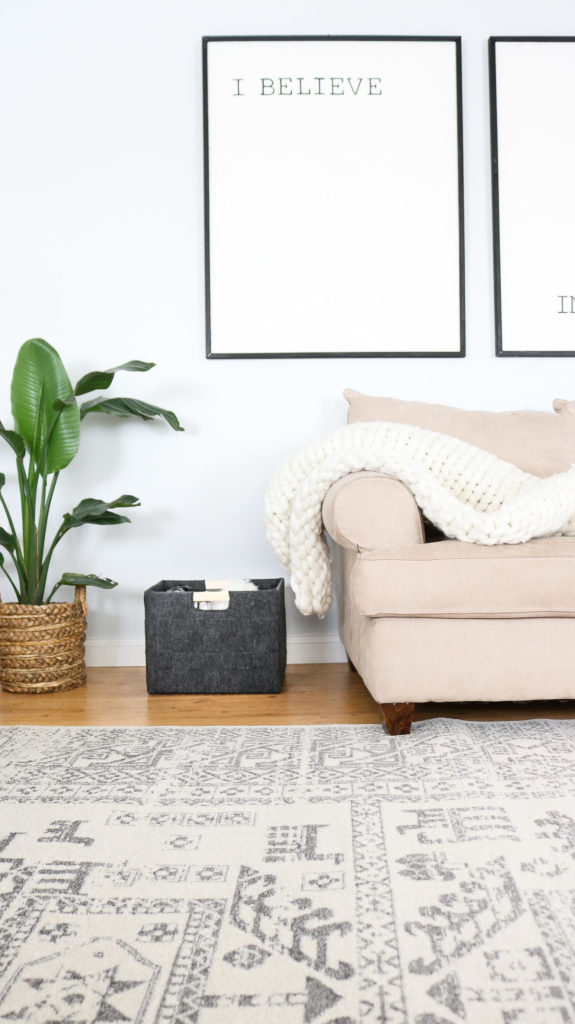
Also looks cute on an open shelve. If you have some this will be perfect for storage organization!
Here’s quick video version!
Okay that’s it! I’ll be sharing my office organization video soon! I hope you enjoy this DIY box and it gives you some great ideas to make your own weave.
Happy Crafting!
Your Friend,
Lily~
Hi lily,how are u and hubby and son doing ?? I love, love, love this little box !!! The weave is what makes it look expensive ! With your over-sized frames and the grey in your beautiful carpet, it just looks so lux !! I’m definitely saving this project for when i get alot more organized…..if ever ! 😆 Thanks for another great idea 😍Take care !
Hi Diena, I am ssso happy to hear from you. How are you and your hubby? We are doing great. The boys have been great helpers with our bedroom remodel. We put up a wall behind the bed today and painted it together. 😀 I am so glad to hear you Loved this box idea. It was an iffy idea to start off with I wasn’t sure about the cardboard box. I thought it might be too cheesy. AWE thank you. The rug belongs in my room but since were not done with the bedroom I have it in my living room. I can’t wait to move it over. 😀 Oh how did your bench hunting go?
I love that box! Looks great! Color is great too.
Thank you Teri! I am so happy to hear that!
Oh gosh it’s so cute I can’t handle it! I’ve covered lots of diaper boxes in fabric before, but never done felt and never done a weave or handles. Somehow you always come up with little details that make your DIY’s look straight store bought. You have inspired me again friend! <3
LOL!! GIRL You’re too sweet! AWWWE thank you so much! You know the handles originally were supposed to be dowels and I was hoping to have the felt stand on it’s own with out the box but since I had to do the box as the base I swapped out for paint stirrers since dowels would be to bulky for the box. In all honestly I’m surprised they look like handles LOL and I’m so happy to hear you loved this idea! 😀 By the way felt is ssso easy to work with. Love that it doesn’t fray like fabric.
Wow,qur ideia incrível e ficou super lindo!
Será que eu poderia usar cola universal ao invés de cola quente? Ficaria com o mesmo acabamento?
I’ve never tried universal glue. I think it will work if the glue comes out sticky and somewhat holds the fabric right away. If it’s wet and runny it probably wouldn’t work. Thank you. I’m so happy to hear you liked it!