Live Edge Mid Century Modern DIY Coffee Table
The least few weeks have been busy making our DIY coffee table! Hi everyone! How have you been?
I know I haven’t been on the blog for a few weeks and that’s because I’ve been tackling a big project!
Let me start off by saying this coffee table DIY was not at all what I expected!! Originally I had planned on this DIY coffee table only taking me 3 days to make. Lies I tell you😂!! This turned out to be a 2 week project! Day in Day out! Measuring, marking, cutting ,sanding , sanding and more sanding! YES I repeated that 3 times 😐!
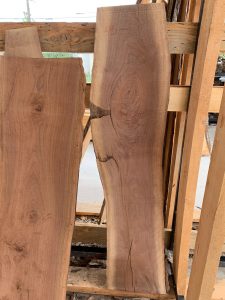
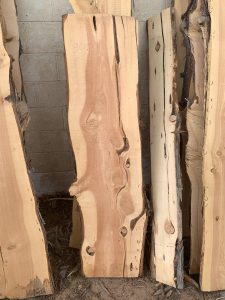
I found our wood slab at a local pawn shop. I know weird I’ve never heard of a pawn shop that sells wood slabs. Their prices were the cheapest I’ve seen anywhere and that’s what pushed me to make the table in the first place. It’s something I’ve had on my DIY list for too long. Since it’s summertime and a lot of the work would need to be done outside I figured I should get it done and check it of the list! There were a few slabs that really stood out to me but, in the end I picked the one the had the most subtle wood grain.
-
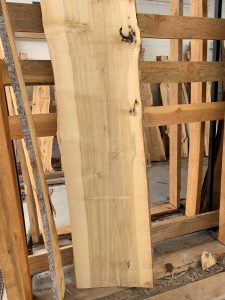
- This was the winner! This wood is called poplar.
WHY WE PICKED WOOD LEGS OVER METAL!
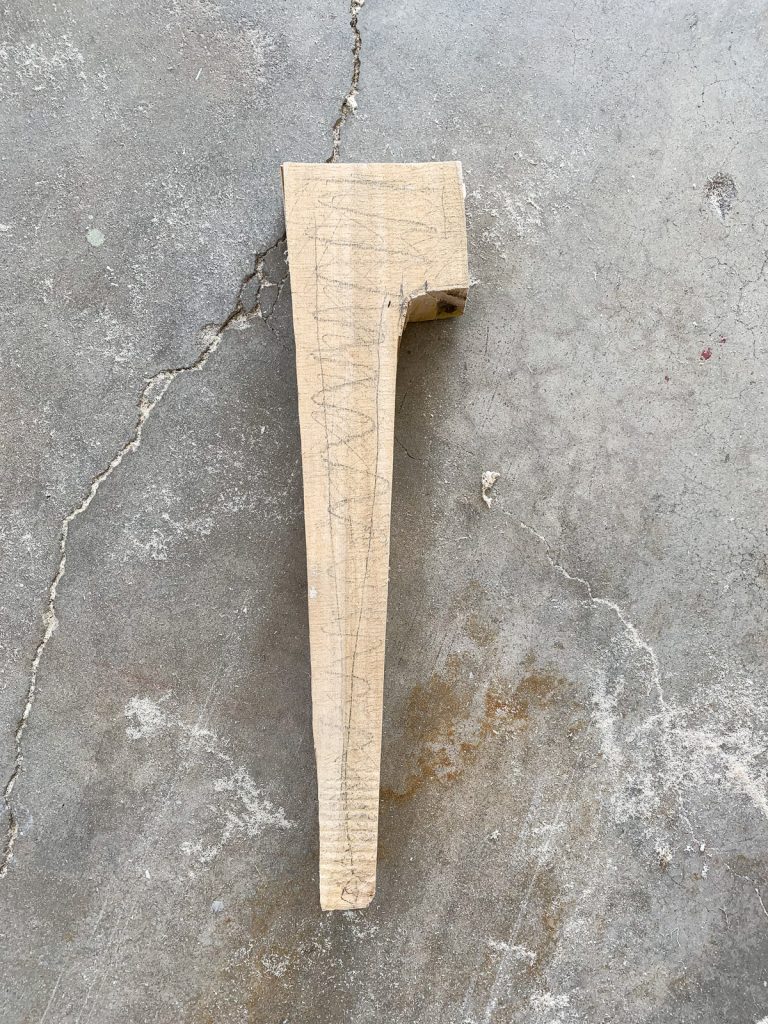
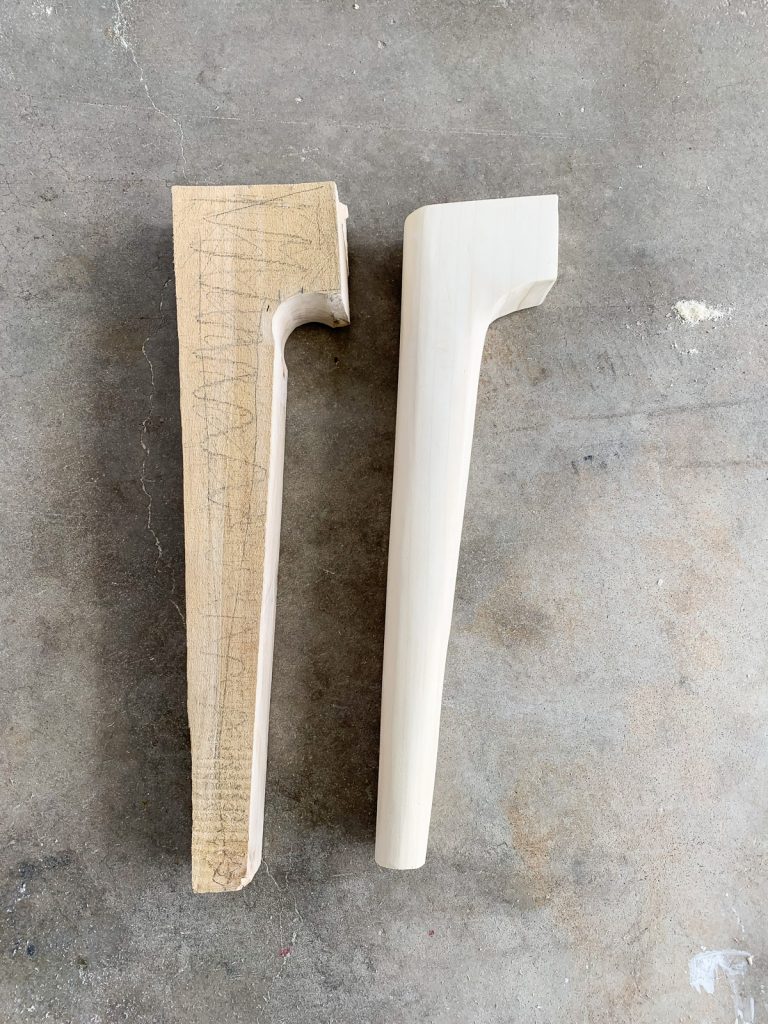
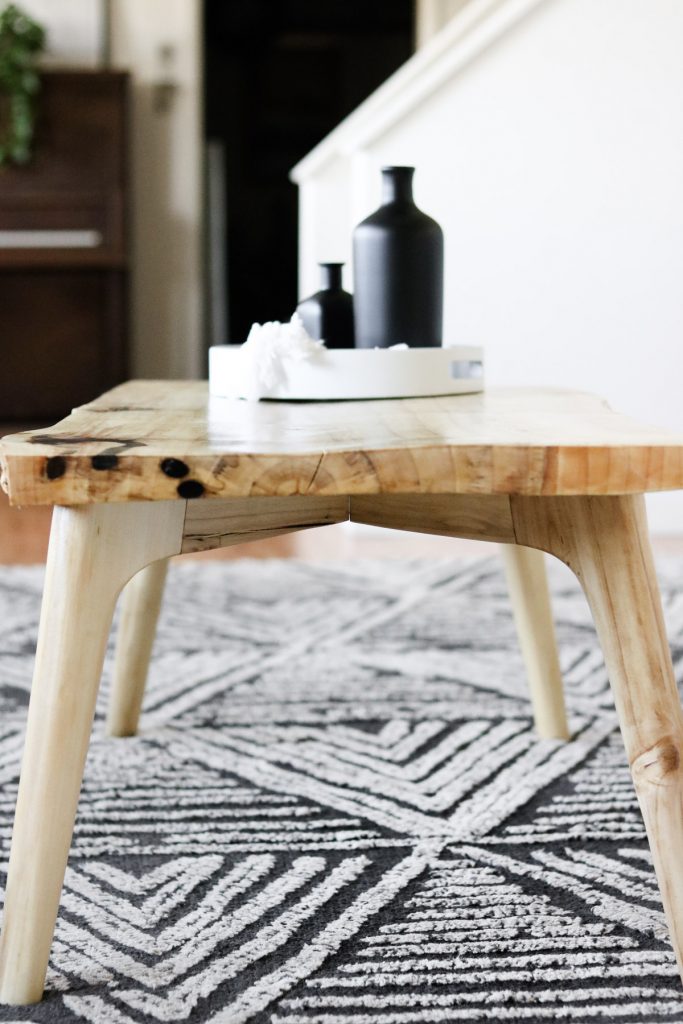
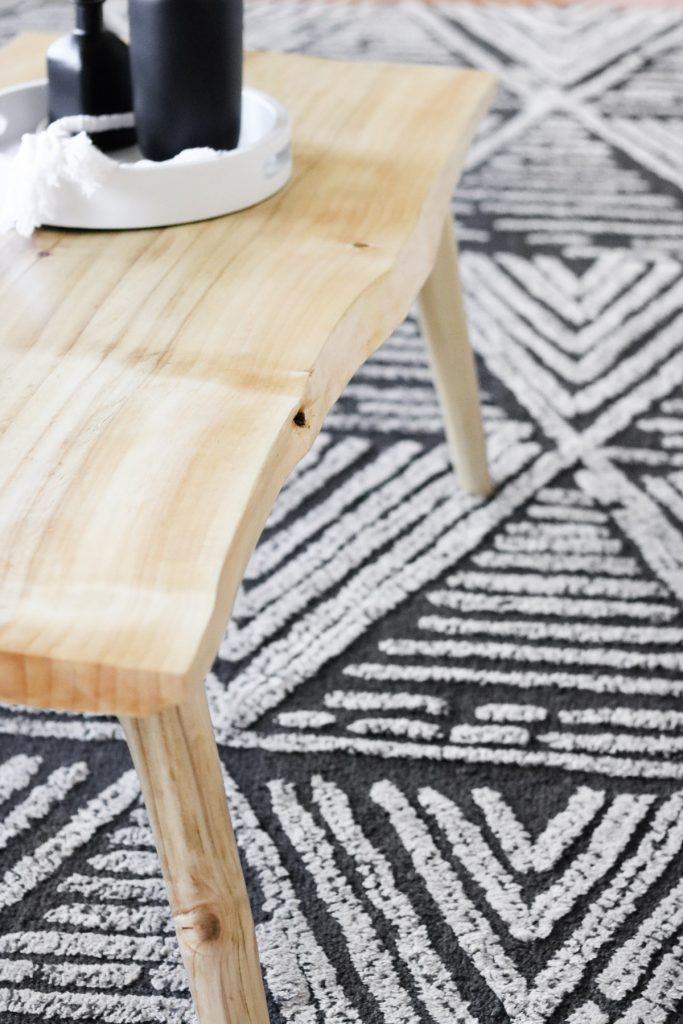
Before starting on this DIY coffee table I had planned to buy or get metal legs made. However, after doing a quick instagram pole a whopping 75% of you 😬 picked wooden legs. (ps. I voted for wooden legs too). I’m so glad we ended up making them! It’s one of my favorite things about the table! I love the mid century modern vibes the legs give off! Also look at that wood grain on the leg!! So pretty! I was worried the knots would make it hard to work with but, I didn’t have issues at all. ( photo below shows table leg)
If you plan on buying legs to simply attach to your slab that’ll save you a lot of time. You could probably even get it done over the weekend.

Time Needed
The ugly truth is you’ll need A LOT of time to make a table like this! It’s sssso worth it though! I wish I would have clocked in each time to keep track of how many hours this took me exactly but if I could say approximately I would say I spent at least a minimum of 40 hours to complete this table. Keep in mind this is our first time making something like this so I’m sure that added on a bunch of time.
Total Cost
This table cost me a little over $100. I know the wood slab was only $42 and to be honest I didn’t plan to spend anymore than about $60 on it but, things add up quick. By the time I knew it I was at around $118 total cost. I’m sure my pickiness with the finishes had a lot to do with the cost 😑. I could have totally used what I had at home but, figured if I’m going to spend that much time custom making this table might as well go big or go home with the finishing products. I talk more about the products later but, just a heads up… Me going out of my way with fancy oils wasn’t worth it 😩 !
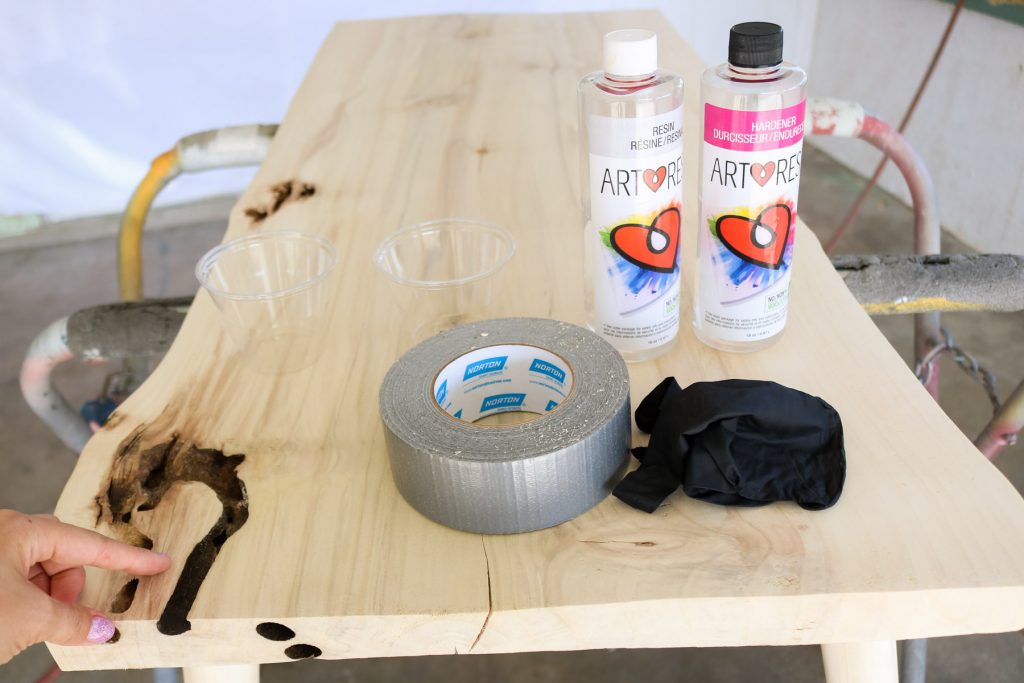
Supplies We used
- 230 grit sandpaper (also used some 80 grit for the table top after planing it)
- kreg jig
- screws
- wood glue
- danish oil
- clear wood finish
- wooster brush
Tools We used
- Miter Saw
- Circular Saw
- Drill + Impact Drill
- Sawzall
- Angle Grinder + Flap Sander Wheel
- DA Sander
Cutting the Wood Slab for the DIY Coffee Table!
Okay before I jump into this DIY I made a very descriptive video to show our process because, I know photos can’t always show everything with projects this big. ( You can watch the video here )
#ColdFeet
Can I just start off by saying this wood slab actually sat around for a week before I got around to cutting it! I’d love to blame it on my hubby HAHA😅 but, truth be told I was super scared to start this project! I knew the slab had a big obvious crack on one end and I had planned to use the other end anyway however after bringing it home I realized it was WAYYYY 😩 more bowed than I had thought it was. To say the least I wussied out for week and let the bent truth settle 😂 in a little before tackling the DIY!
After thinking about it hard all week I finally figured I’d give it a go and had nothing to loose except the $42 I had already spend on it and wasn’t getting back😆.
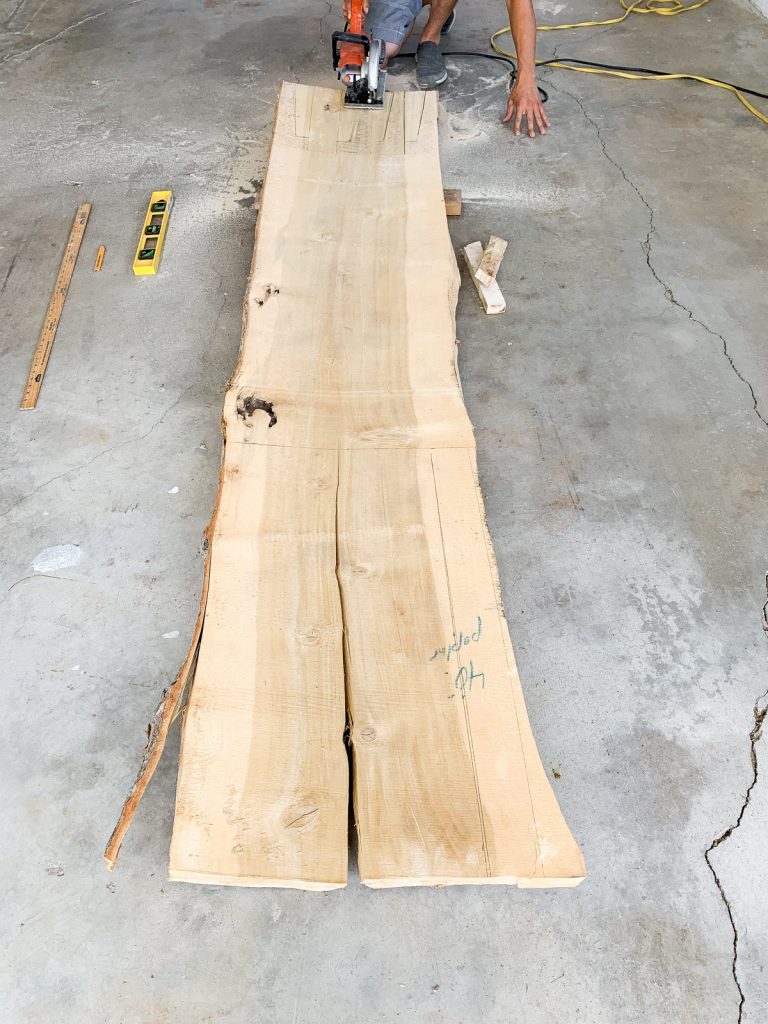
First Things first!
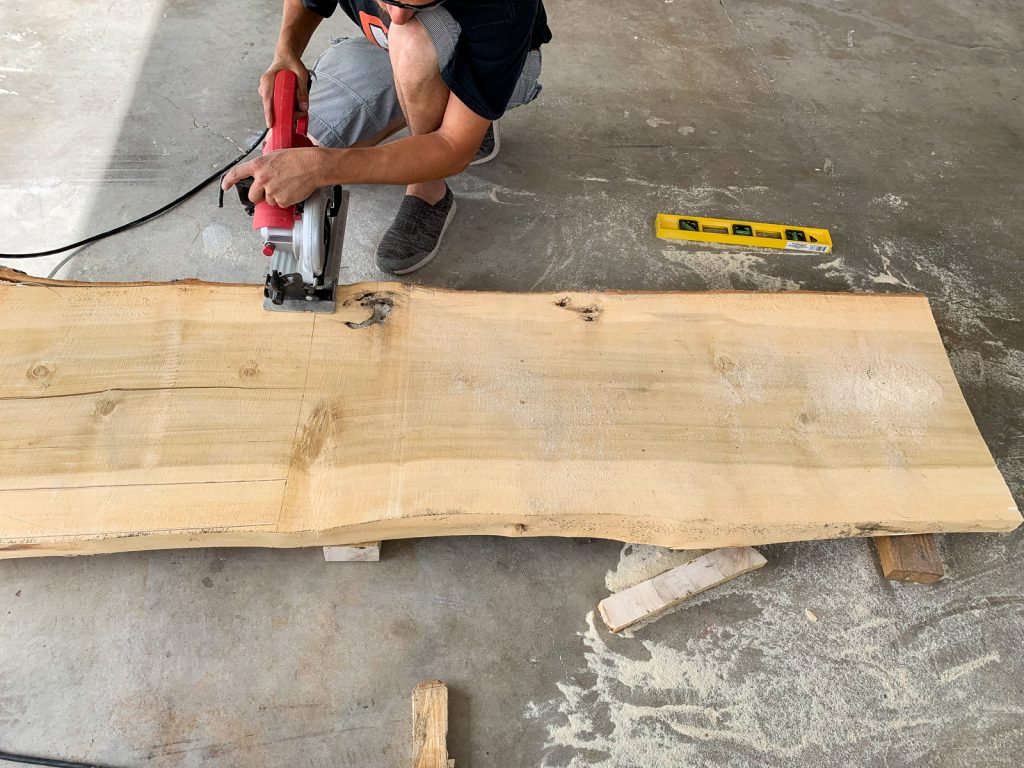
Before we cut the table top we decided to cut out as much of the legs as possible while it was still one whole slab. Photo below shows the marked legs and how Tony cut each leg in with the circular saw. I can’t imagine him making nice cuts if he would of pre-cut out each leg and than tried making the angled cuts. If you’re wondering how I drafted each leg I talk about it in detail in the video.
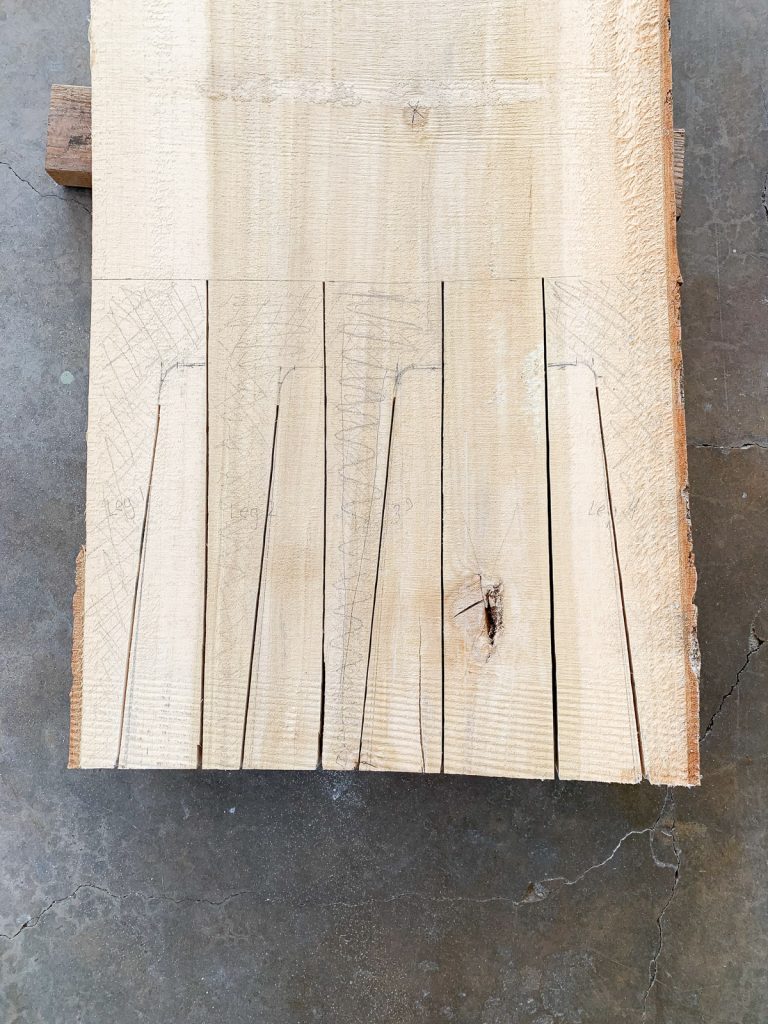
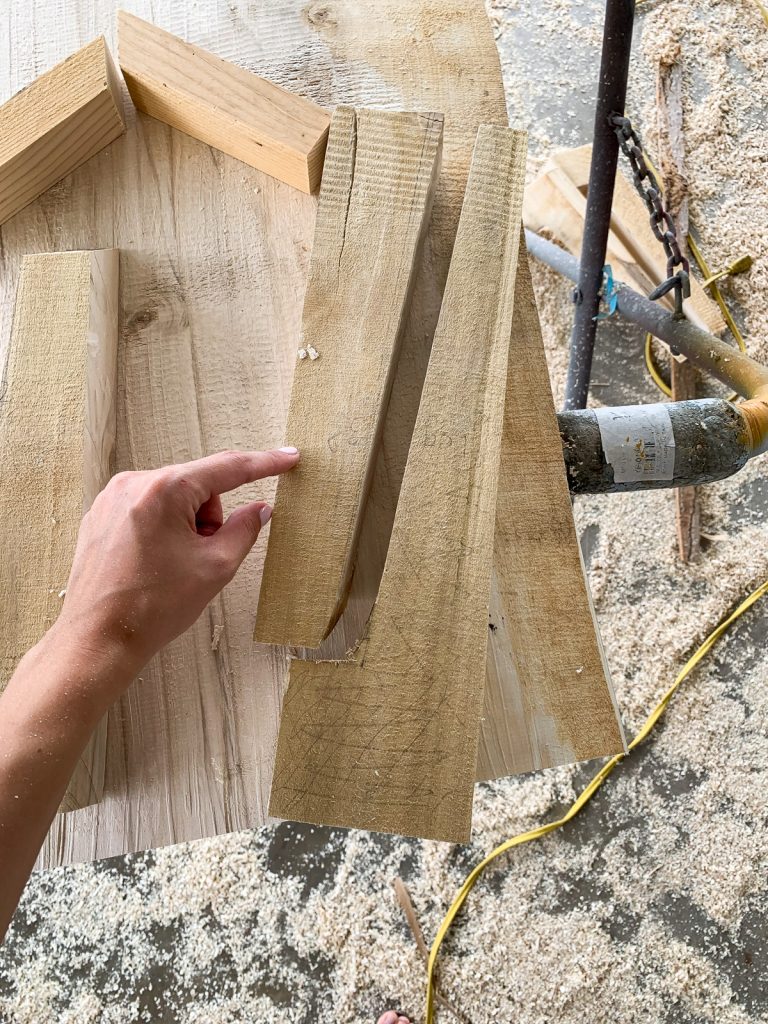
Than he cut all the legs into pieces and we were left with long blocks of wood. ( photo below)
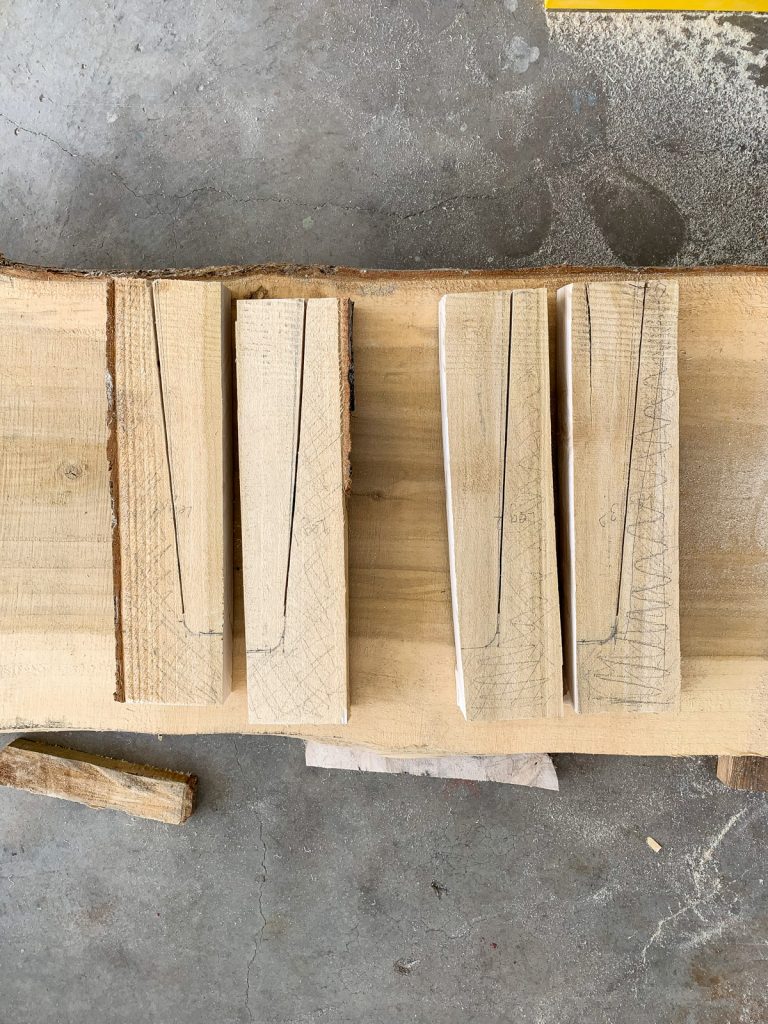
Next he used our sawzall to cut the remaining rounded areas of the legs. 🙈 Not the most professional way of doing it but, it’s we had and it worked! One day I dream of getting a jig saw for reasons like this! 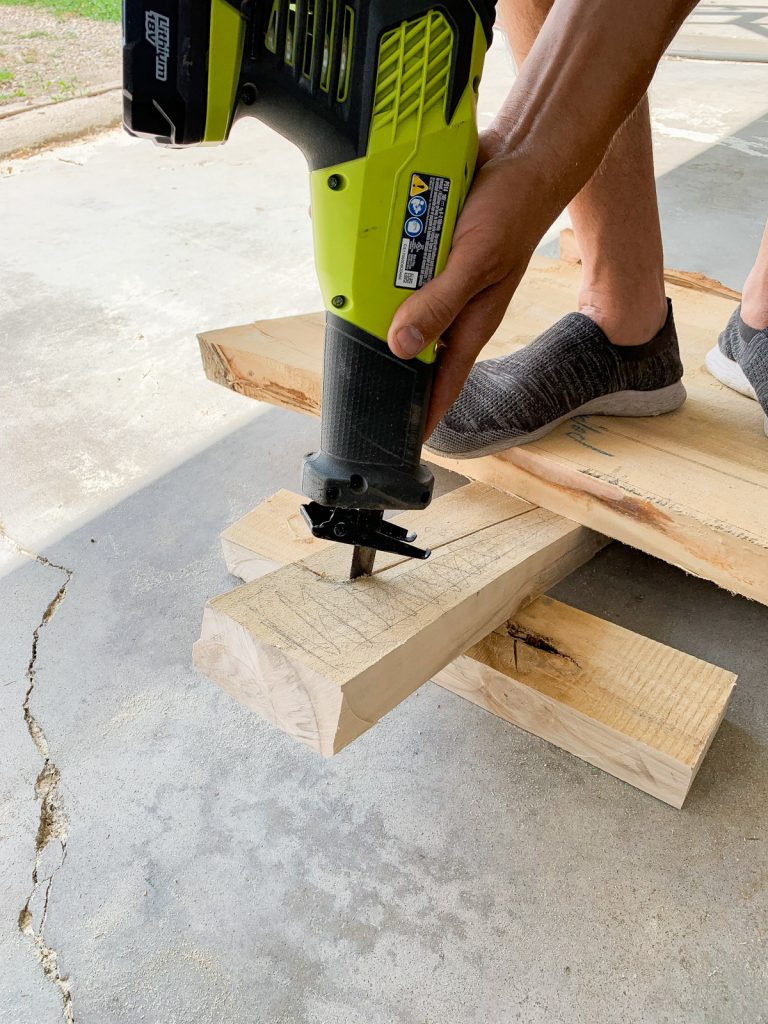
We were left with 4 legs that looked very very rough! I wasn’t freaking out about it though because, I knew I’d be doing A TON of sanding to smooth them out! I just needed the approximate shape and size.
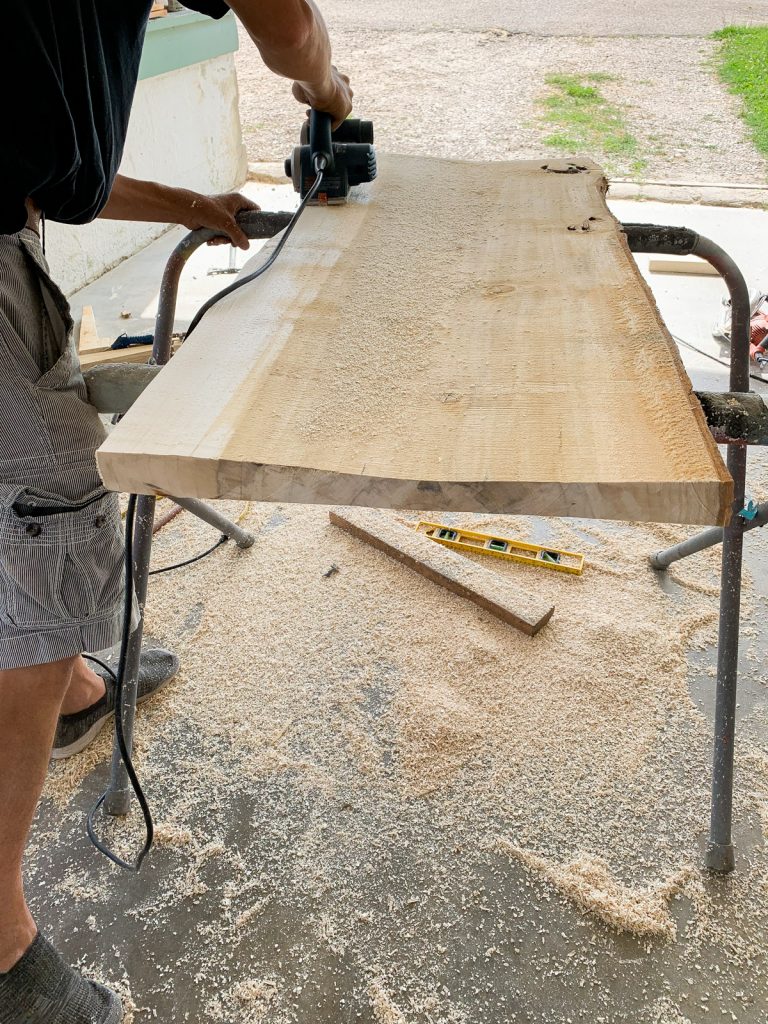
And finally he cut the bad end off to make the coffee table top.
How I shaped the Legs for the DIY Coffee Table!
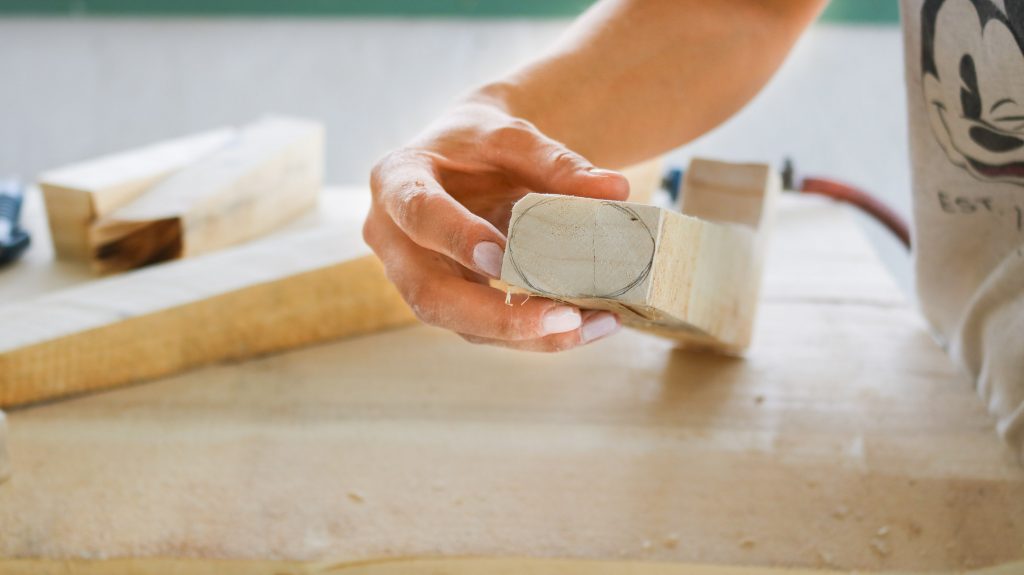
Okay now that all our pieces were cut I was ready to start defining the look a bit more. I had this idea of rounding off as much of the edges as possible.
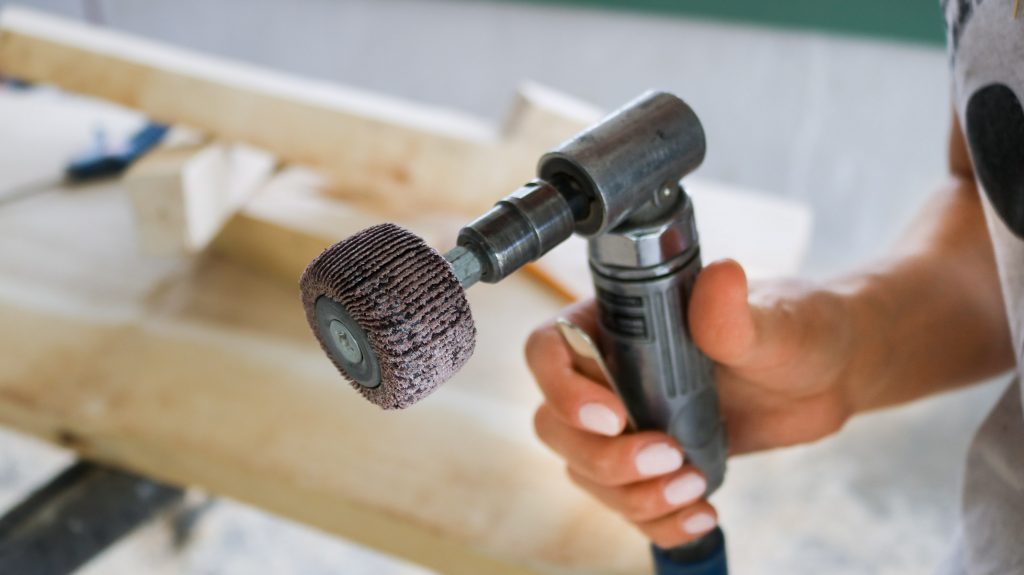
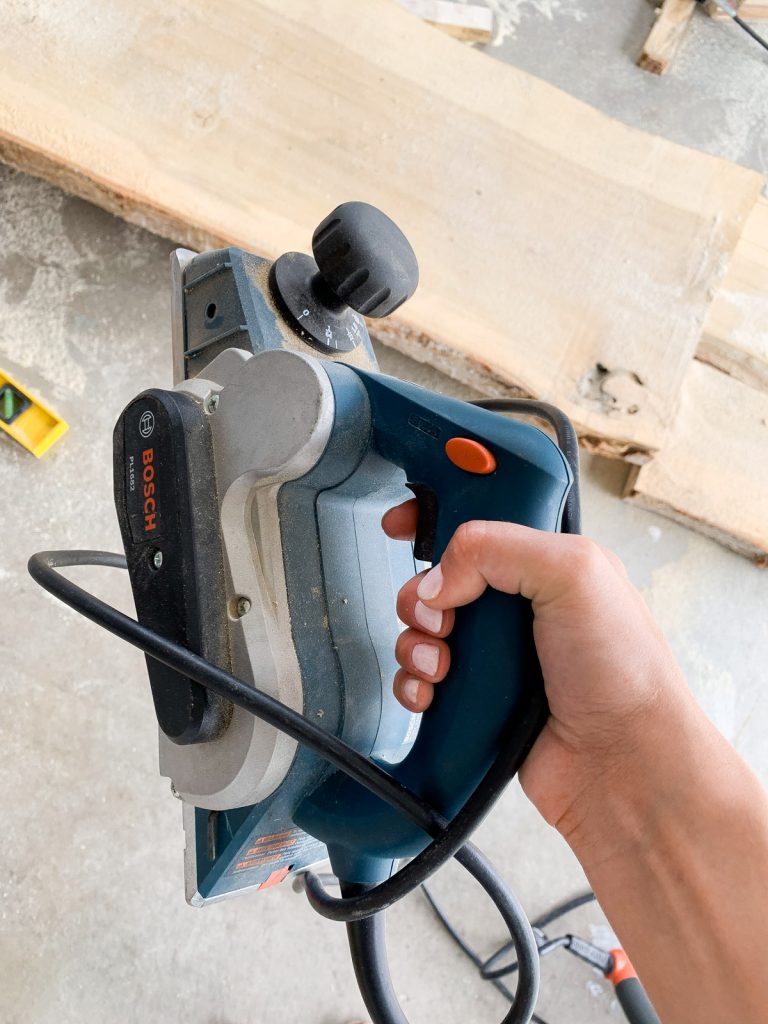
I used this tool called a flap sander wheel that was attached to an angle grinder. This helped me round off the corners for the legs. This tool is amazing!
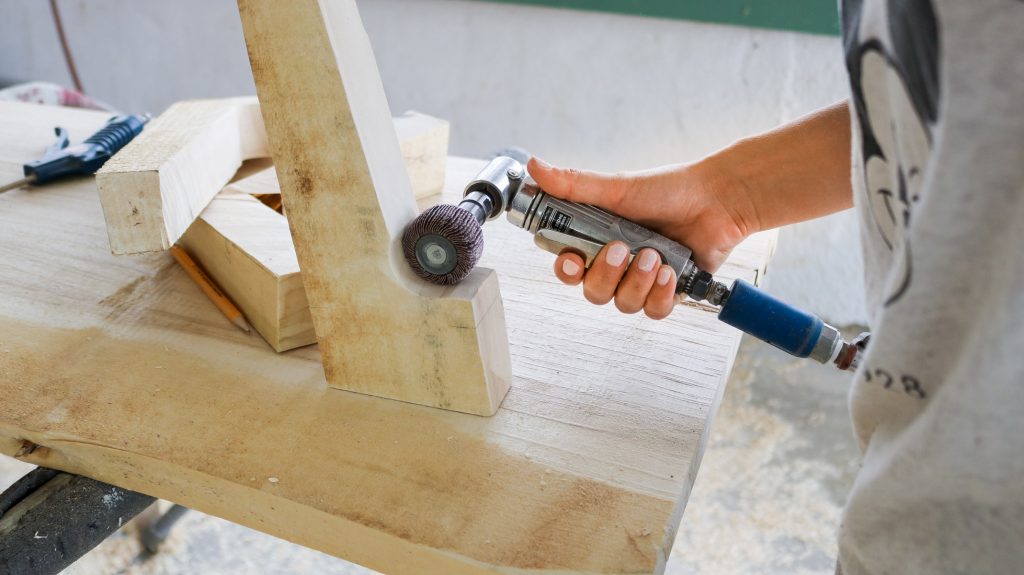
To shape out the rest of the legs I used my angle grinder with some rough sand paper. This process was a lot quicker than I expected!! I seriously love this tool! Before rounding off the sides of the legs I marked how rounded I would like them at the very bottom this helped keep each leg uniform.
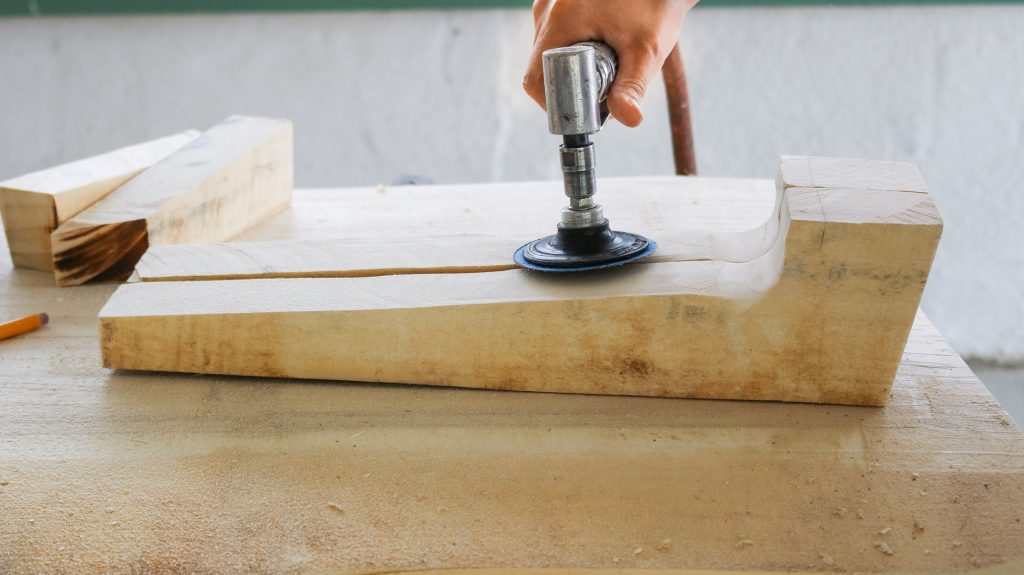
Since the angle grinder had rough sand paper it left behind a pretty rough texture. So I used some 230 grit sandpaper and my dual action sander to help smooth it out. It helped a lot if I turned the leg slightly while sanding to keep the rounded edges.
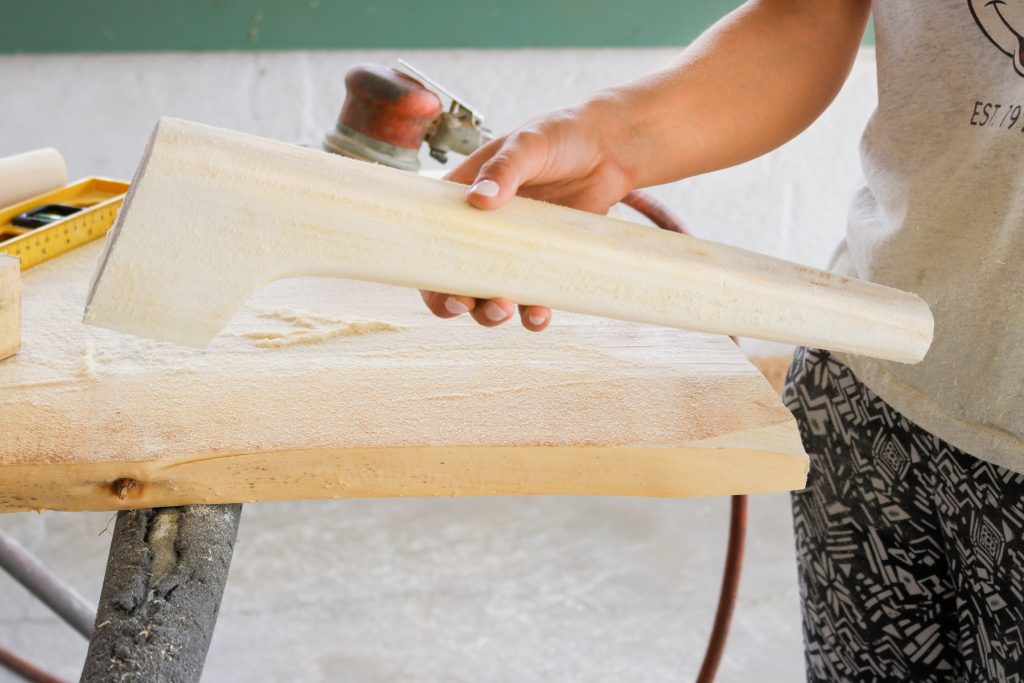
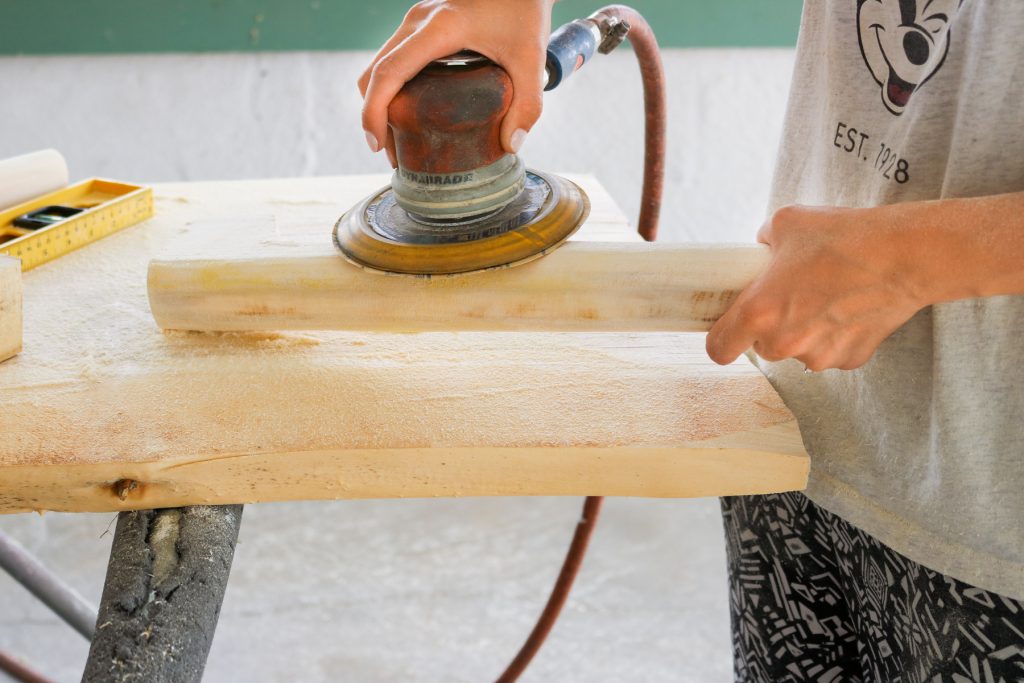
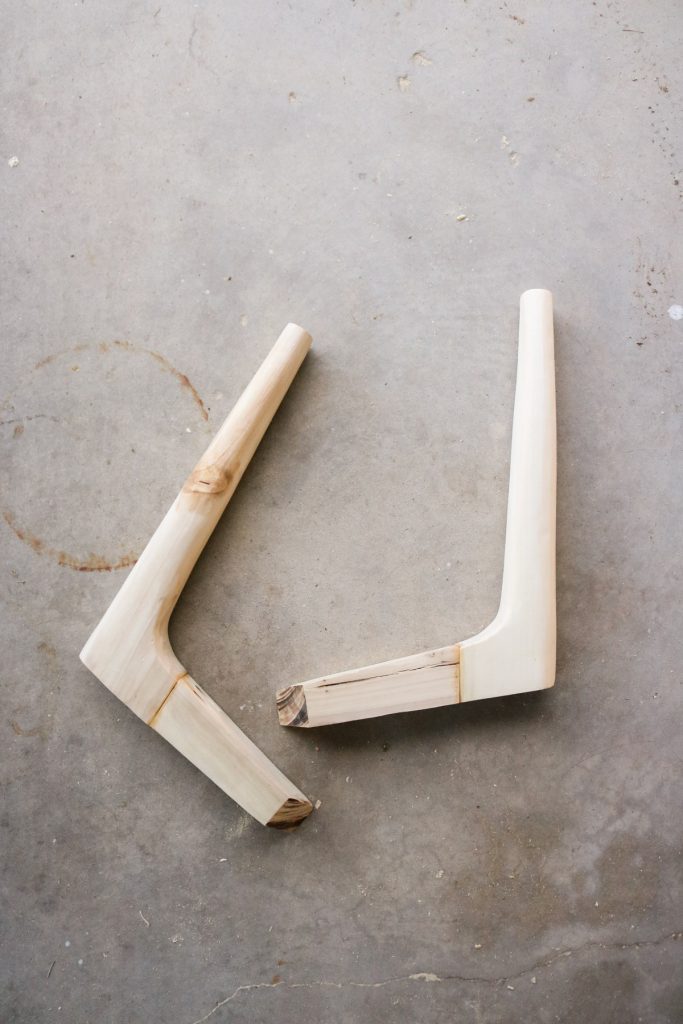
Here’s an example of how the legs looked before and after shaping and sanding! I was so impressed with the completed look. Honestly wasn’t expecting them to look that neat 😋 !
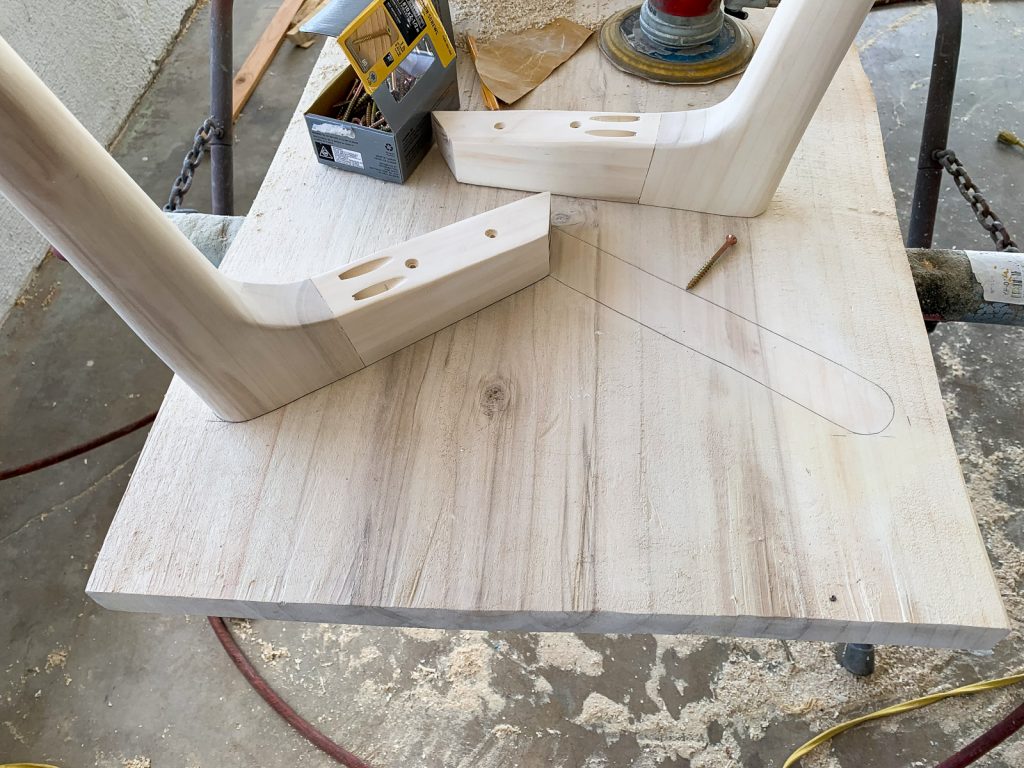
Completing the leg base!

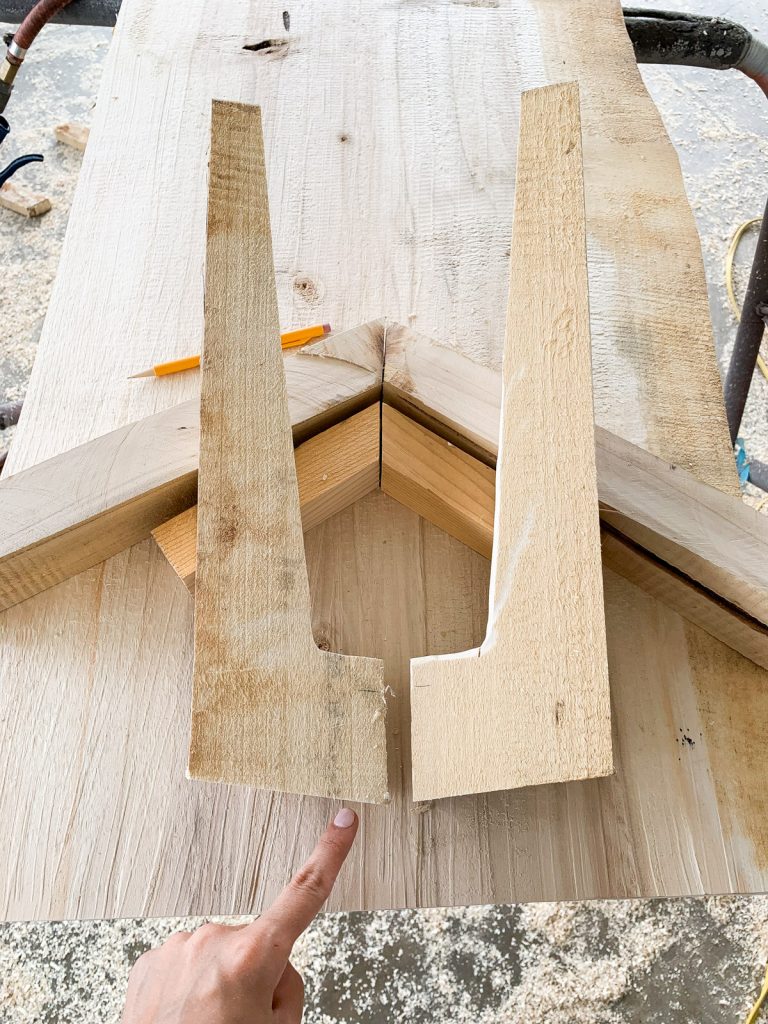
Here’s a rough idea of how I wanted the legs to look. I really wanted to create a v in the middle between the two legs. I ended up using whatever was left after we cut the legs to create the v.
Here’s the pieces I used to make the v
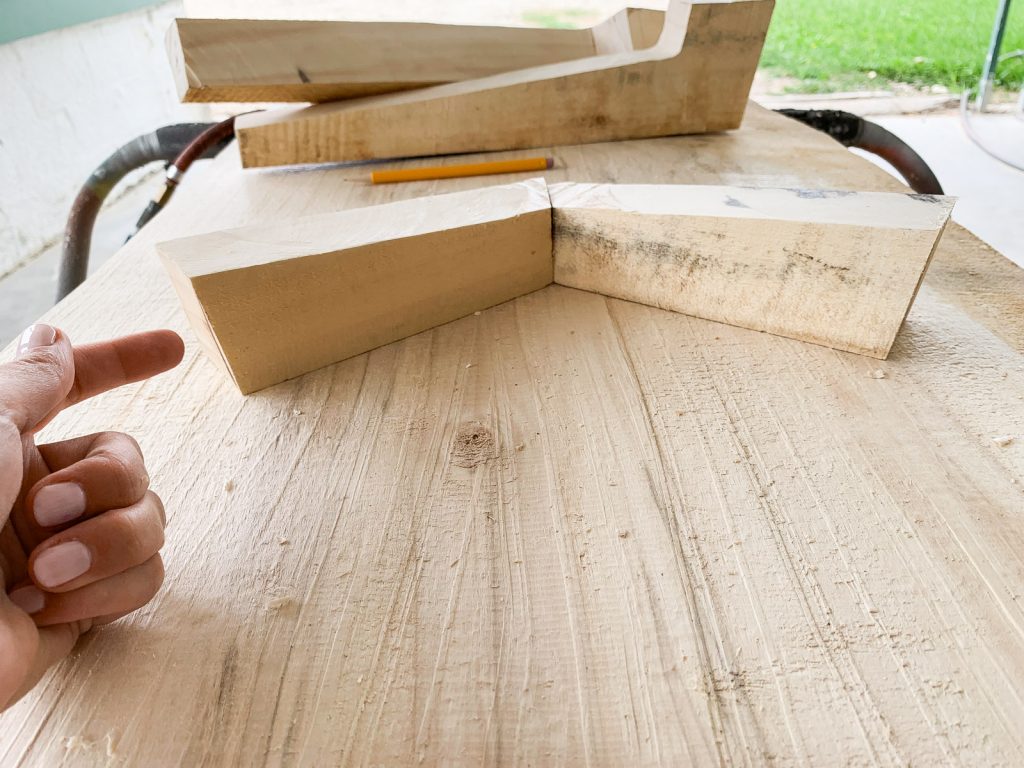
I love the way they angled down towards the center. I also made sure the edges of the v angled a bit to match the way the legs lay because I cut the legs at a 10 degree angle ( confusing?! Here’s the video link to clarify ) . The 10 degree angle made the legs slightly angle out when they’d be attached to the table.
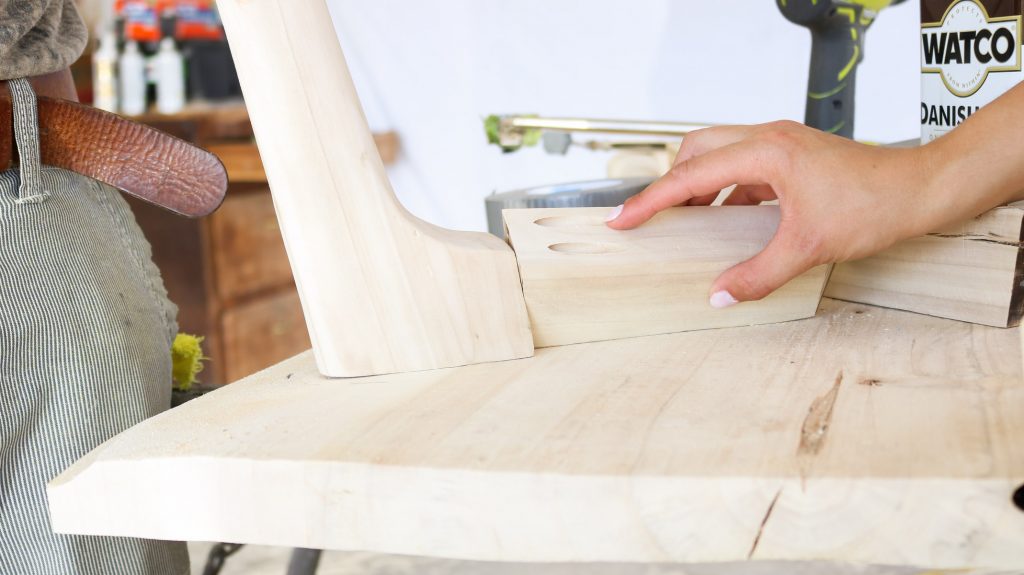
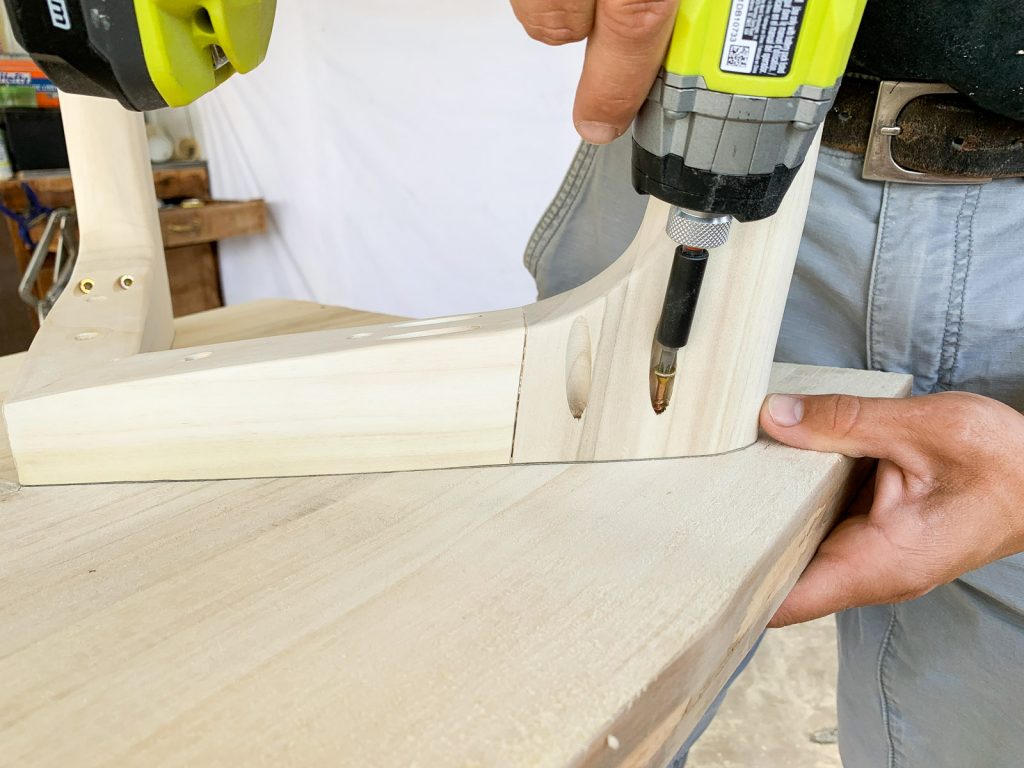
Creating Pocket holes to secure the V and the Legs!
For this step we had to use a kreg jig! Truth be told I was pretty overwhelmed with the idea of using a kreg jig but, I knew it needed to be done because I didn’t want visible screws.
If you’re not familiar with a kreg jig it’s a tool that makes pocket holes that help hide your screw a bit more and gives you more options to attach screws from different angles.
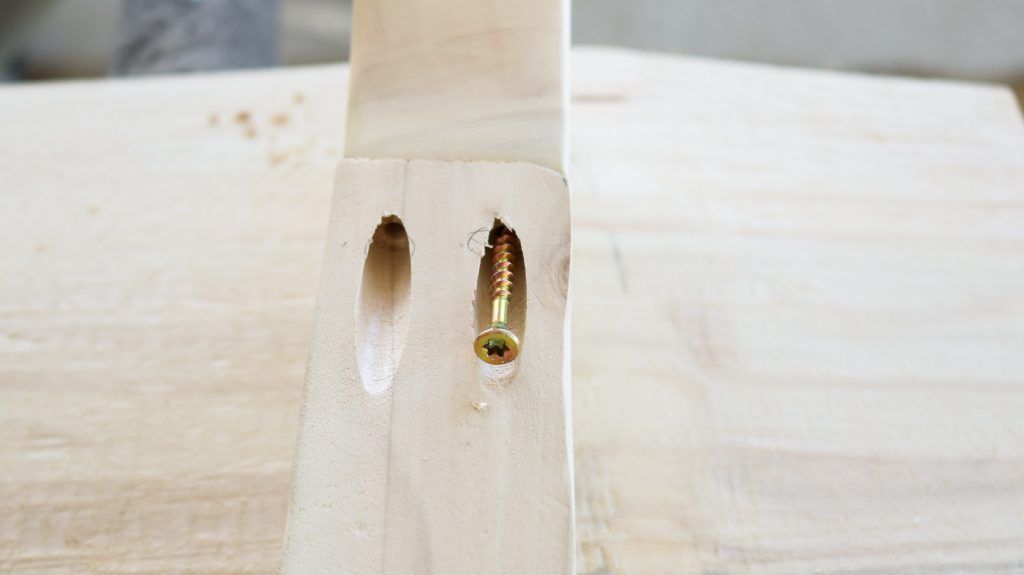
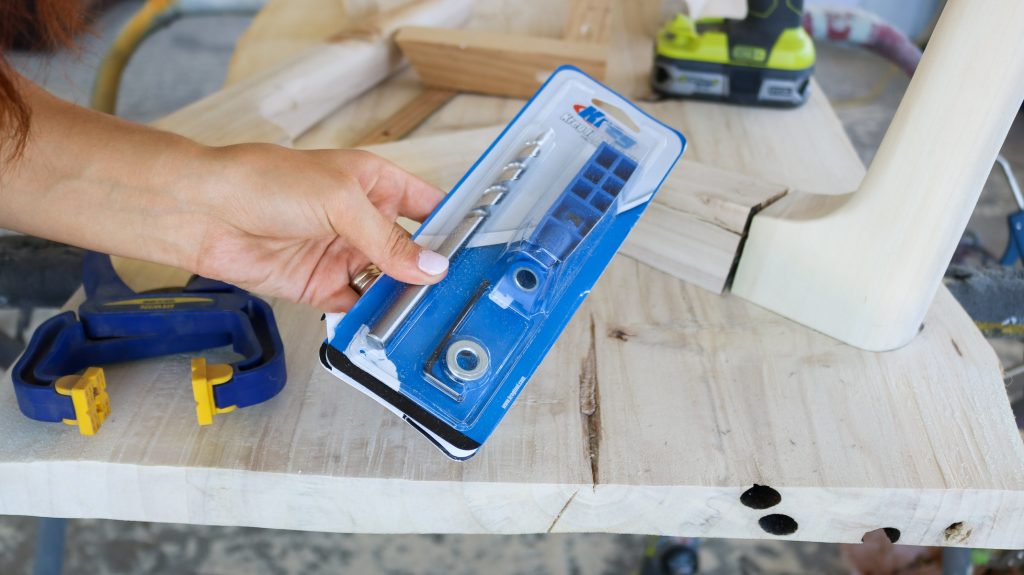
Here’s a pocket hole example and the photo below shows the kreg jig set I used. I got it at my local homedepot. It was only $15.
How to use a kreg jig!
To begin I tested it on some scrap wood and honestly this thing is actually fun to use. I don’t know why I was so freaked out about using it😄.
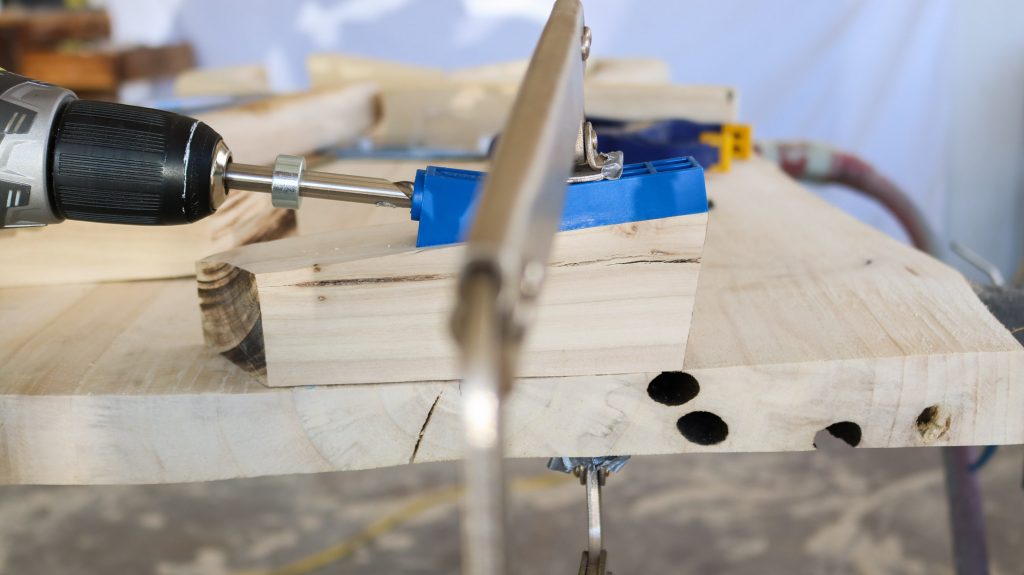
- You simply adjust the metal ring on your drill bit. This determines the depth of your pocket hole.
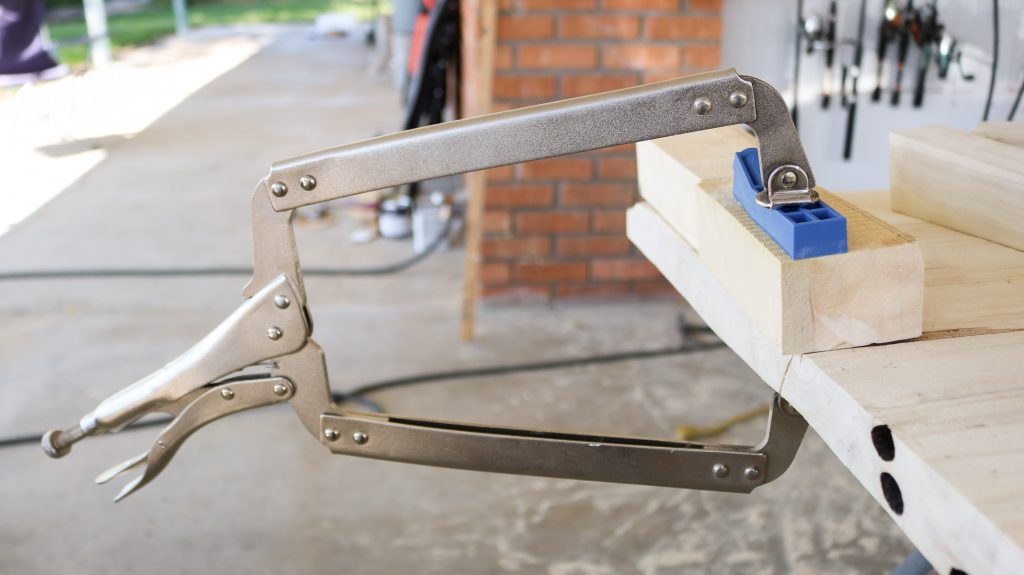
- Than you secure your kreg jig onto the wood with a clamp make sure the edge of the wood and kreg jig line up.
- All that’s left to do is drill a hole through the kreg jig! Remove the clamp and viola!
Pretty EASY right?!

We made some pocket holes at the top and bottom of the V. Than we secured it to the leg with some wood glue and screws.
Here’s what the legs looked like before being attached to the table top.
Fixing the bowed wood!
To fix the bowed wood we used this hand planner and it did an amazing job.
We first did the side the was bowed. Focusing on the middle of the wood. We did not touch the edges much at all.
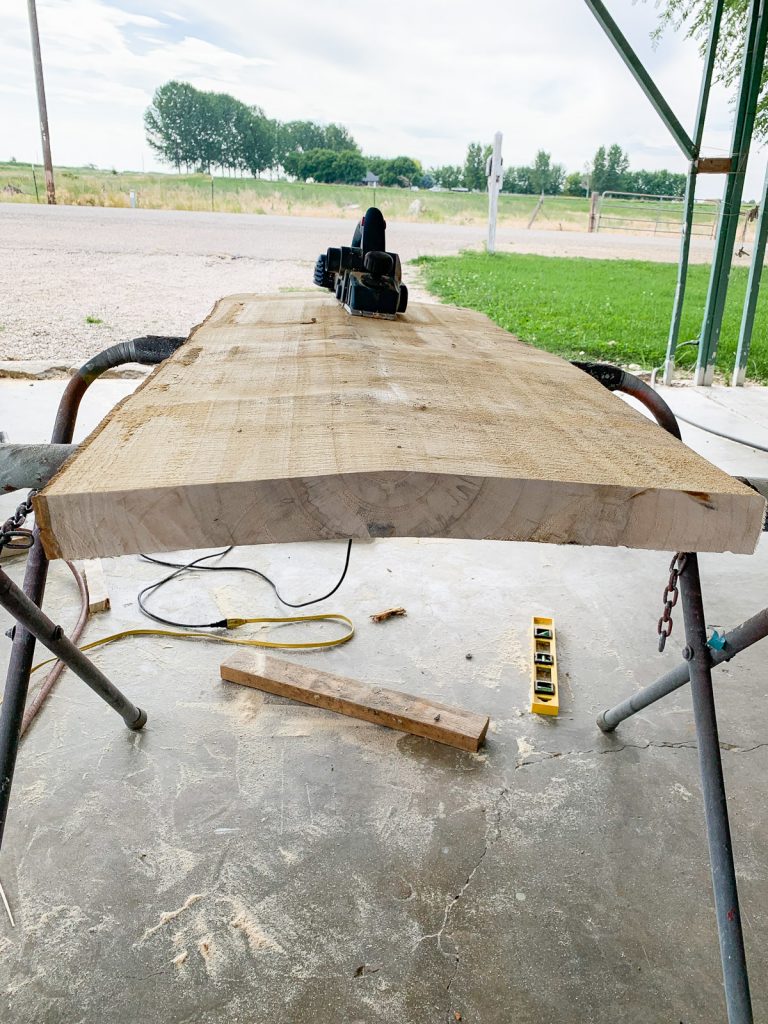
Here’s what it looked like after we planned this side down with a ruler against it! Not bad! 😀 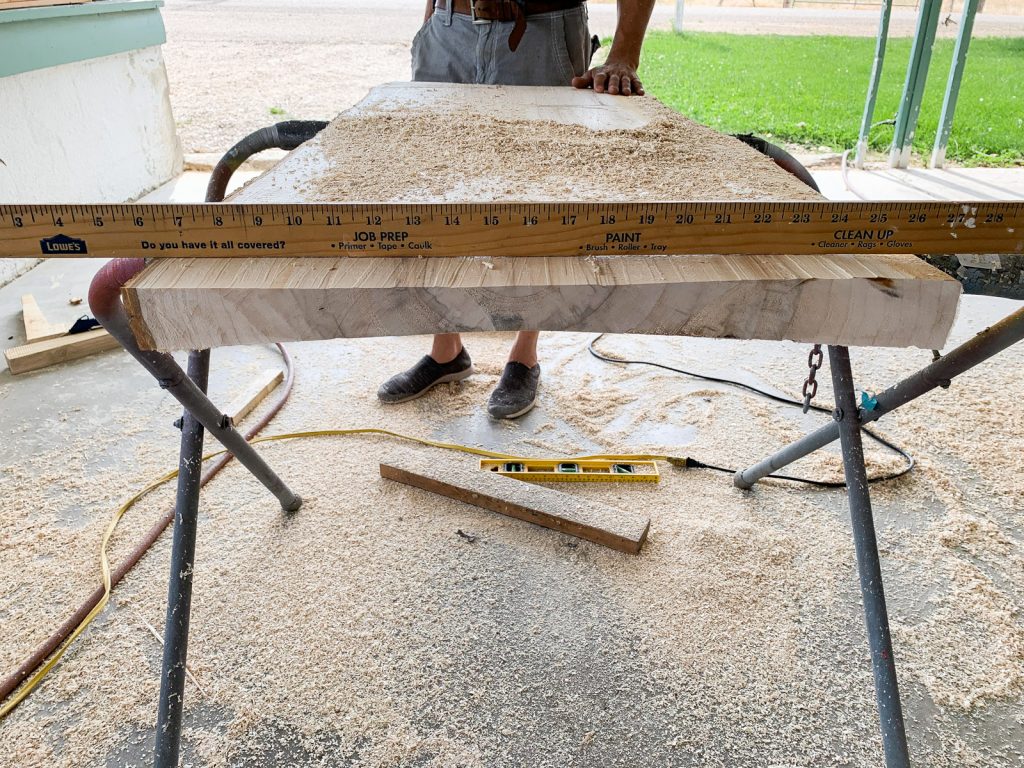
Than to finish it we flipped it over and focused only on the sides not touching the center at all.
Attaching the legs to the table!
I measured and marked were we would like each leg. Than we pre-drilled holes in the v and secured the legs to the table.
We also made sure to make pocket holes on at least one side of the legs to secure that area to the table. This made a huge difference in durability!
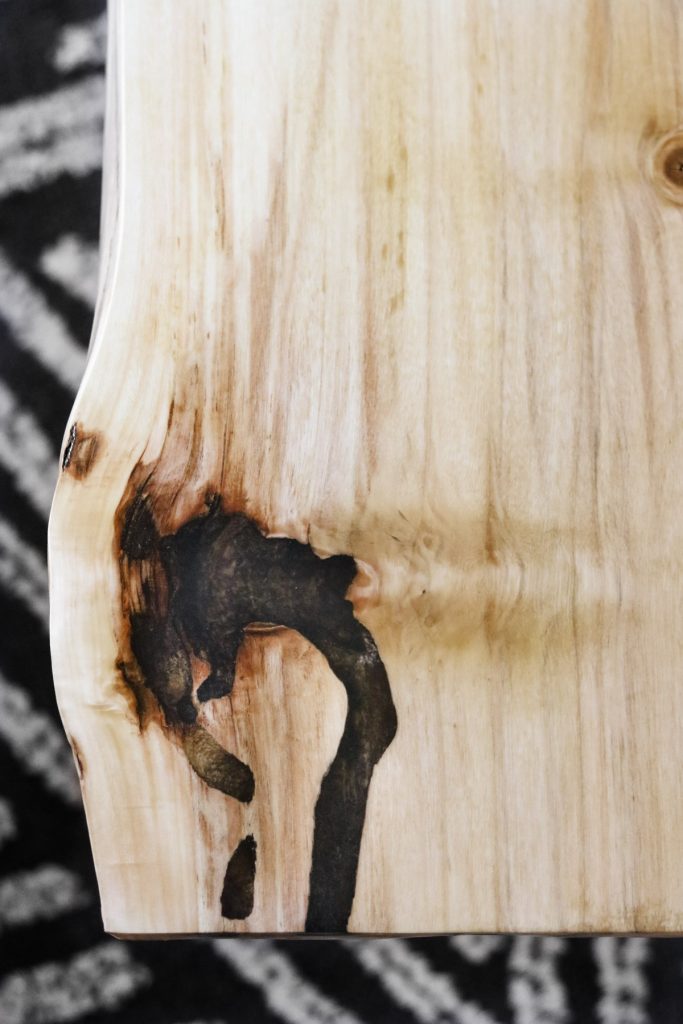
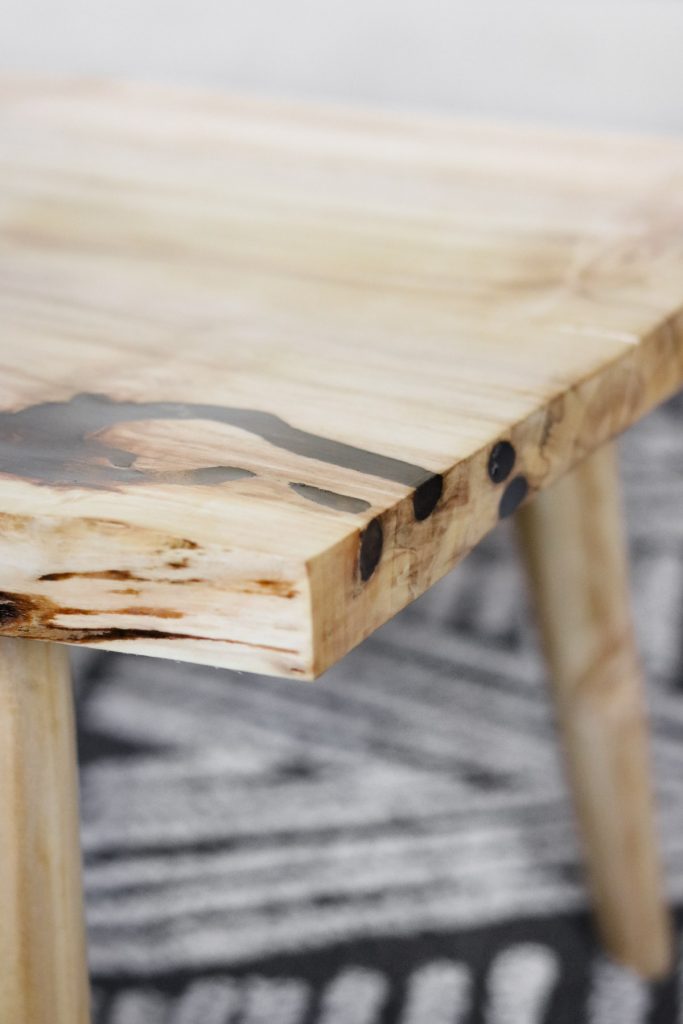
Filling holes in the wood with resin!
Just when I thought I was almost done with this table. HAHA😂 I seriously didn’t account for all these drying and setting times. This DIY coffee table seems like it took forever!
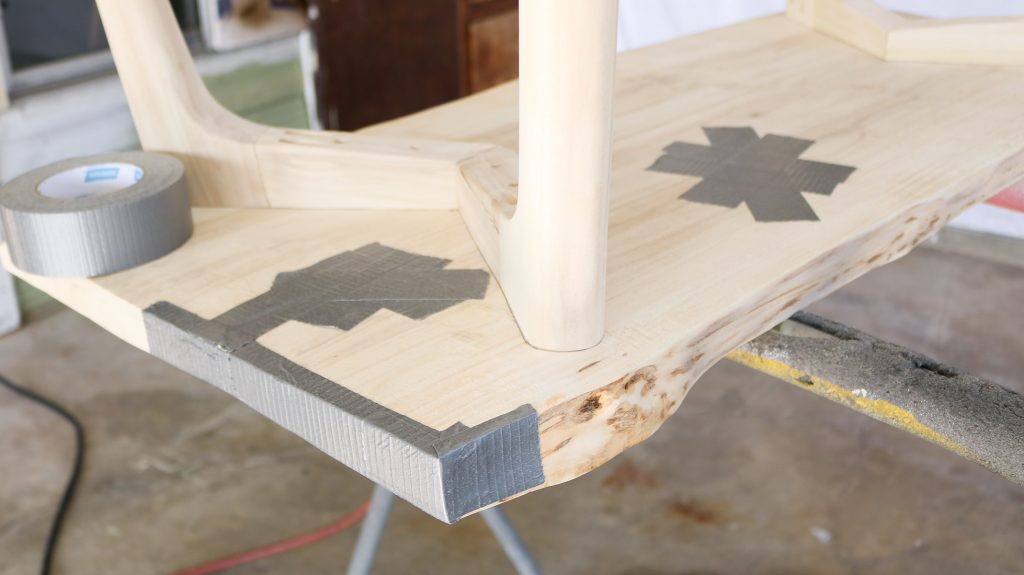
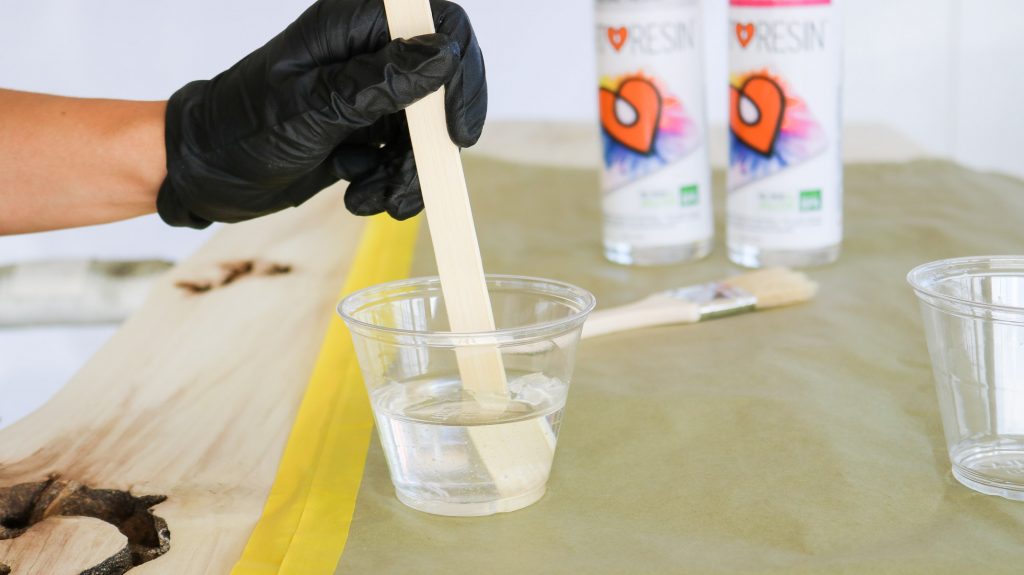
To fill our holes with resin we started out with blowing out all the dirt. Than we flipped it over and taped off all the holes on the bottom. It helps if your table is propped up higher to do this. Also make sure it’s level so your resin fills the holes evenly. I used leftover art resin from a previous project. I honestly don’t think it really matters what type of resin you use as long as it’s clear. This resin is on the pricier side I know the casting resin sold in stores is a lot cheaper.
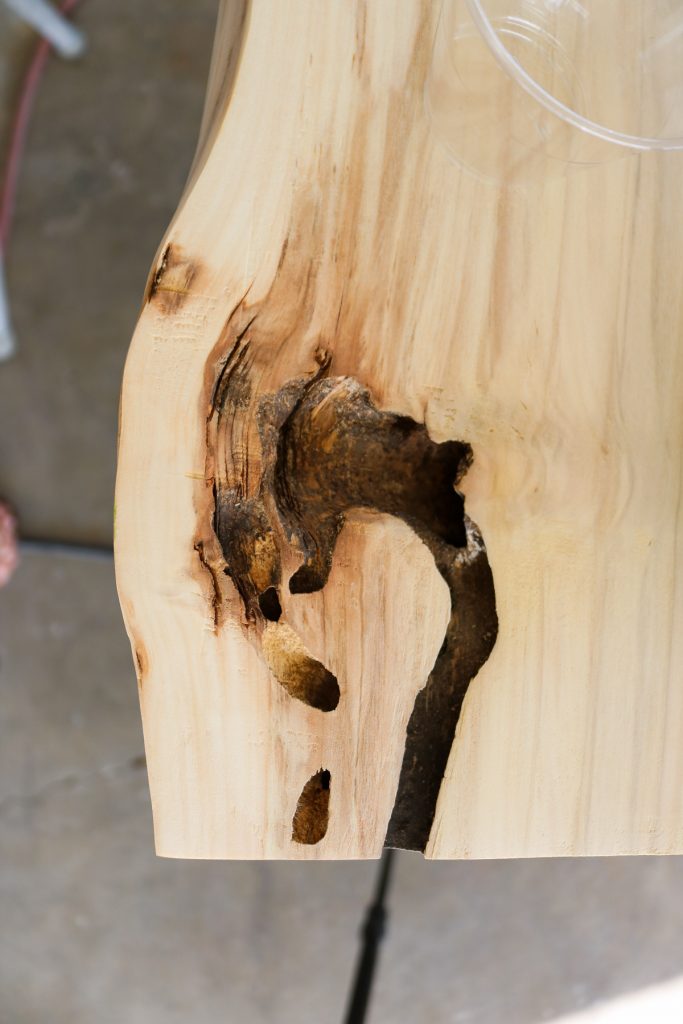


DON’T DO THIS RESIN MISTAKE!
I can’t say I’m a pro with wood and resin however I’ve done my fair share of research before jumping into this DIY. In order to avoid major bubbling when filling holes in the wood you need to coat the whole area with a thin coat of resin first. Especially if the area has bark or lots of texture. By applying a thin coat of resin you pretty much seal in all the dirt and air bubbles that would otherwise rise to the top if you didn’t seal it.
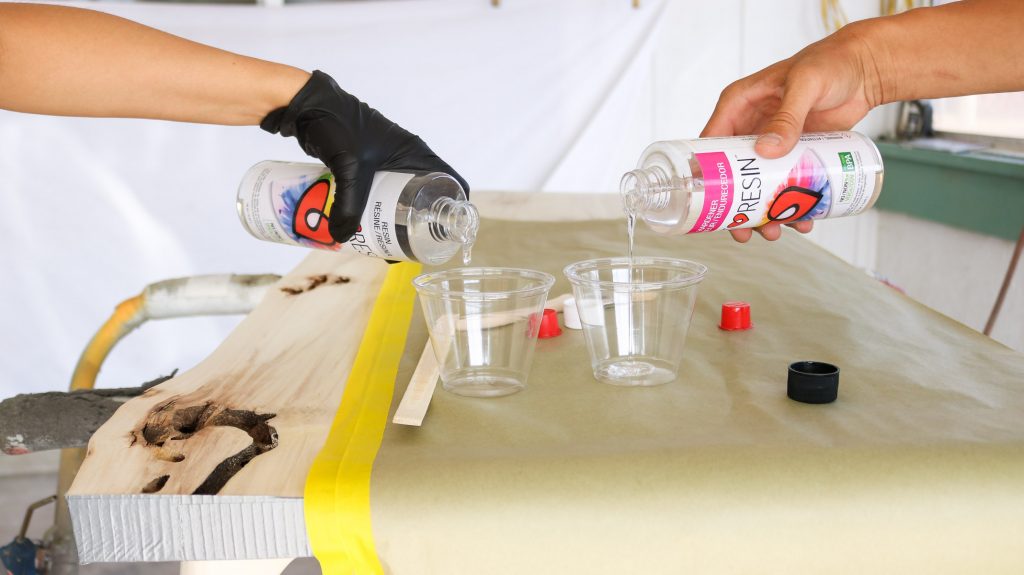
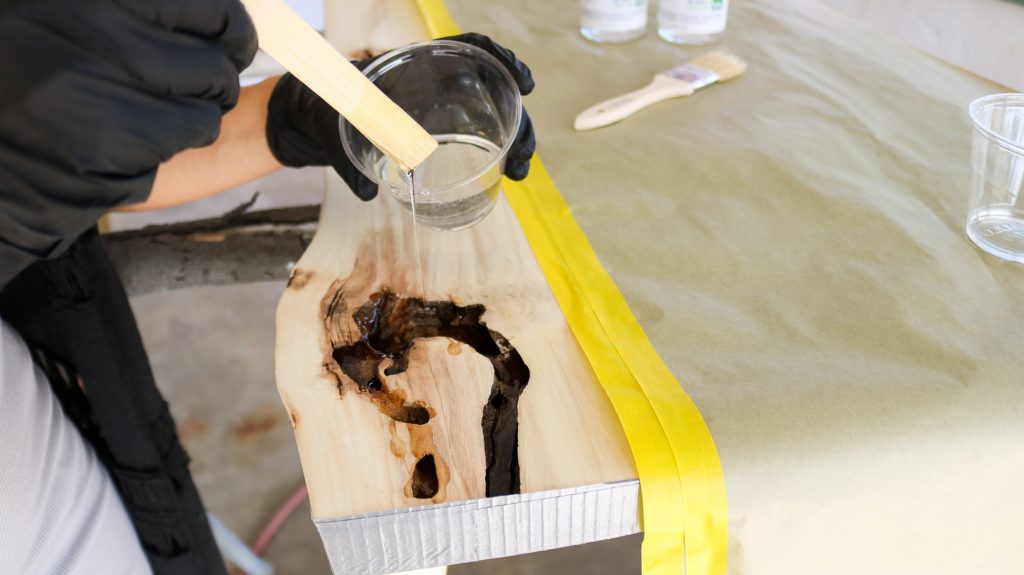
After letting my first thin coat of resin set for about 5-6 hours the holes were ready to be filled with resin completely. Keep in mind resin will not set completely in 5 hours it will still be tacky. Even tough it’s tacky it won’t mix with the fresh resin you pour on top.
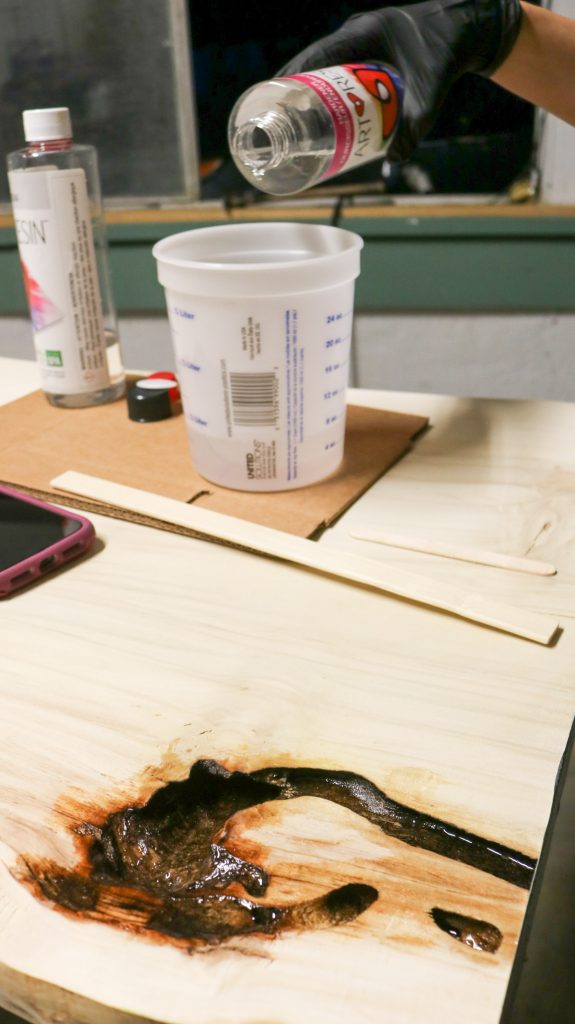
Here’s me filling the holes with more resin after 5 hours
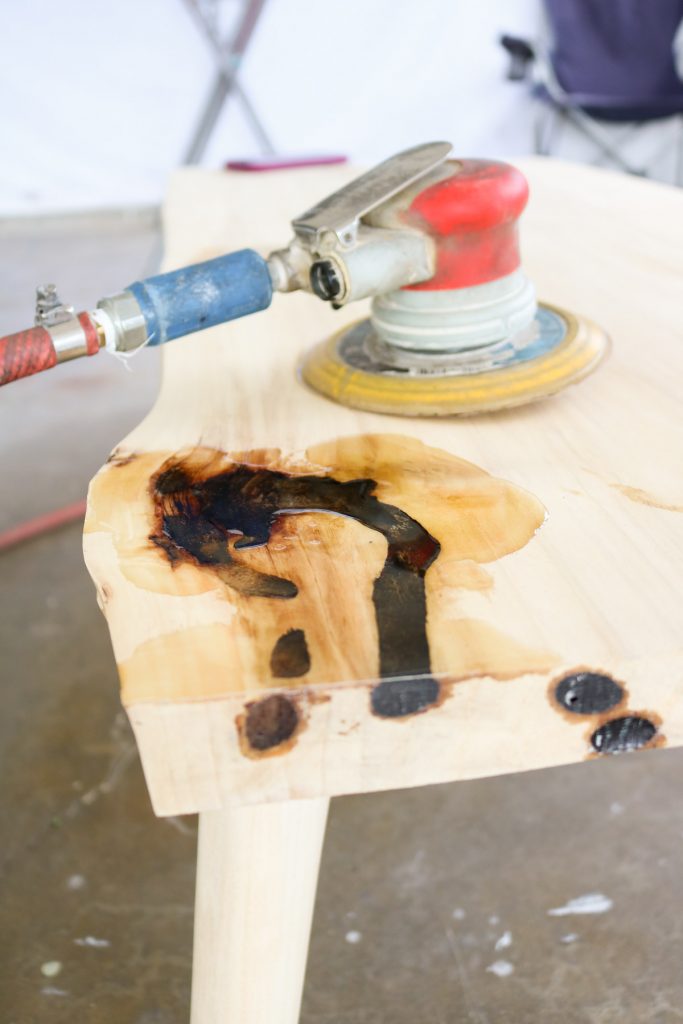
Now it’s a waiting game! I wish there was a way to speed up the process of setting resin. It took about 36 hours before I could sand it down. I used some 230 grit sand paper and sanded it down until it was smooth and flush with the wood.
Finishes and Protective Coatings for the Coffee table!
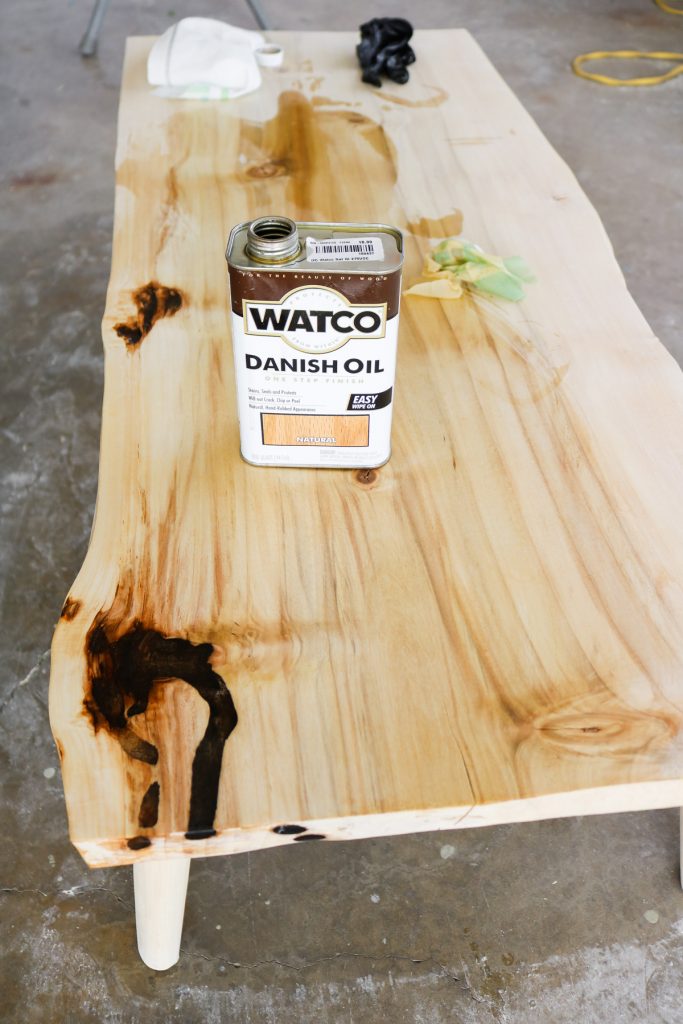
Okay as much as I wanted to stain the wood darker I was so scared to ruin it. I decided to use something that would bring out the natural grains in the wood so I went to our local wood shop for some advice. They introduced to me this danish oil. I was in love at first! This stuff really made the wood grain pop and I thought WOW! There’s a downside to it though! It’s not like wood stain that takes a lot quicker to set ( about 12 hours) . This Danish oil takes 72 hours to set if you plan on applying any clear protection on top. LET ME just say I learned the HARD way😑! Whatever you do don’t apply clear finish before the 72 hour mark. 😫 BOY did I wanna cry when I saw my clear coat bubbling up!
Just use stain it does the same thing and they have different colors to pick from too. I don’t know why I bothered to try something new on a table that took me so long to make!
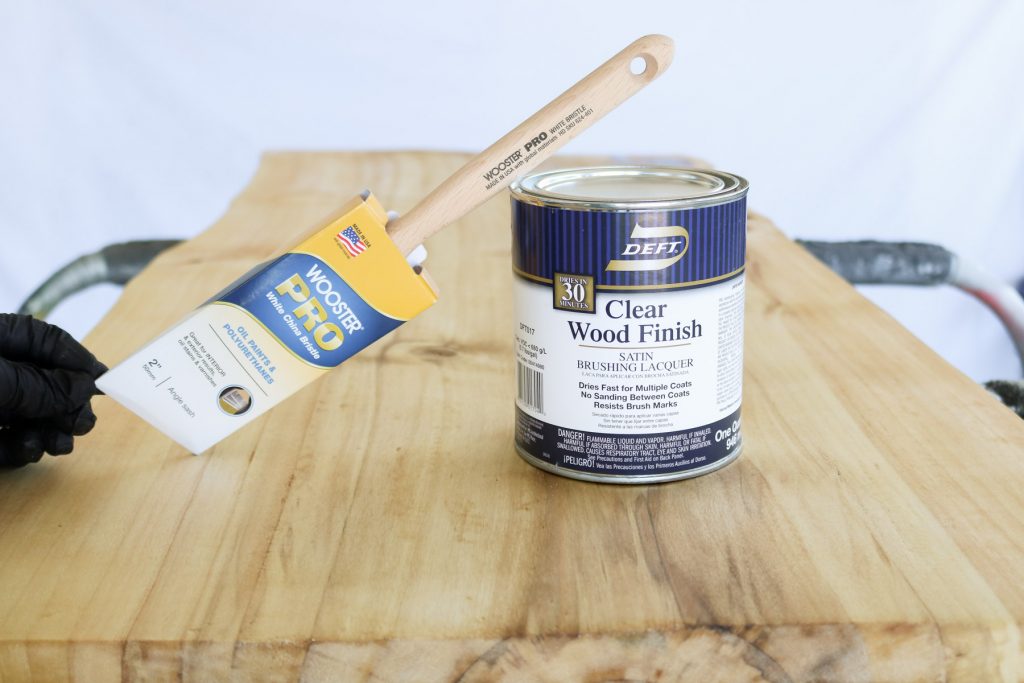
Why I love minwax clear finish!
If that wasn’t bad enough I decided to try this clear wood finish from deft on this DIY coffee table! I always used minwax lacquer before with any of my wood projects and loved it but, I was at home depot and they stopped carrying minwax (now only sold at lowes). So I quickly googled reviews and was convinced this stuff was amazing! Don’t get me wrong it’s not bad. It doesn’t leave spots and dries clear. Compared to minwax lacquer I feel like this stuff is a joke. Minwax goes on silky smooth and feels thicker and even somehow seems to level itself out while drying. Every time I use it looks like I applied it with a spray gun. It looks so smooth. This deft stuff applied like regular water based clear finish even though it says it lacquer. Maybe the oil had something to do with the finish of this clear finish. I’ll have to try it again on another project with regular wood stain.
Doesn’t this stuff look so milky. I don’t remember the minwax lacquer being this milky. It was clear and silky. I think that’s because this one is water based and lacquer finishes are usually clear.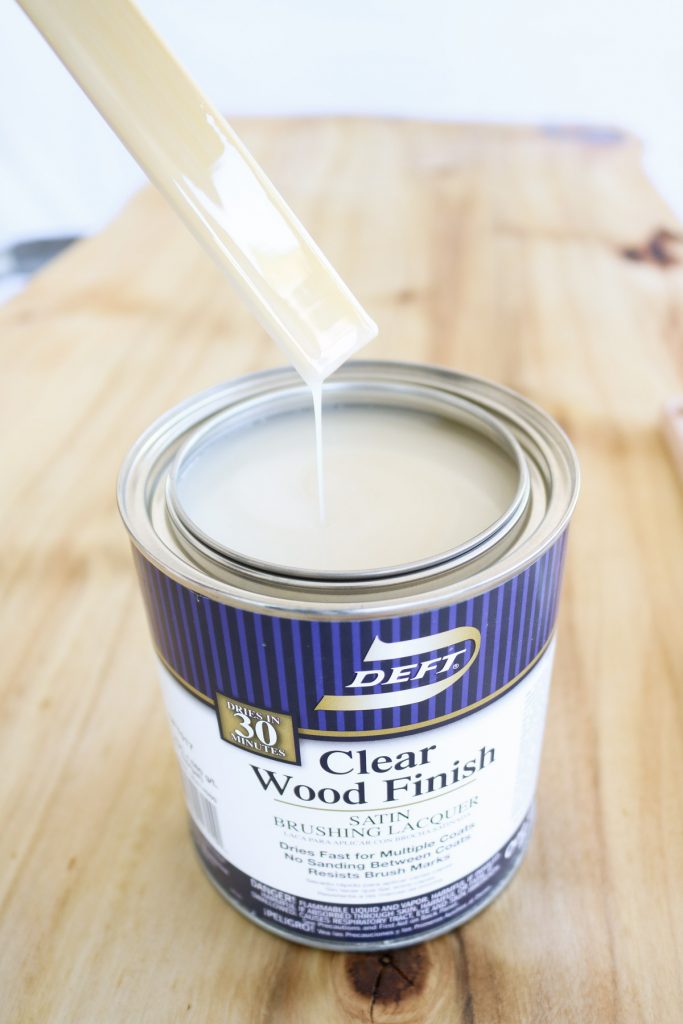
Other’s DIYs You’ll love:
- MAGNETIC KEYHOLDER DIY
- DIY BUILT IN SHELVES!
- INDUSTRIAL CANDLE HOLDER IN 10 MINUTES
- STRUGGLING WITH UGLY PLANTERS! TRY THIS 5 MINUTE HACK TO TRANSFORM THEM!
- RECYCLE YOUR OLD SUNHAT INTO WALL DECOR
Here’s the video
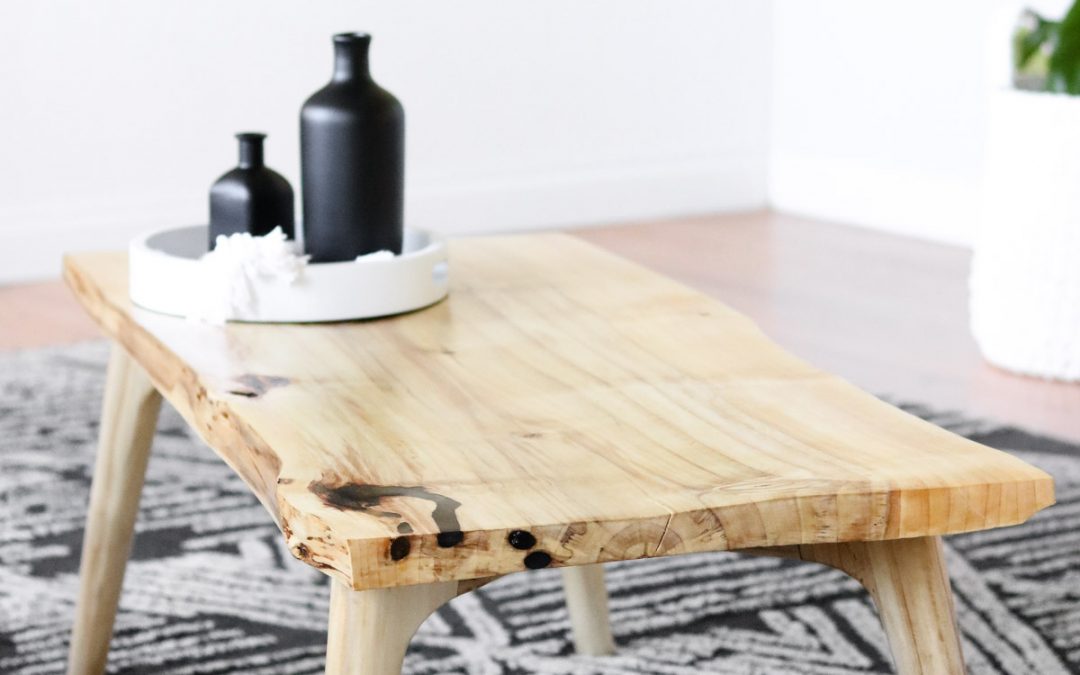
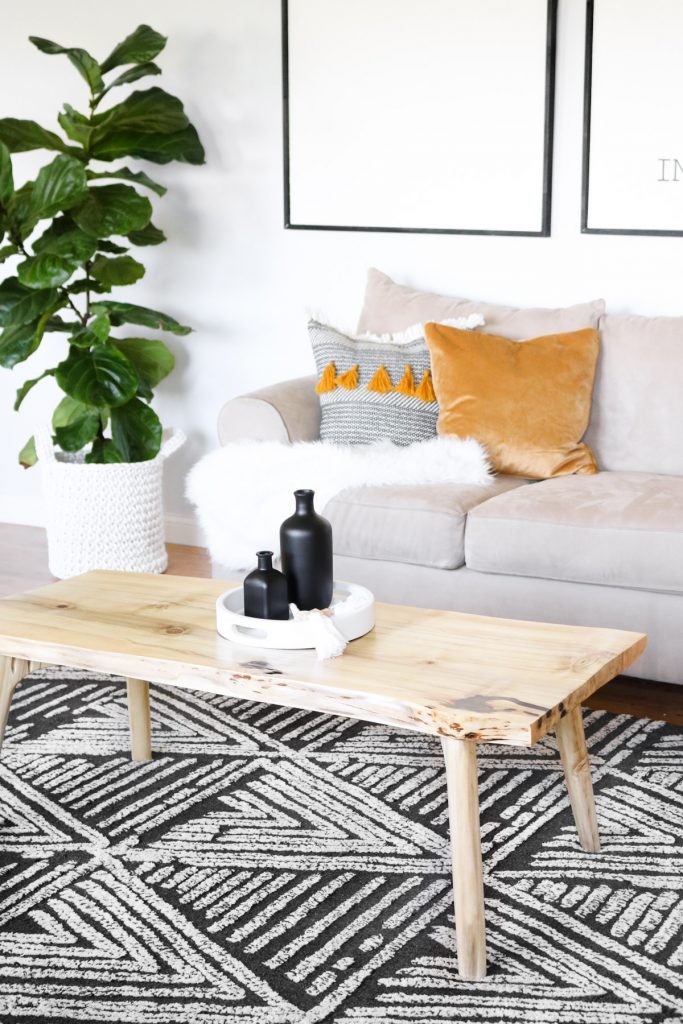
That’s it! Here’s how the table looks! I’m in love! Those wood holes look amazing!
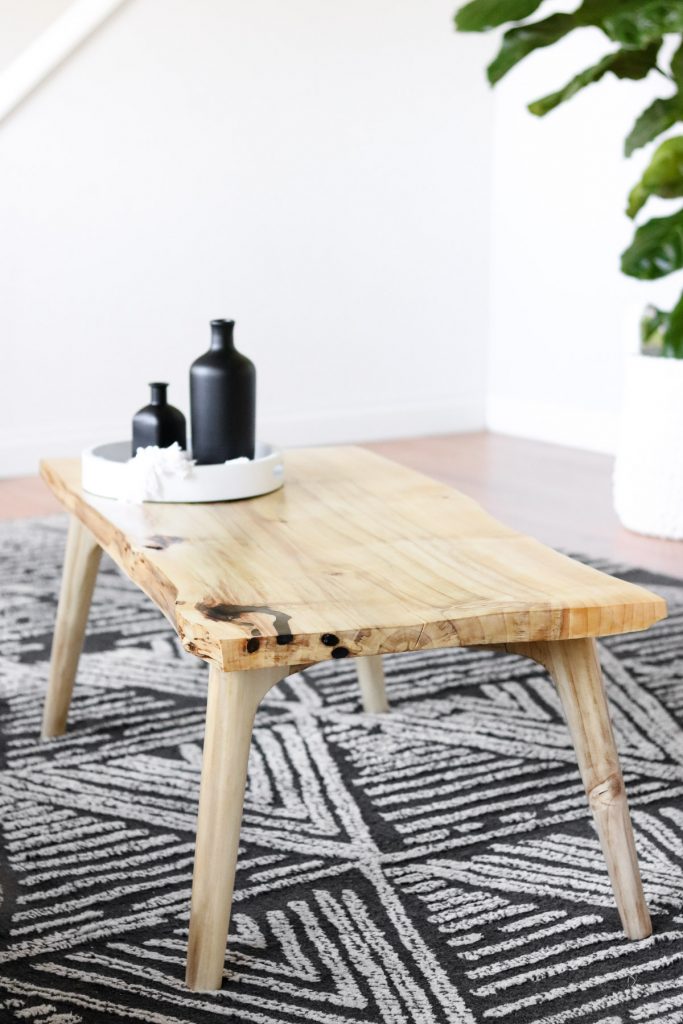
I got my big fiddle leaf fig from costco. It was only $49. Isn’t that a steal! It’s been about 5 months and she’s still alive! YAY! I’m usually horrible with plants but she’s gotten a few new leaves.
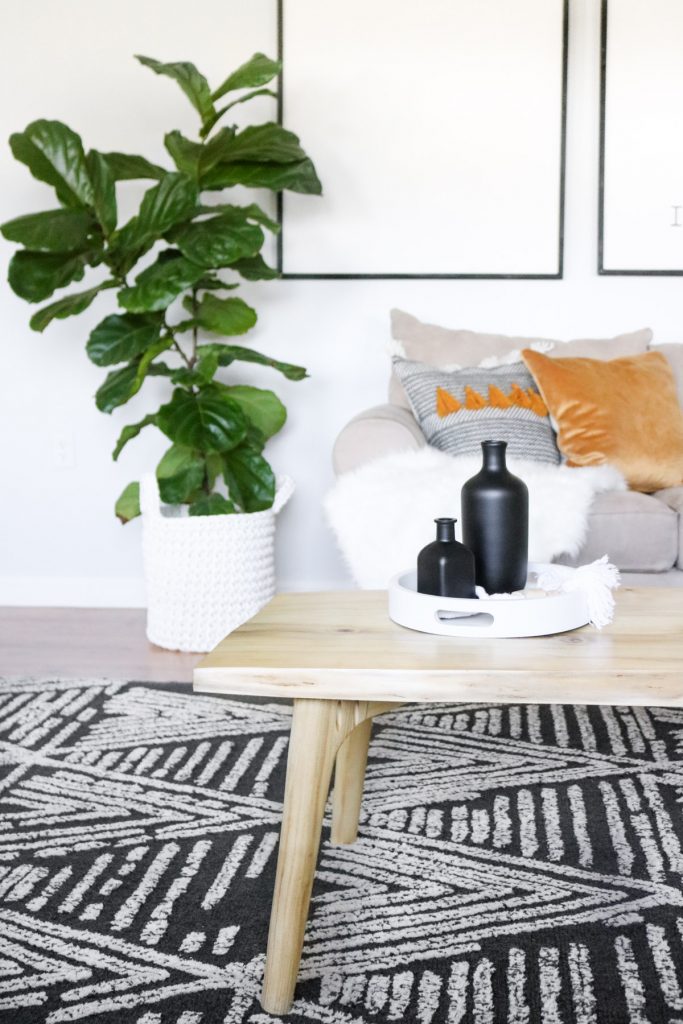
I love the live edge details!
The top of the table still isn’t perfectly flat but, I don’t mind it at all. Like Tony said it turned out alright. We can all sit on it with the family and the legs don’t spread apart 😅😂 ! I guess this DIY coffee table wasn’t a complete flop! Overall I’m pretty happy with how it turned out. 🙂 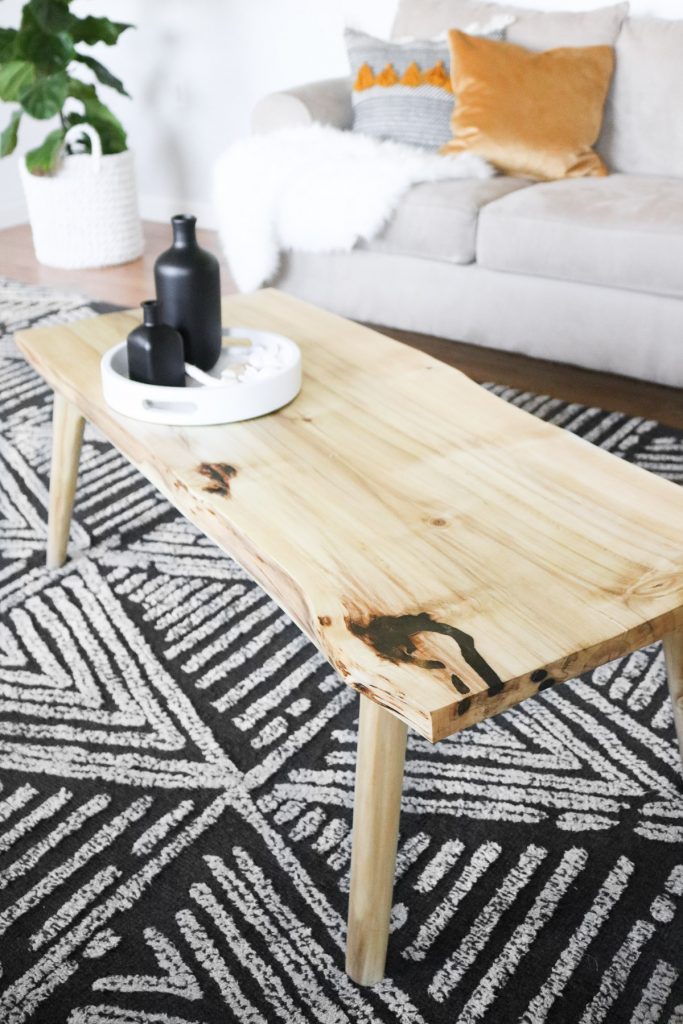 Will I be doing this again anytime soon? Probably not! LOL! 😂 I don’t want to see or touch wood for a while!
I know Tony already knows this but, I’ll say it anyway😊! There’s no way I could have done this DIY coffee table without him! A huge thanks to my right hand #aka my husband! Also little Oleg helped a ton with my indecisiveness! Couldn’t have done it without my boys!
If you’ve read this article I hope it inspires you to make your own DIY coffee table and learn from my mistakes😄 .
I’ll see you next time!
x,
Lily-
Can I just say what a relief to find someone who actually knows what theyre talking about on the internet. You definitely know how to bring an issue to light and make it important. More people need to read this and understand this side of the story. I cant believe youre not more popular because you definitely have the gift.