This Mother’s day butterfly gift idea was on my to-do list for a few months now! Time got the best of me and I just finally had a chance to get around to it. I know mother’s day is like one day away and the chances of getting this gift done before mother’s is almost impossible! I apologize about such a last 🙈minute DIY! Maybe a late mother’s day gift 😬? Or birthday gift ?
Cost:
$10-$12
Time Needed:
about 30-50 Minutes
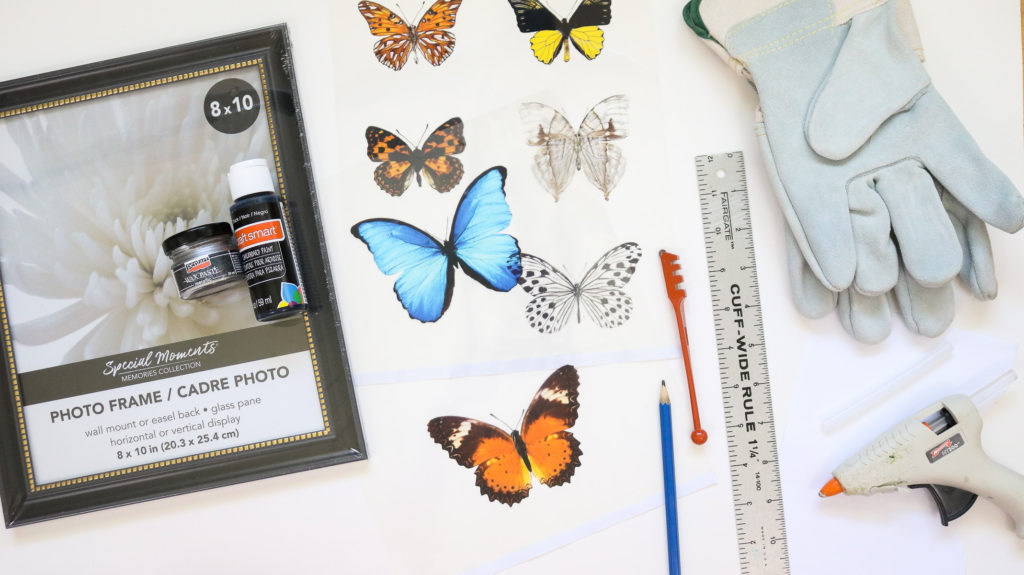
Supply List:
*This post contains affiliate links
- A few sheets of glass ( I used some dollar store frames. The glass is thin and easier to cut)
- Printed butterflies ( on transparencies)
- ruler and marker
- glass cutter ( you can get one here)
- hot glue ( just a regular small high heat hot glue gun will work)
- Thick Gloves and goggles for safety ( you can get gloves here)
- White paint and paint brush
This is meant to be a kid friendly craft with the help of an adult. Here’s some glass square tiles that might work for this if the size fits your butterflies. This will save you time and trouble instead of having to cut you own glass.
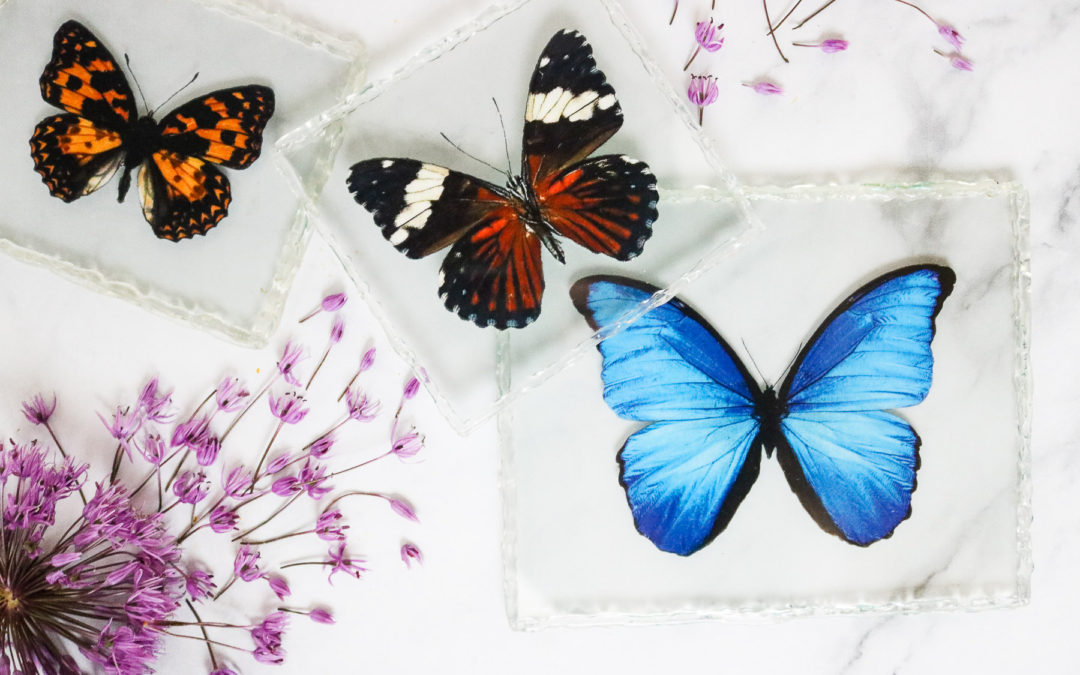
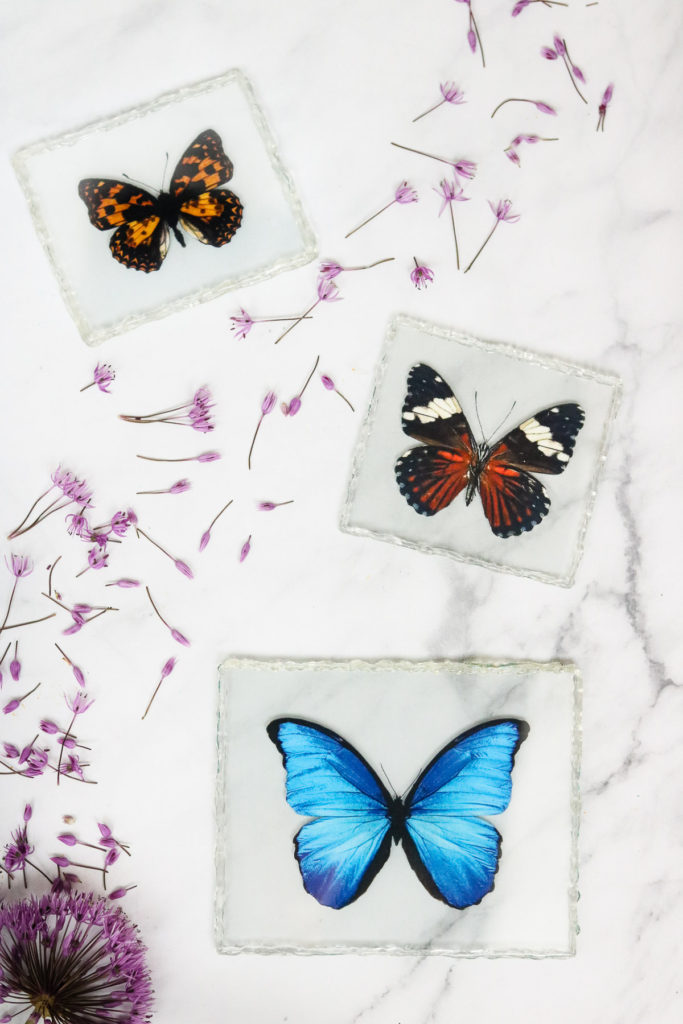
Mother’s Day Butterfly Gift
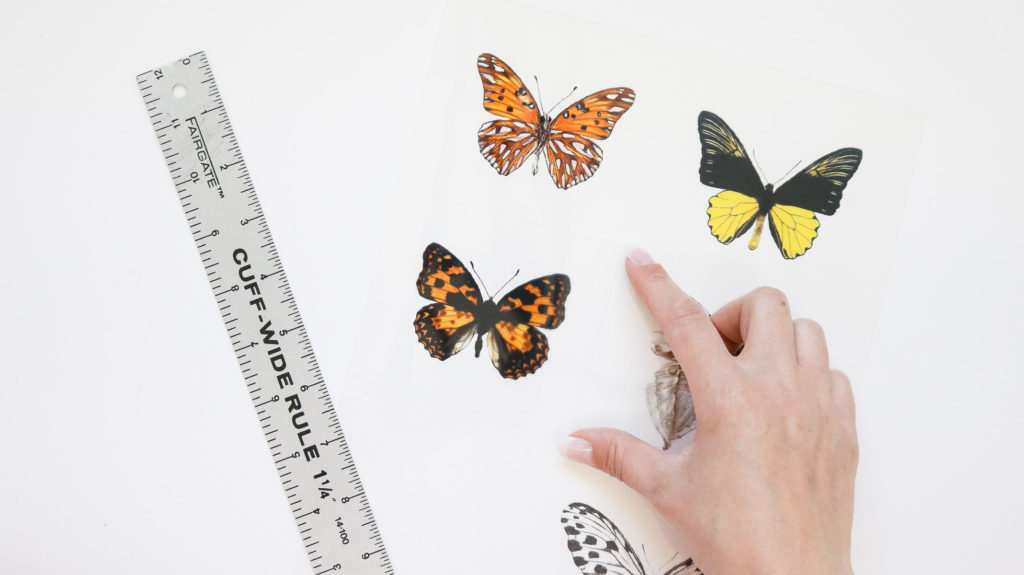
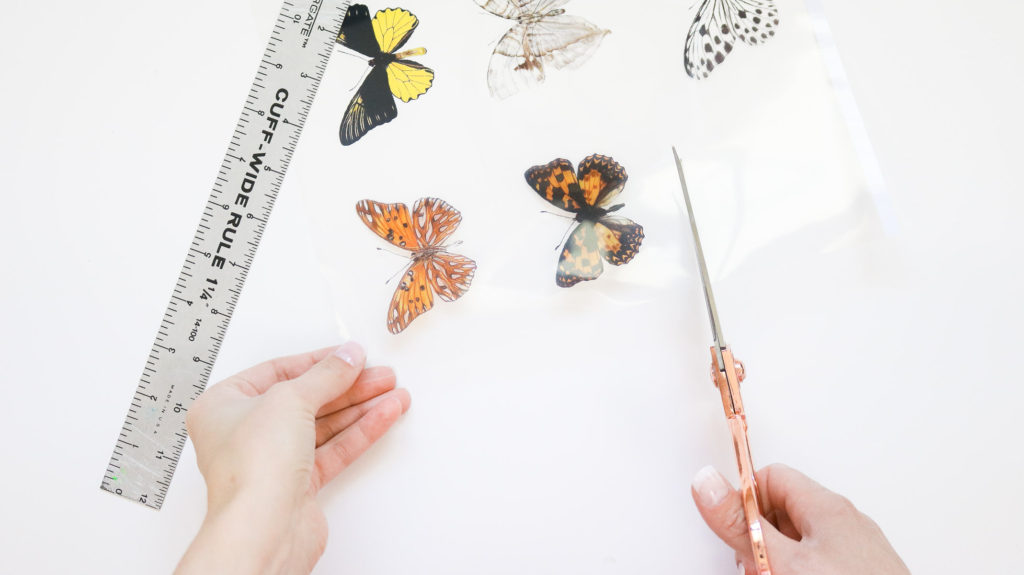
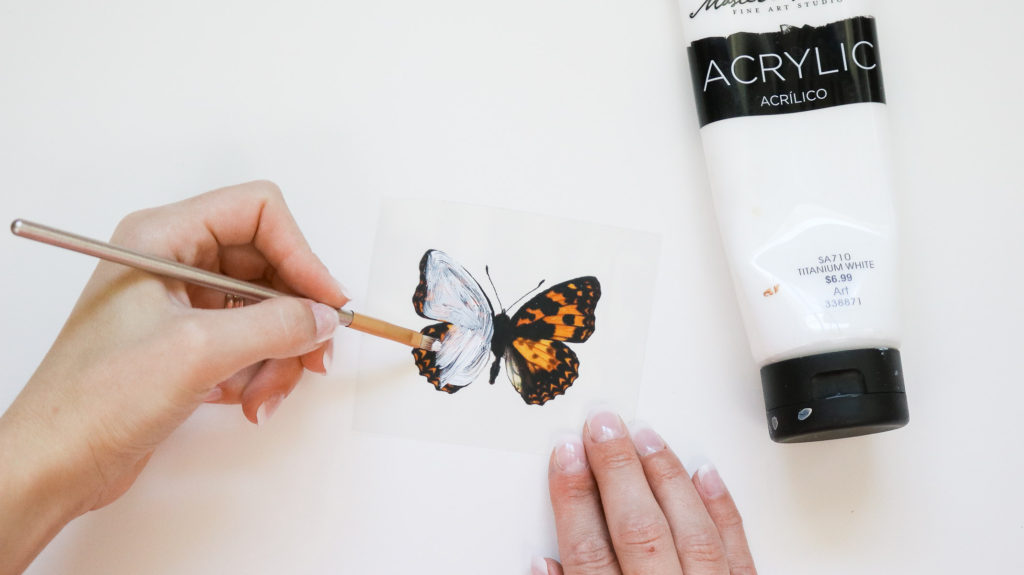
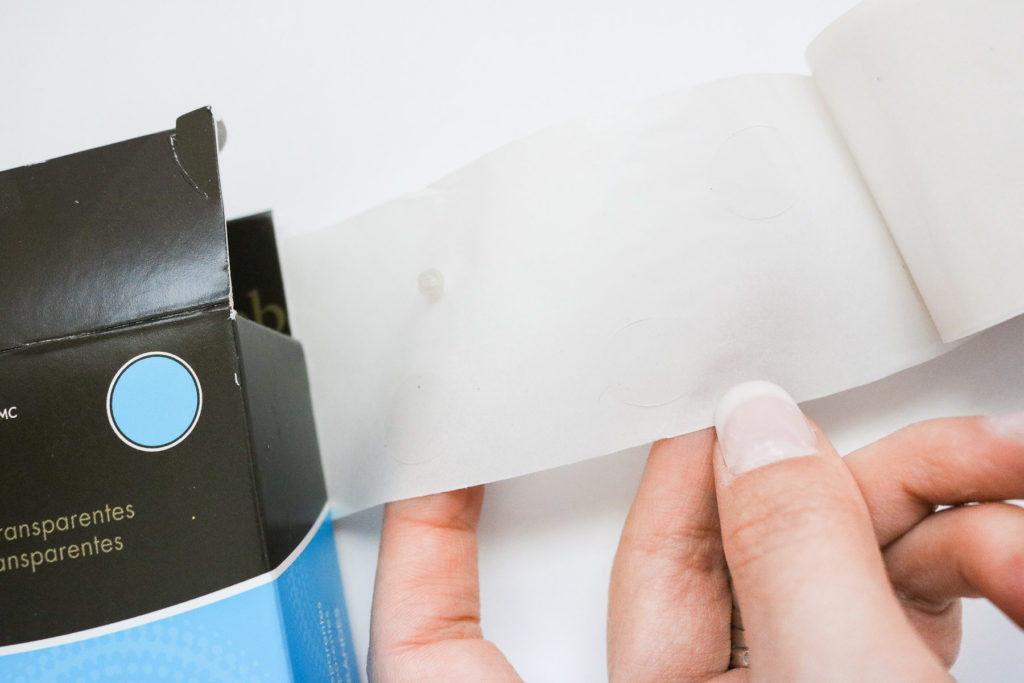
I’m a huge fan of butterflies! When I planned on making these framed butterflies I realized I didn’t want to use real butterflies but, I still wanted them to look kind of real. So with that in mind I decided to get some printed. I ended up getting them printed on transparent paper however I did consider printing them on regular white paper. If I printed them on white paper I would need to cut them out really neatly and since I still wanted the antennae in tact I decided to print on transparent paper to save the trouble of cutting out each butterfly.
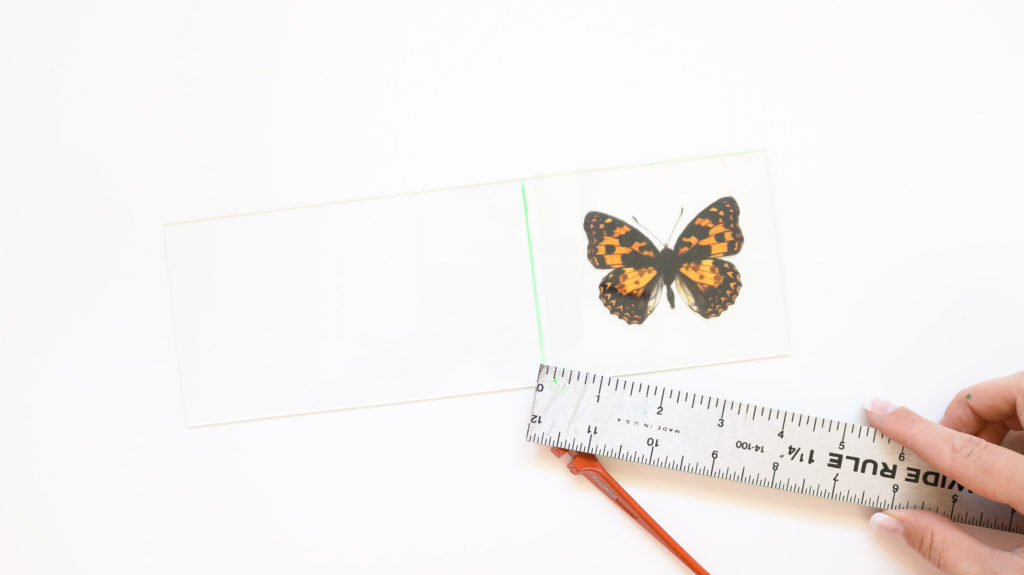
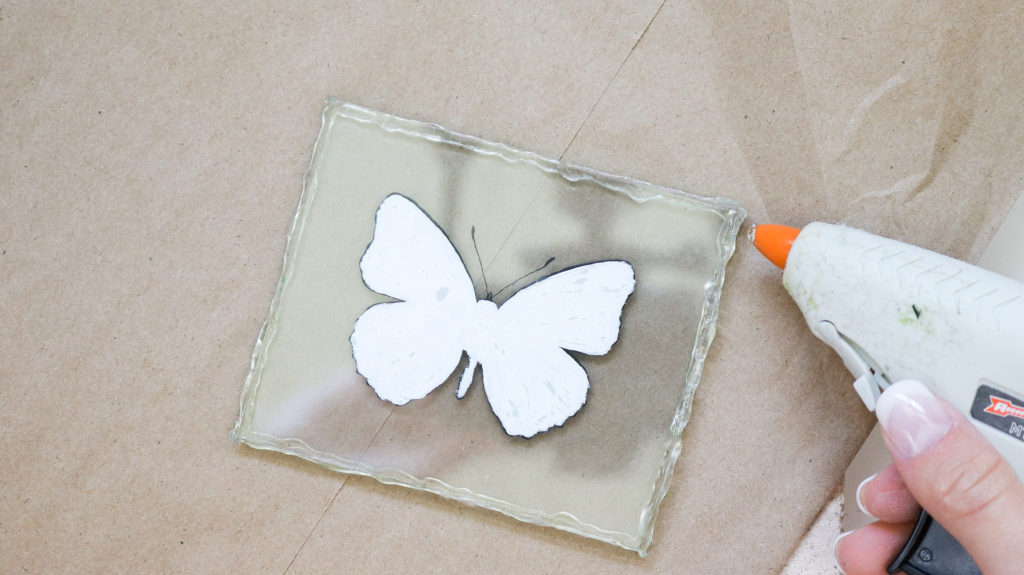
Okay here’s how I made them. To begin start by marking and cutting an even rectangle around your butterfly. Since white ink doesn’t print on transparent paper I ended up painting the back of the butterflies with white acrylic paint.
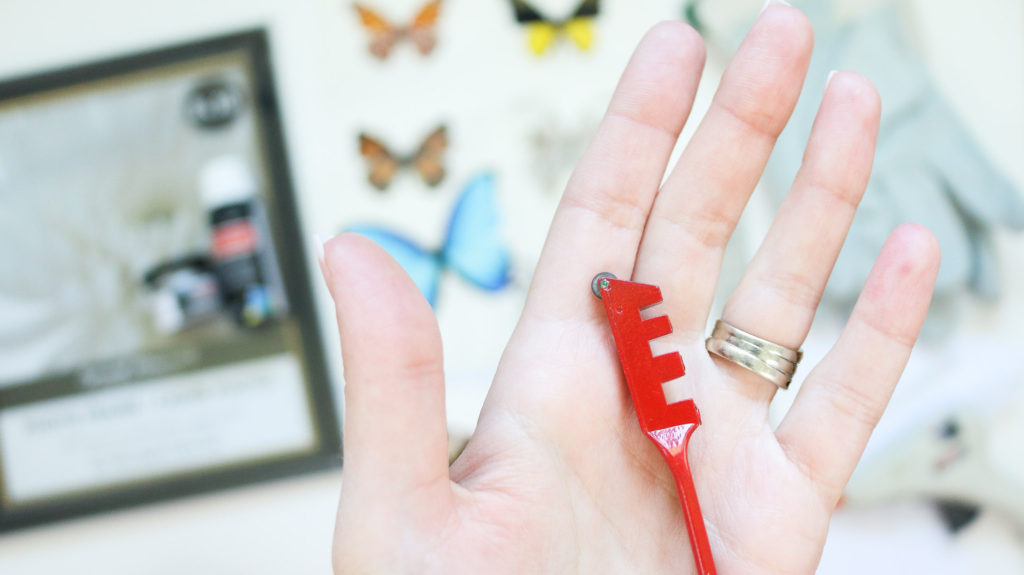
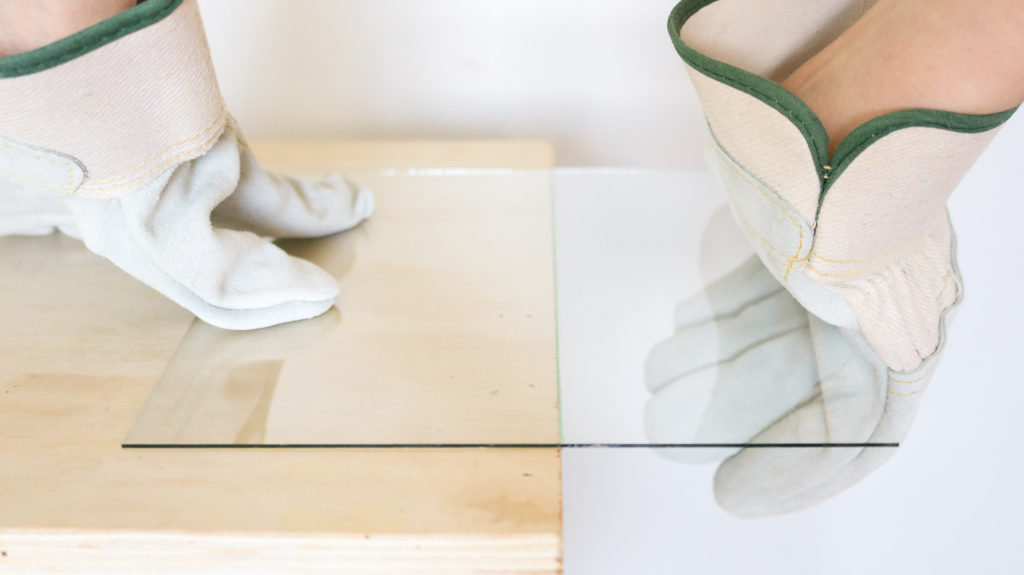
How to cut your glass to size
Here’s the glass cutter I used. Keep in mind this tool does not cut the glass. It will only score your glass so you can break it easily.
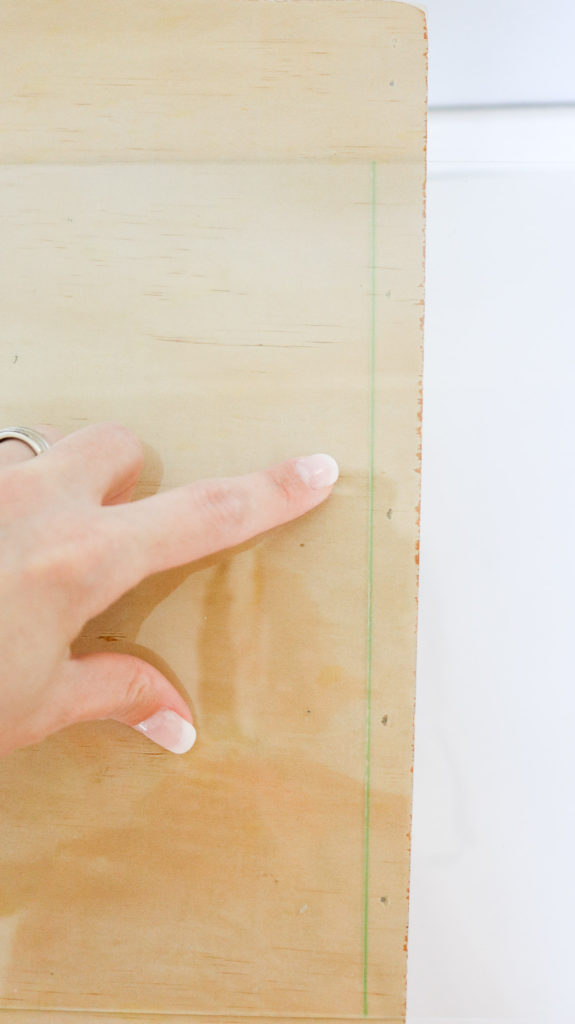
Here’s what a score lines look like. It’s a thin white line in your glass. 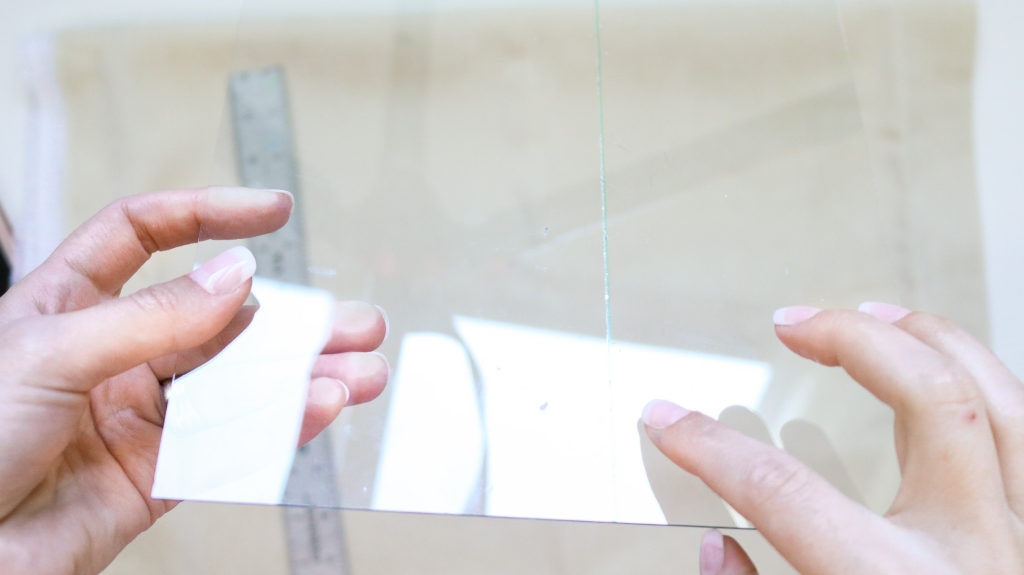
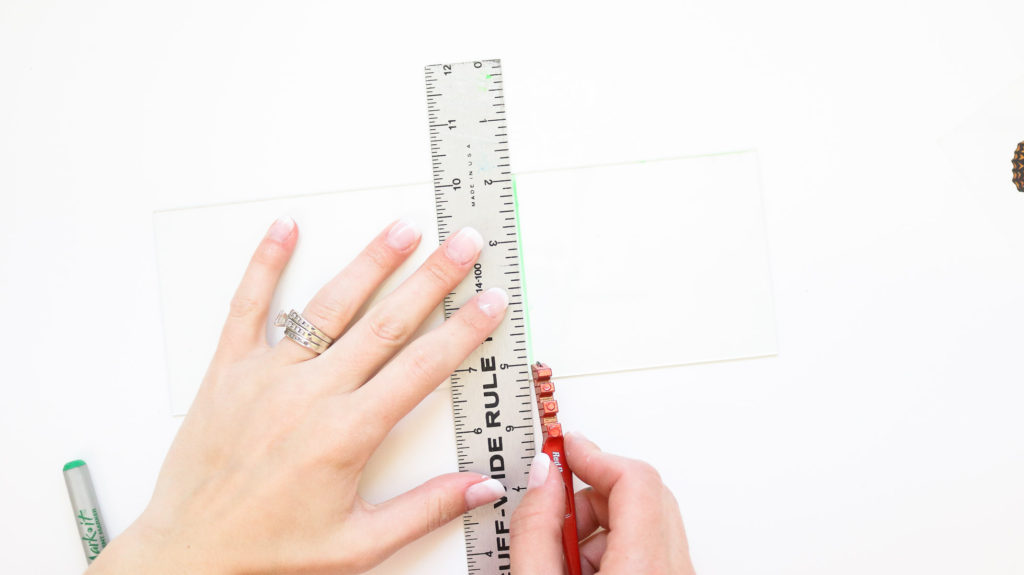
To begin measure the height of your butterfly transparency and mark that height across the whole piece of glass. To break glass you can only do one line at a time. This technique can be used on so many other project not just this mother’s day butterfly gift. 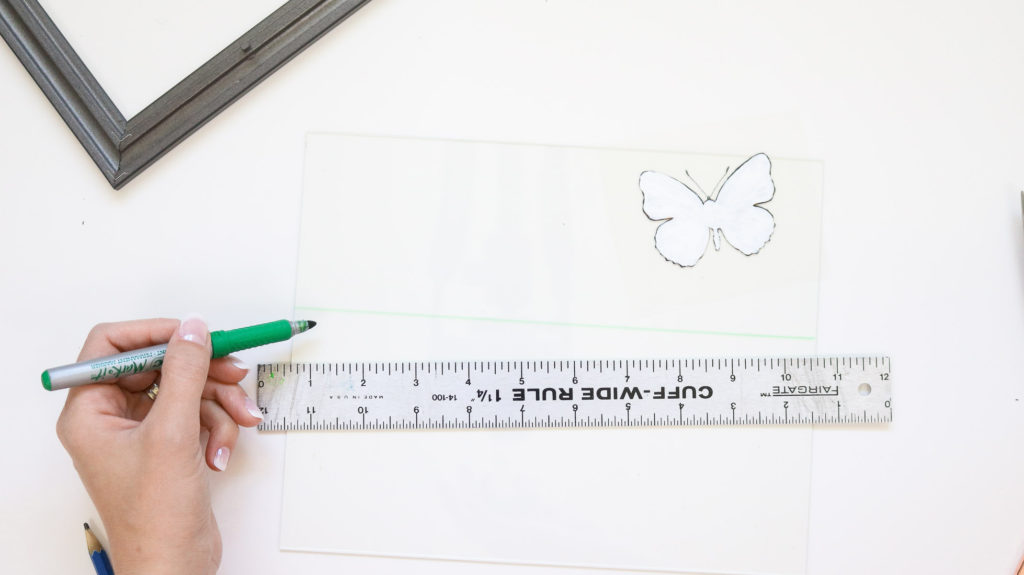
Lay the glass on a flat surface and align your ruler to the line. Than use your glass cutter and with light to medium pressure run the glass cutter along the side of your ruler. You should have a scratching sound. Careful not to apply to much pressure as this will cause the glass to crack. If not enough pressure is applied you won’t get a good score line to help break your glass. 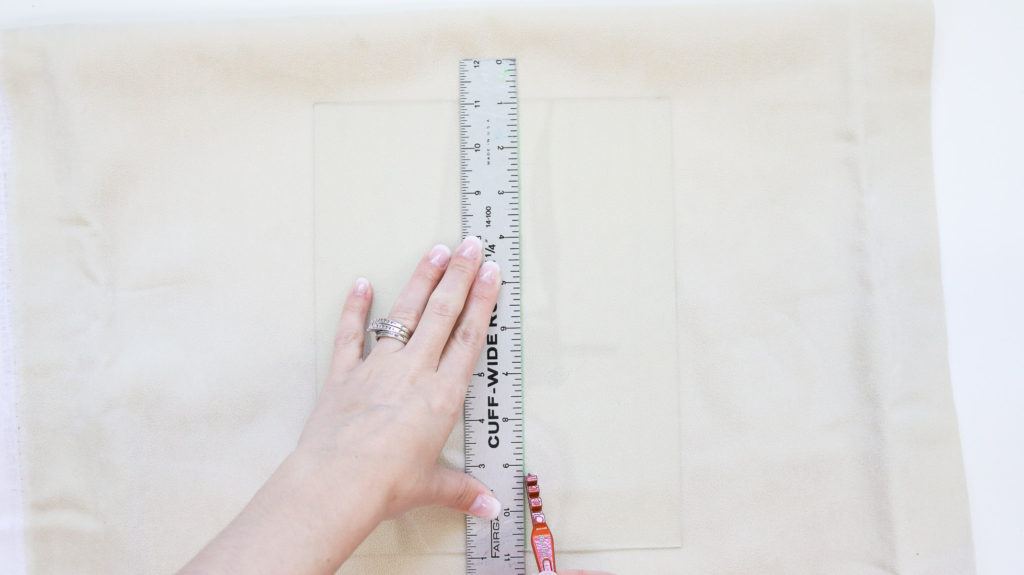
Breaking the glass!
Okay now you’ll need something with a clean edges to help break your glass.
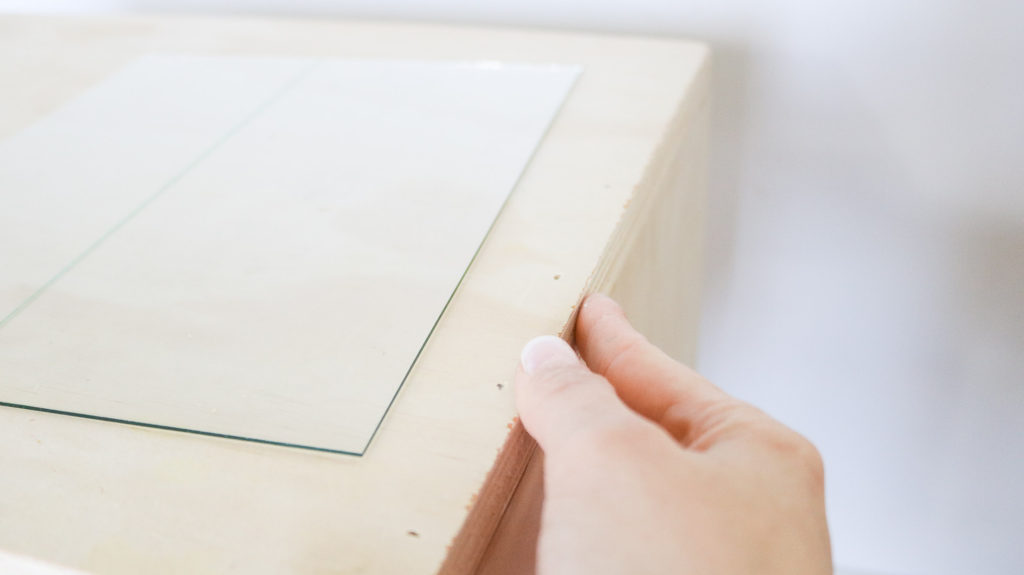
Align your scored line with the edge of the table.
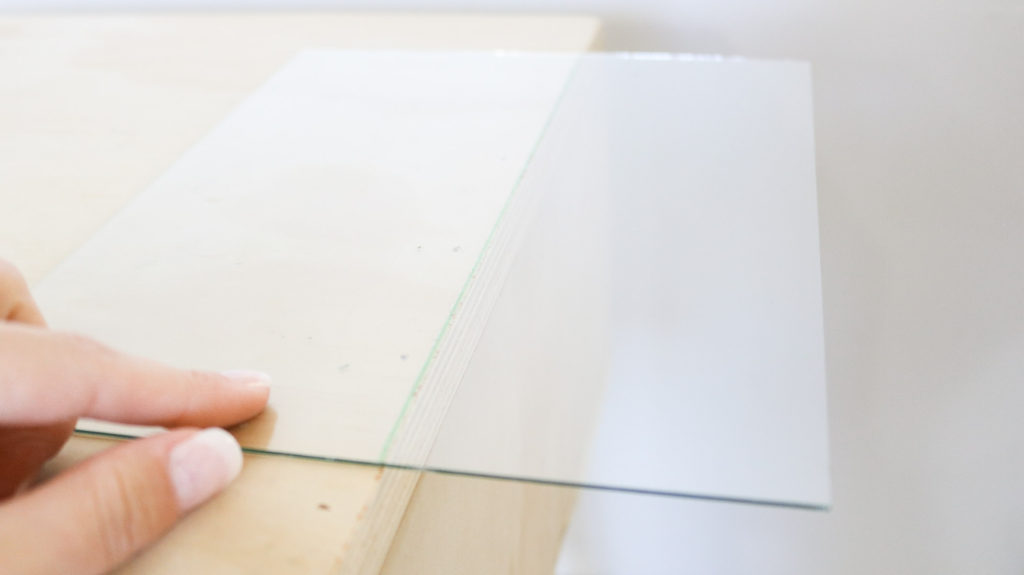
Than to break it, hold down the glass that’s on your table firmly and with your other hand quickly snap the glass that’s hanging off your table in a downwards position. You should get a clean break. This took me a few tries but, once I got a hang of it, 😁I gotta say it’s actually really easy. Also remember the thicker the glass the harder it’ll be to break. That’s why I love using the glass from dollar store frames because it’s pretty thin.
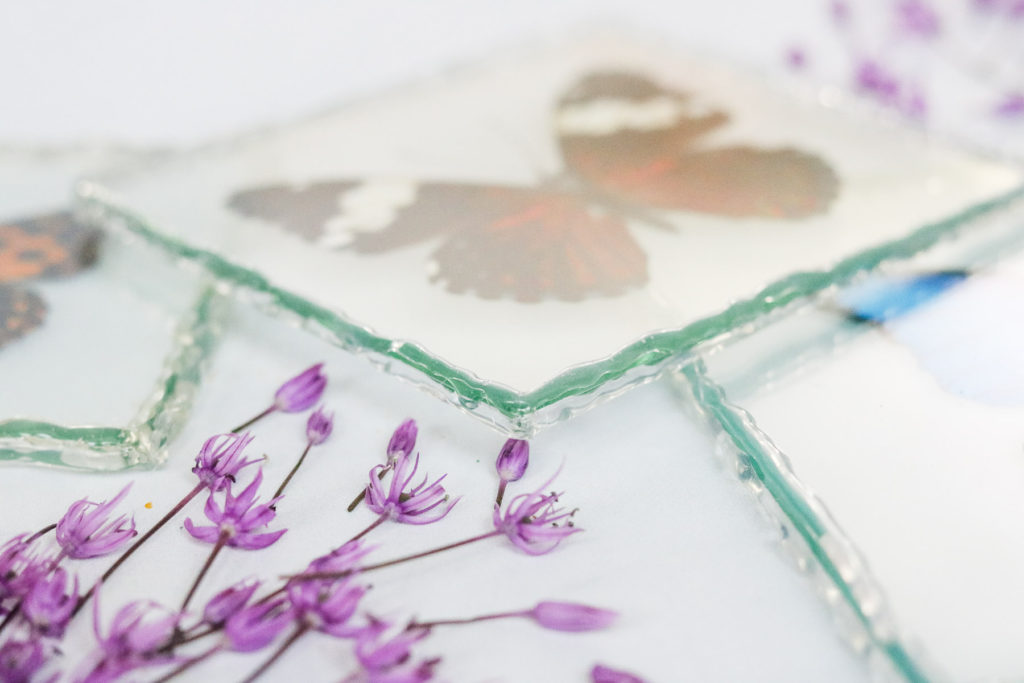
Follow the same steps to break even squares of glass for your butterflies. I love that you can make your glass frames any size to fit your butterfly.
How to frame your Butterfly!
Oh man can I just say this was the hardest part for me. I tried my hand at soldering three times and failed. I really wanted to have soldered edges on the glass but, I guess it wasn’t meant to be. Maybe I wasn’t using the right tools. I used whatever my hubby had in his toolbox and it’s not a very comfy setup. Someday I’ll have to get the right tools and give it a go again.
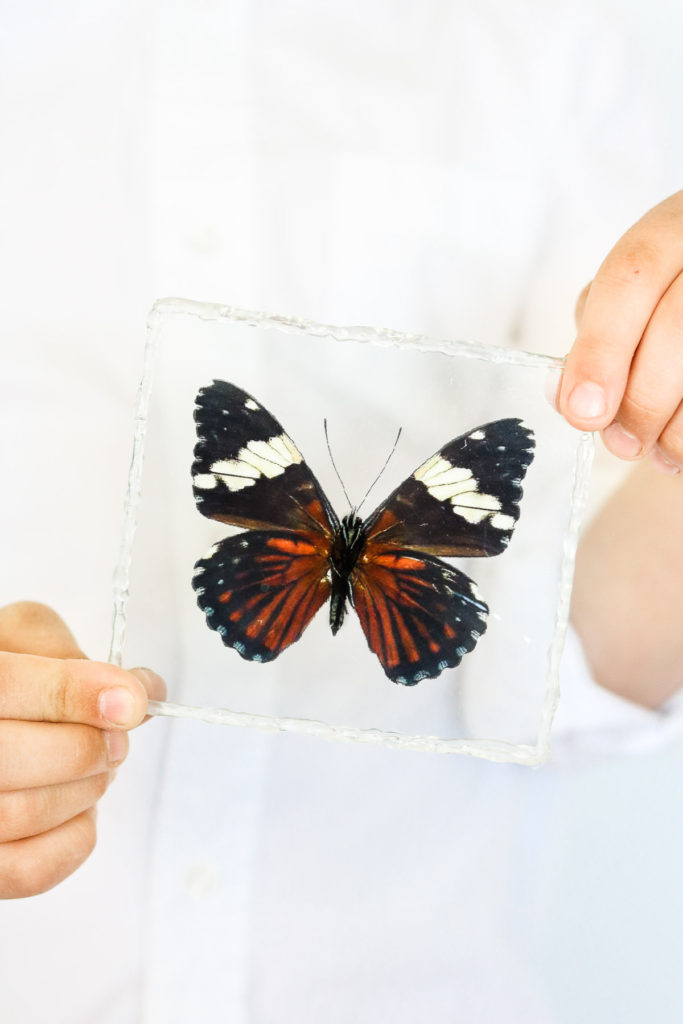
Start by laying your butterfly between two sheets of glass. Then take your framed butterfly and squeeze it between two books or some bricks. This helps hold it really still while you glue the edges. Than apply a dab of hot glue to all four corners. 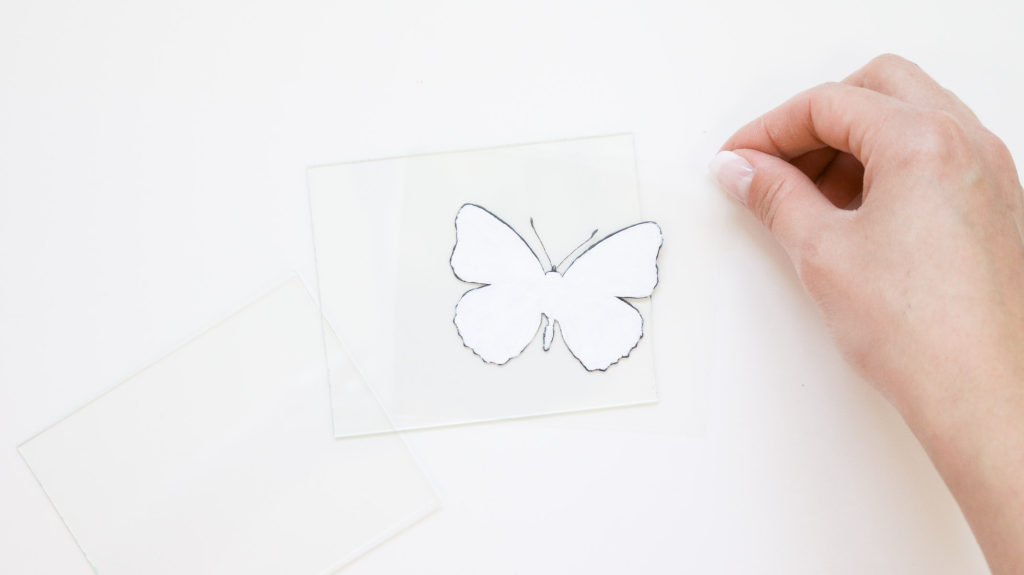

Remove the framed butterfly and apply a strip of glue all along the top edge of your butterfly frame. Once it sets flip it over and do the same to the back. Then to finish it off lean it on something again and apply a third strip of glue going along the edges again for added security. 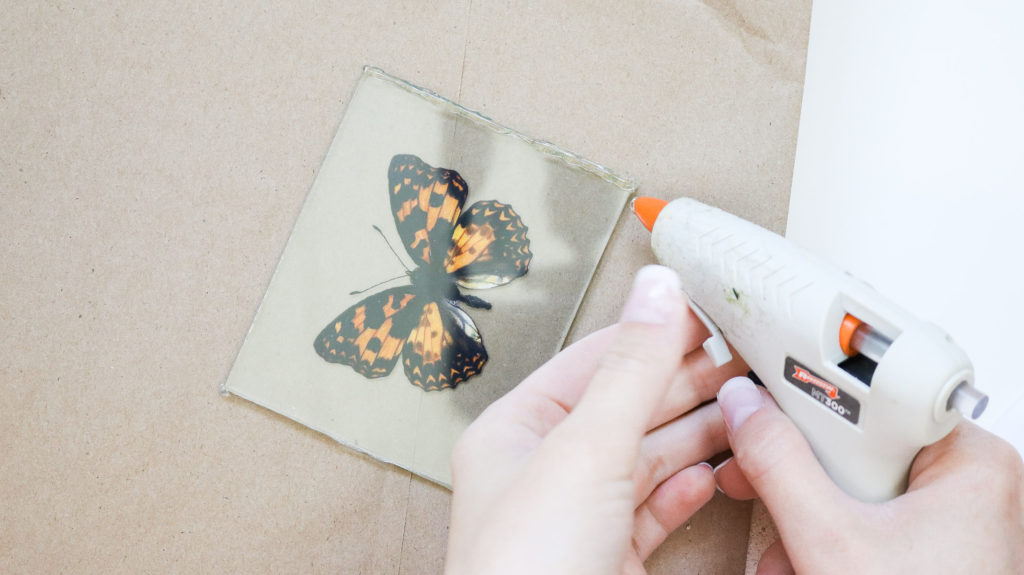

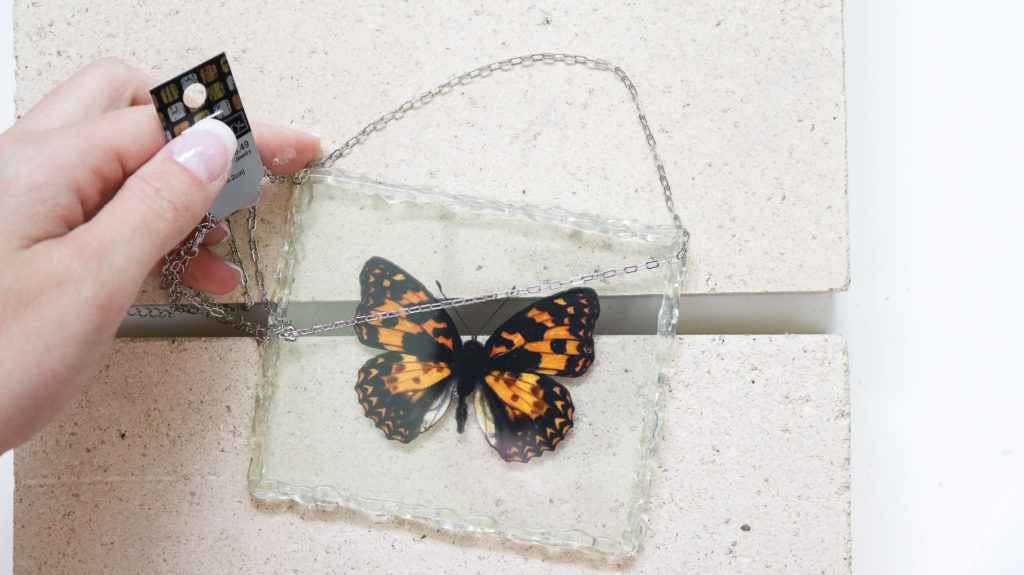
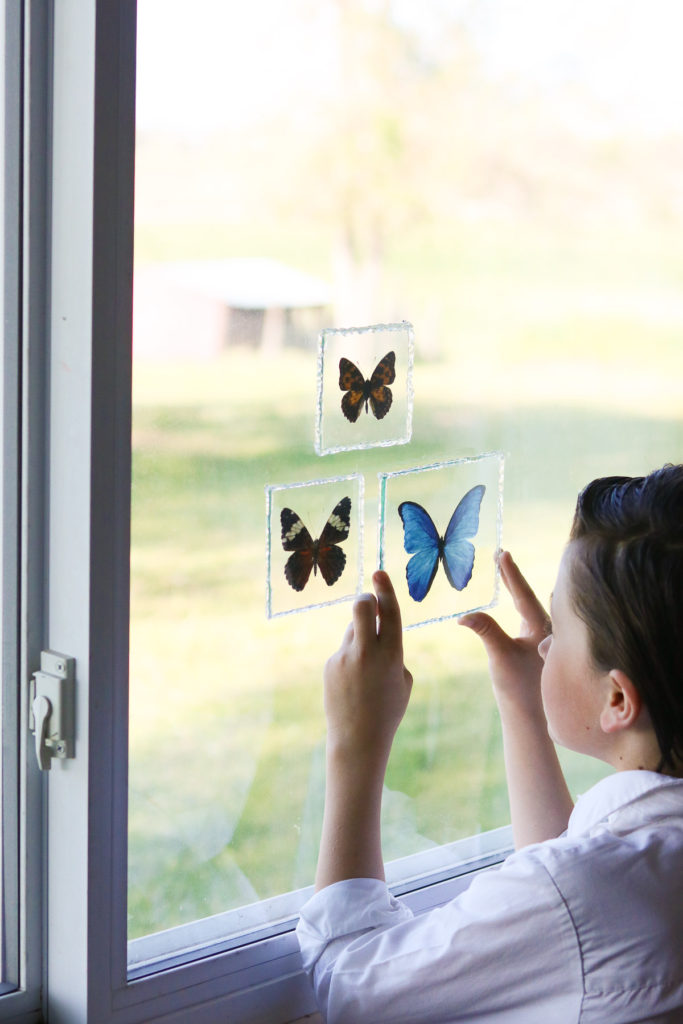
How to hang your butterfly art!
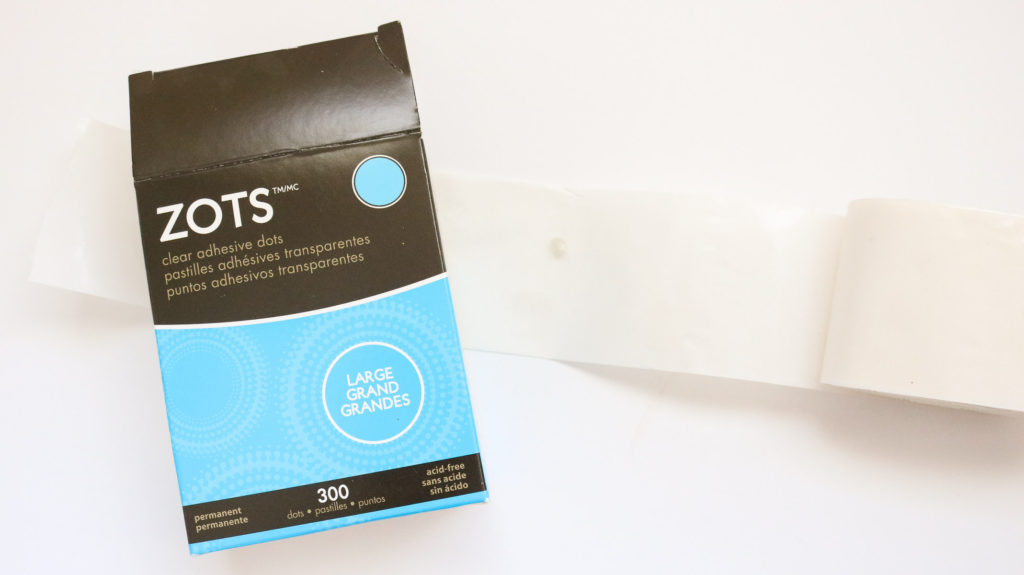
You can hot glue a little chain to the top of you’re butterfly art or if you want something more invisible you can do what we did. We applied zots to all 4 corners on the back and you can hang it on the wall or on a window. 😊 Zots are tiny adhesive dots that can be attached to almost anything.
Here they are on the window!
MORE DIY YOU’LL LOVE :
- PRESSED FLOWER ART IN BEADED HOOPS
- HOW TO PRESS FLOWERS IN THE MICROWAVE — IT ONLY TAKES 3 MINUTES
- HOW TO DRY AND DECORATE WITH CITRUS
- I LOVE YOU MOM FLOWER GIFT
- TURN THAT OLD SUNHAT INTO WALL ART
Here’s a quick video for this Mother’s Day Butterfly Gift!
This butterfly is so pretty! Oh and that smile! How cute!

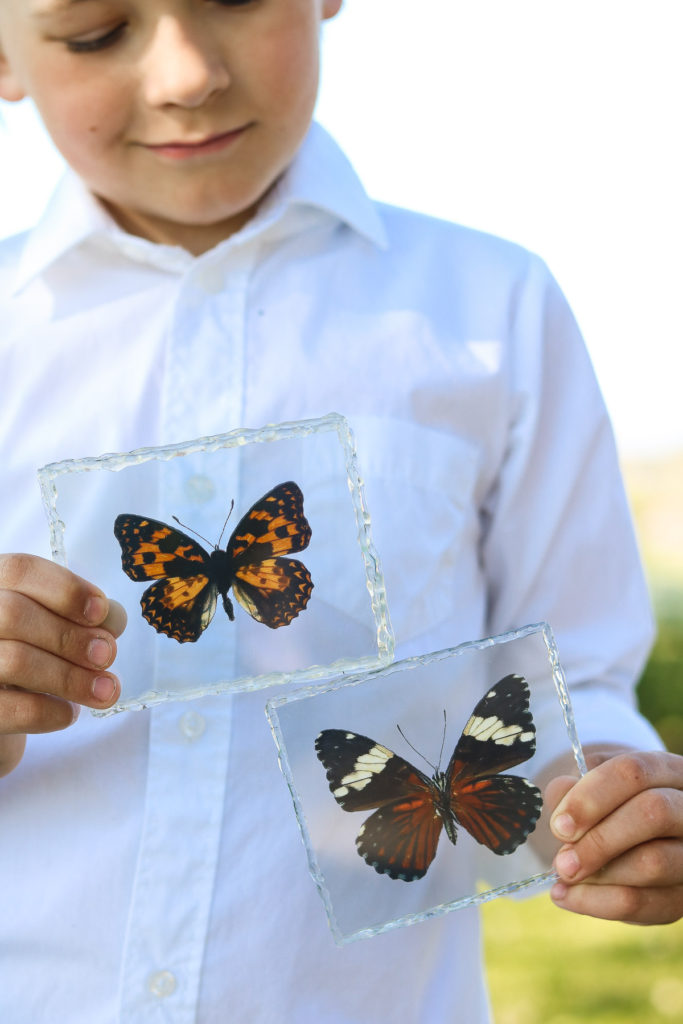
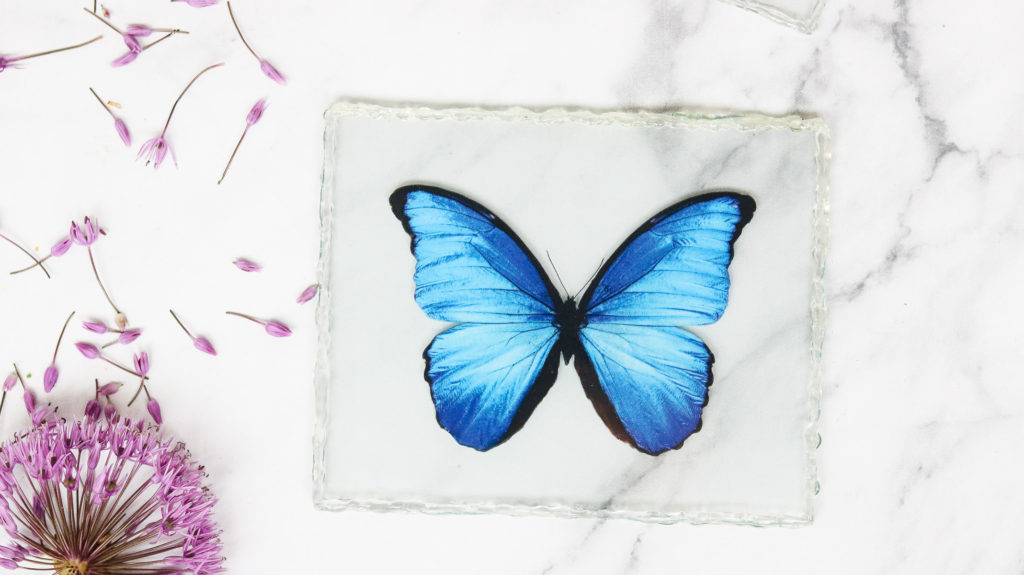
I don’t why but this one looks the most realistic to me. Definitely my favorite of all three butterflies. 😁
That’s it for this Mother’s day butterfly gift! I hope you’re inspired to make your own. They would make lovely gifts for your loved ones. My little nieces were so excited to get one of these! I wasn’t even done with them and they had already called out who’s keeping which one. 😂
I’ll see you all next week! Go make so DIY gifts!
Happy Crafting!
X,
Lily-
I really love this idea , definitely will be trying it, thank you for sharing
Thank you so much Rhonda!! I’m so happy to hear you love this idea!
Where did you get the printables? Were they free?
Hi Ruby, no they weren’t free. It’s been a while but as far as I remember I believe I purchased them on shutterfly. ( stockphoto website)