Easy Wall Decor Idea
All In White
I don’t know what has gotten into me! Maybe, it’s the New Year giving me a kick or maybe, I’m just finally maturing. HAHA! I want everything very clean and simple in my home and by clean I mean white as far as the eye can see . That’s good though!! RIGHT?! Honestly I’m a bit surprised myself. My styling has changed dramatically. I don’t make as many trips to thrift stores anymore, and that’s not because I’m to cool for them HEHE 😀 😀 but, because I can never find that one specific thing. It gets frustrating when you know exactly what you want and there’s a fat chance you’ll find it at the first thrift store you drop by. I’ve been focusing on using coupons at craft stores which has been working out quite well.
Gosh it feels like I haven’t posted in ages and its refreshing to be writing again. I’m sorry my awesome loyal readers. I’ve been a bit mia lately. Christmas and new years got a bit hectic. I’ve been a busy bee making everything white. I went out to Lowe’s and got a bucket of white paint. Well, we all know what happened following that. 😀 😀
Large Wall Ideas
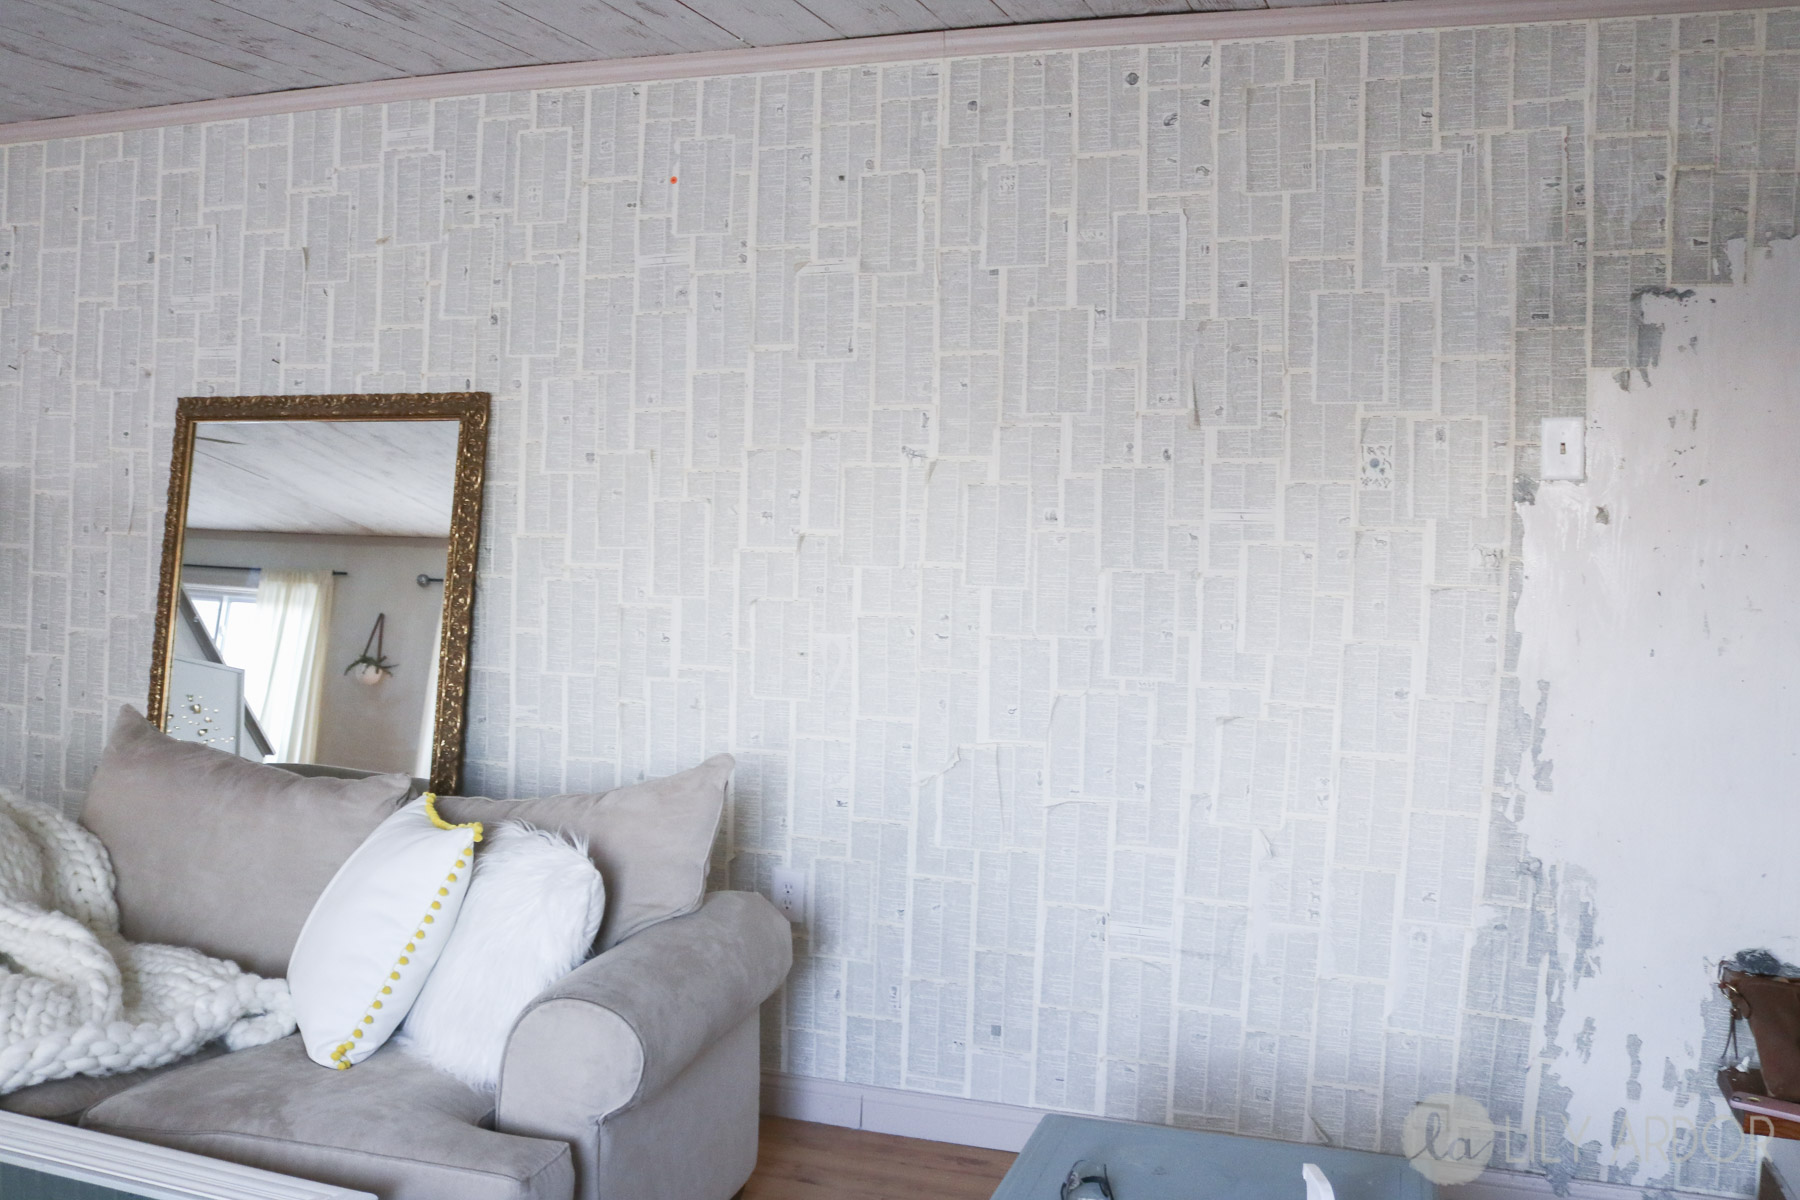
If you’ve been following along you’ve probably noticed my book page wallpaper somewhere on my blog. Here’s a photo of my big living room wall (above). I just started removing the wallpaper on the right of the photo.
Since my living room looks like a long hallway a few years back I decided to create a distraction from the lengthy space and the book page wall was born. I’ll be honest at first I was absolutely in love but, it wasn’t the clean I’m looking for in 2018.
Before I went into crazy white mode I thought how bad would it be If I embraced the hallway living room instead of creating distractions thus making more clutter. That’s when I realized my walls aren’t exactly white. When we moved into this home I never really noticed but, the paint on the walls must be cheap quality. My walls browned over the years and look like someone rubbed mud all over the walls. HAHA Mud that I can’t remove!! When I finished removing the wallpaper I was freaked out a bit. There’s was alota naked going on! 😀 😀 HAHA.
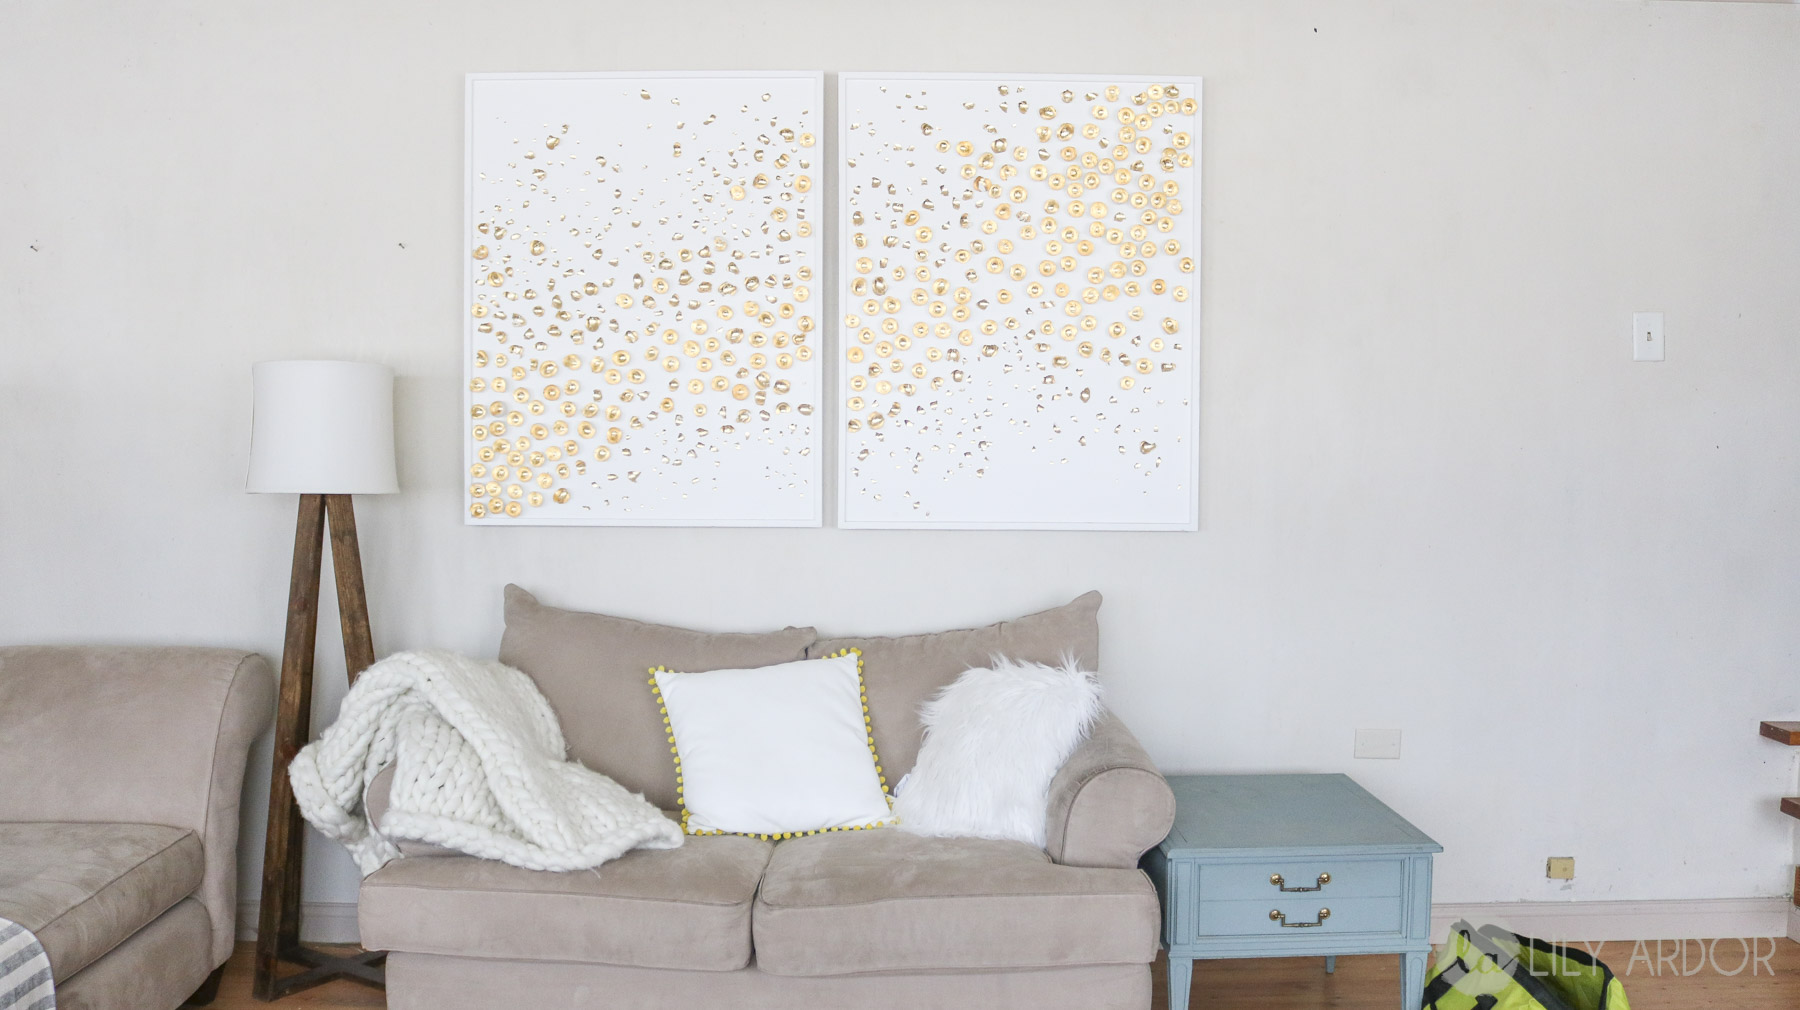
Here’s a photo to show you how not white my walls were especially with that crisp white art on it. HAHA Gosh they almost look gray in here. Yes I could have painted my walls white, upgraded the frame on this art and left it be…but, same goes with this art. Not the clean I’m looking for. Too much going on for me. 😀 😀
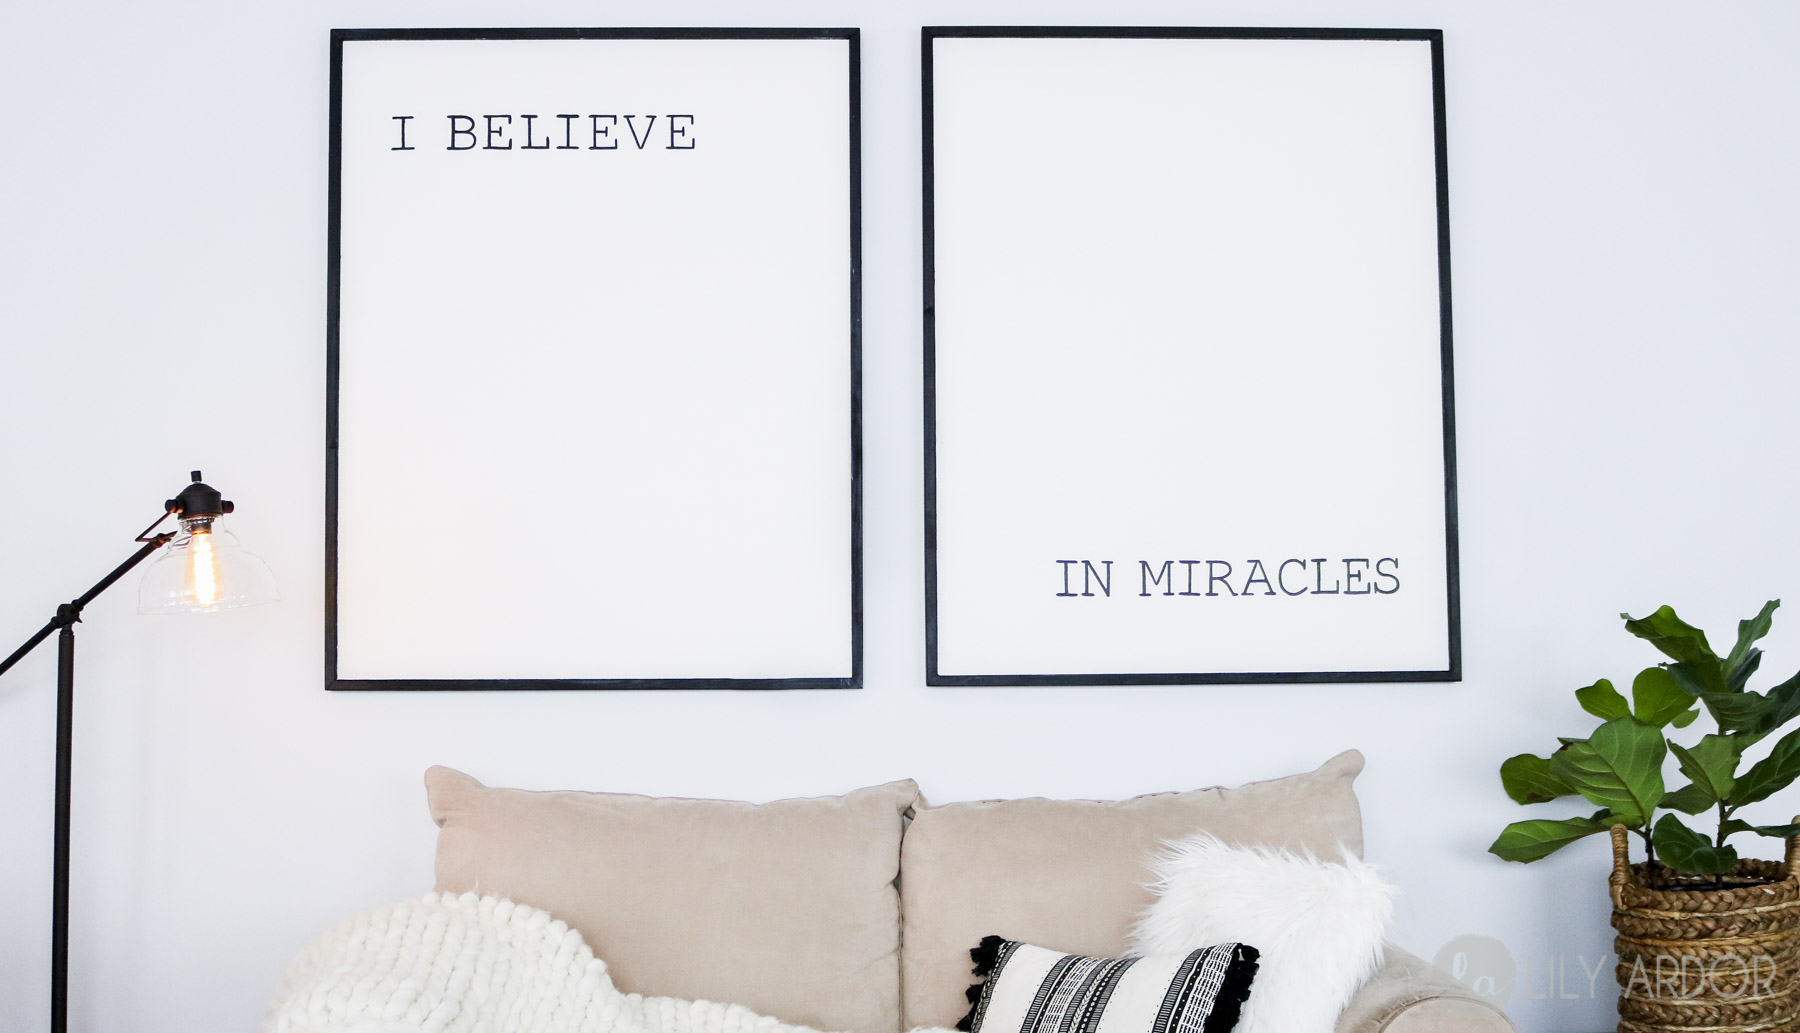
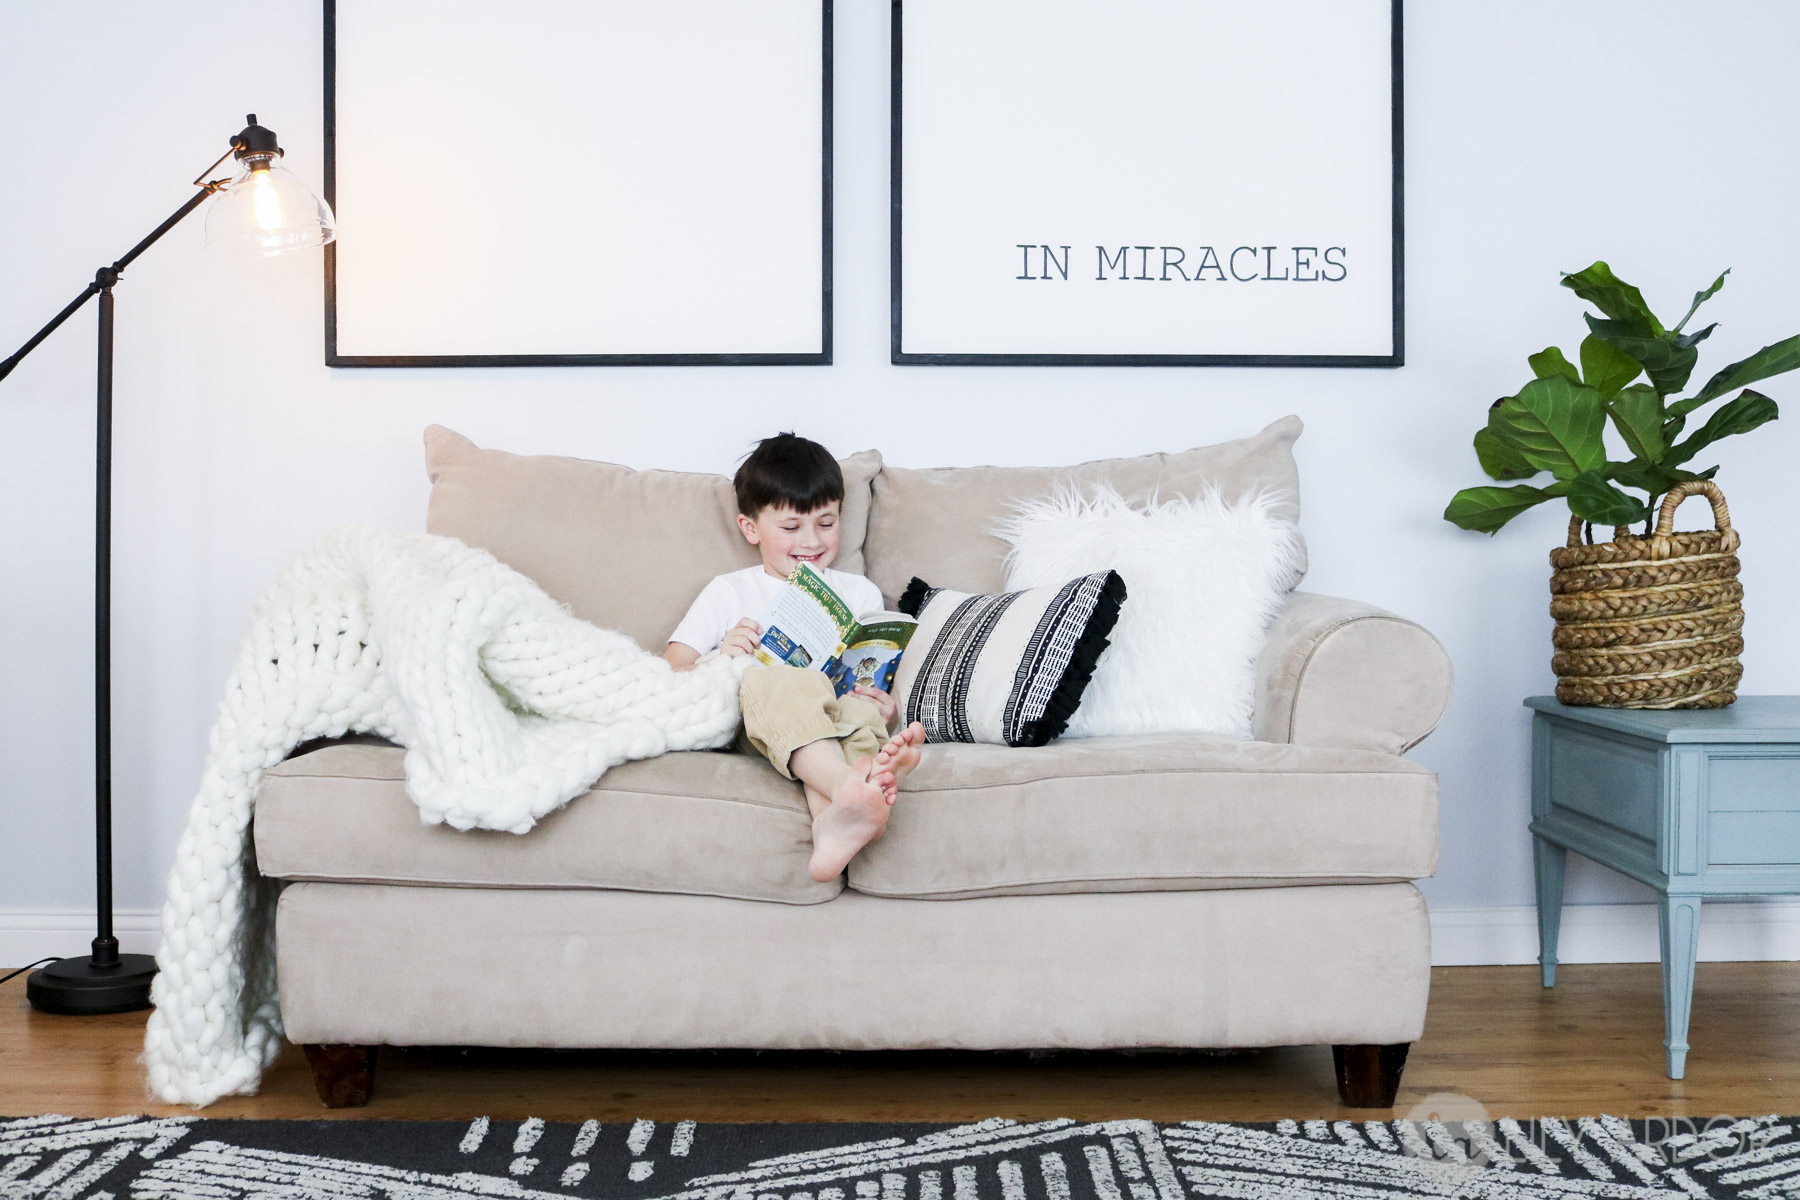
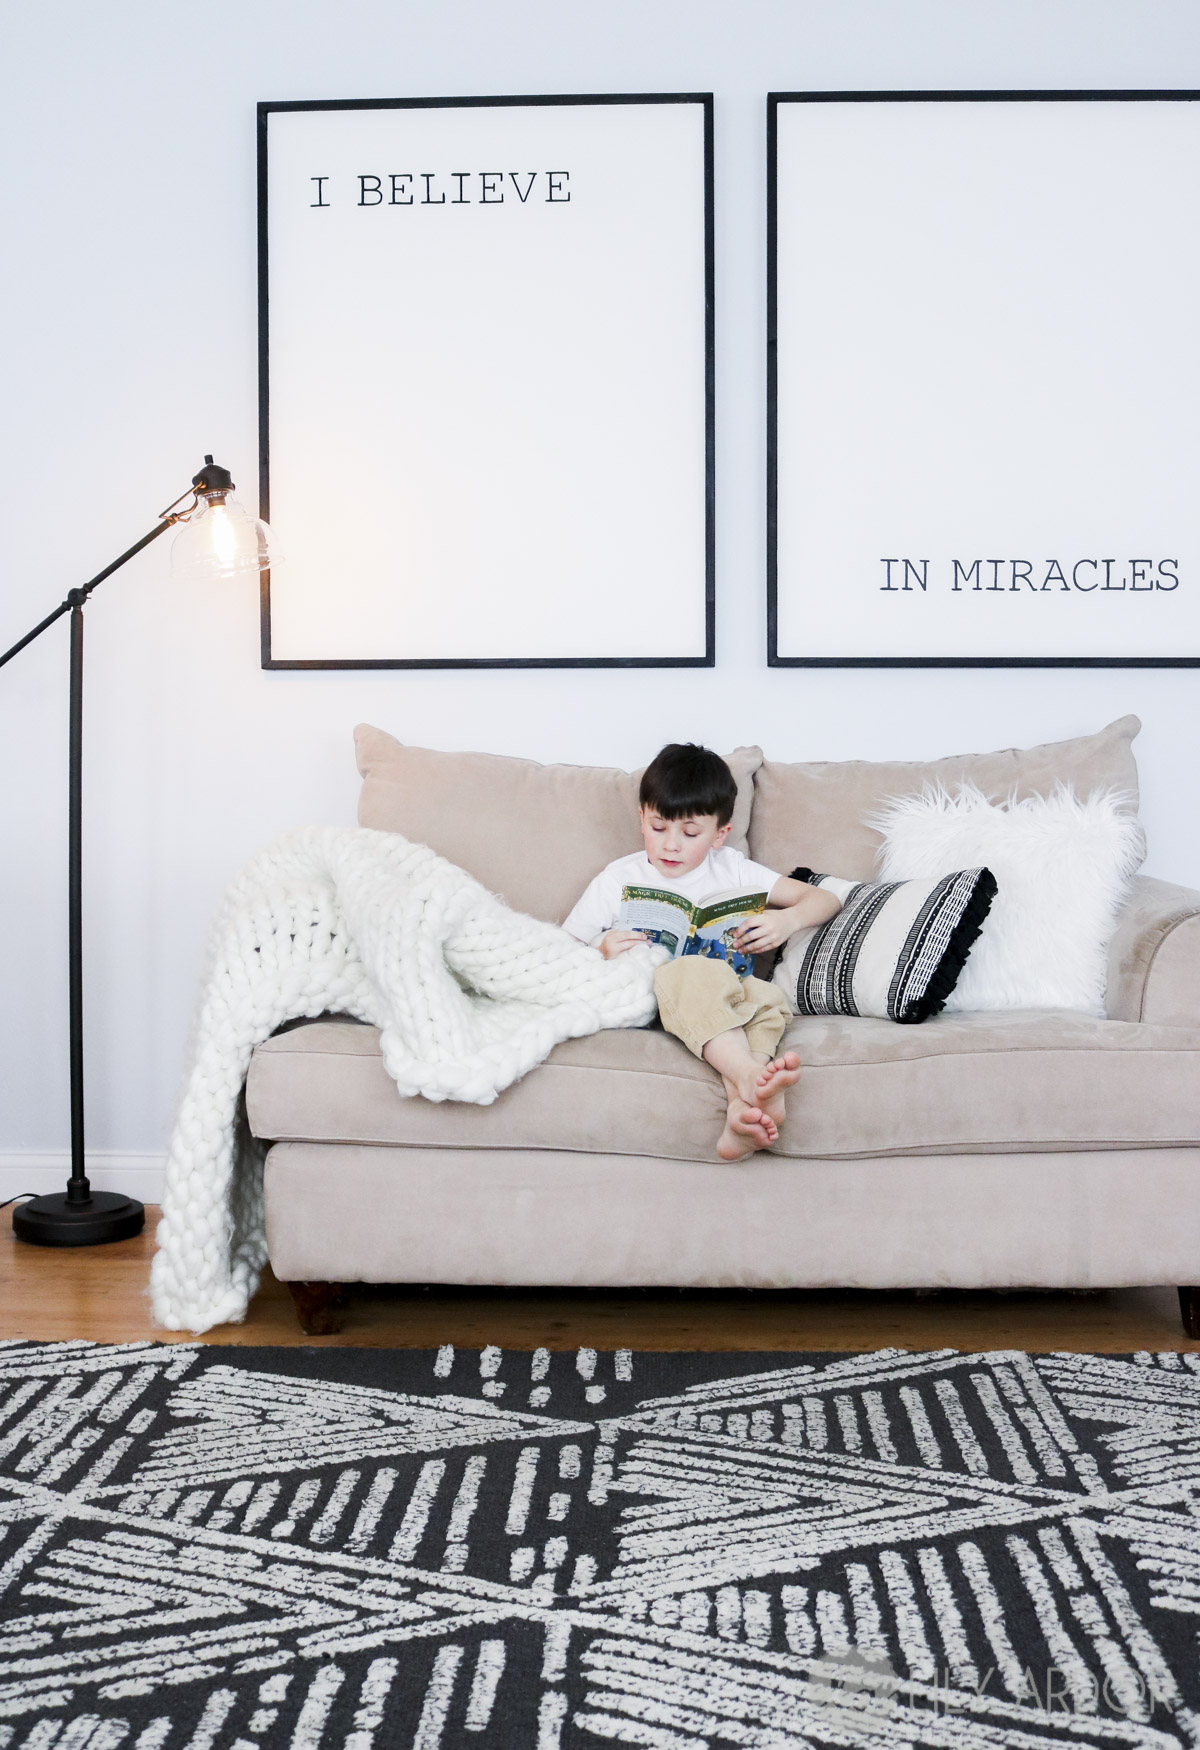
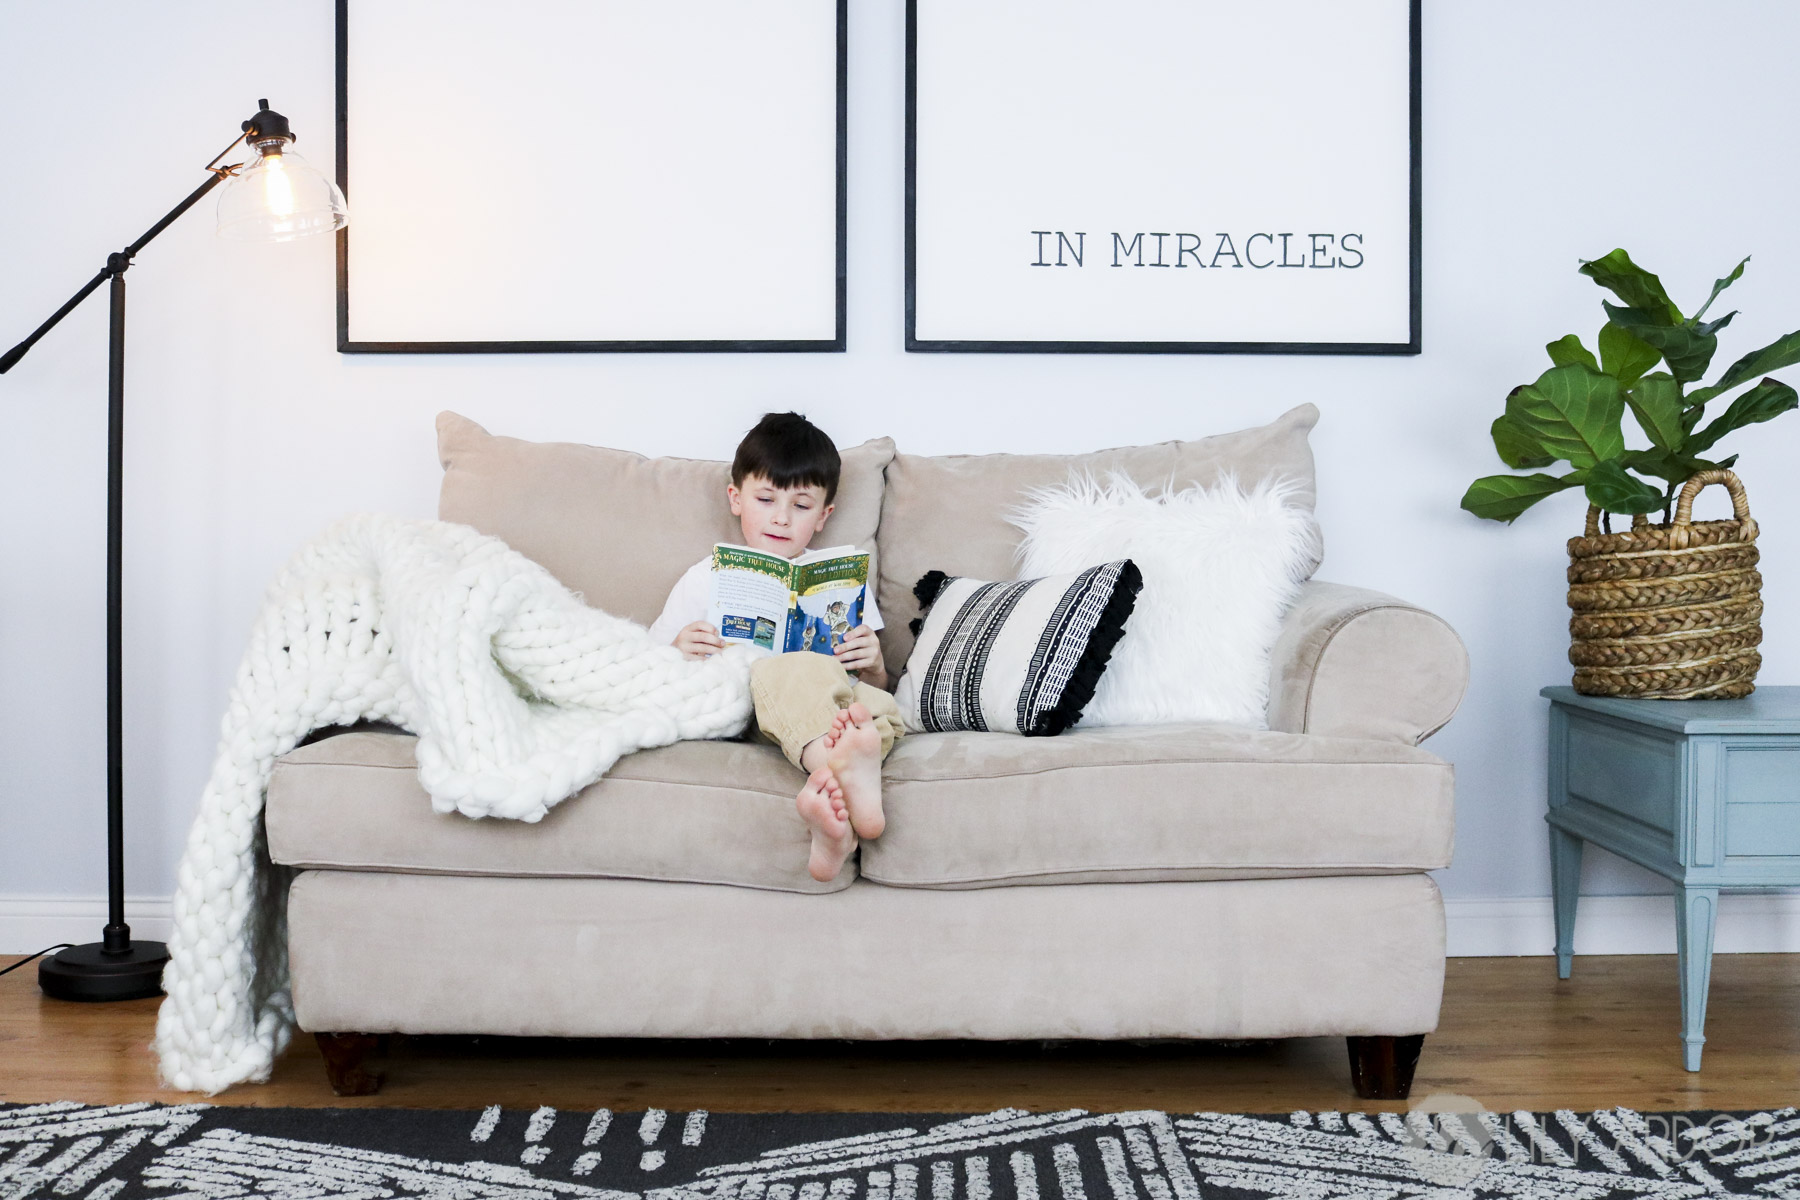
Behind this Quote
I’ve wanted art like this for at least a good year. Only prob was it was all over priced and they all had the same quote. ” Be Still, My Soul” . Don’t get me wrong I love that quote, but I wanted something that would connect with me on a personal level. When I picked out ” I believe in miracles ” I didn’t realize how much of a connection I had until I was done with the art. LOL. Yes That’s how weird I am and don’t think things through. I just thought it’s a quote I would like to look at and remind myself that miracles happen everyday.
Why I believe in Miracles
I got married early on. 16 to be exact. Crazy right! We had our little guy when I was 18 and, it hit me like a rock. I wasn’t ready and for the first 4 months of my pregnancy I cried my eyes out because, I was so scared to be a mom. My hubby took it pretty hard too. We were not financially stable and I worked at Mcdonalds for the first 3 months of my pregnancy. Well that was until I was puking more then working. Not exactly a job any pregnant women wants but, I did what I had to do. Years flew by and we couldn’t seem to get on our feet financially. Gosh I probably shouldn’t get into too much detail but, here’s why I believe in miracles.
Prayer Works
For years I prayed for God to change my husband because, he wasn’t that same happy guy I knew when we met. When nothing seemed to change over the years I started praying for God to change me and guess what, still nothing changed.
4 years into my marriage on got onto my knees and out of frustration and exhaustion I cried out to God and said, “God I don’t know what to pray for anymore, I need a miracle!!” For a long period of time that’s all I prayed for. Shortly after we had some pretty dramatic turn of events. I’m not going to lie. We hit rock bottom, HAHA and here it is I thought I was at rock bottom all those years. God never gives you more then you can handle and that’s exactly what he did. I’ve learned you need to fall before you can get back up.
After years of pilled up fear, worry, and, frustration one day my husband woke up a changed person. It was like he woke up to a whole new world and he’s been the happiest sweetest dude on earth ever since!! Who knows, 😉 maybe it was me who changed.. LOL All in all that is why I believe in miracles. It might not seem like a big thing but, this was my whole world and I can’t Thank God enough. He has truly blessed us.
Well than, now that you know my life summed up in a paragraph. 😀 😀 What about you? What’s your story?
I love this quote. It’s a great reminder of what has happened and what happens everyday. It’s the little things that matter right?! 😀 What’s you favorite quote and why?
Okay than let’s make this art!! 😀 😀
Here’s a quick video for you to enjoy.
What you’ll need
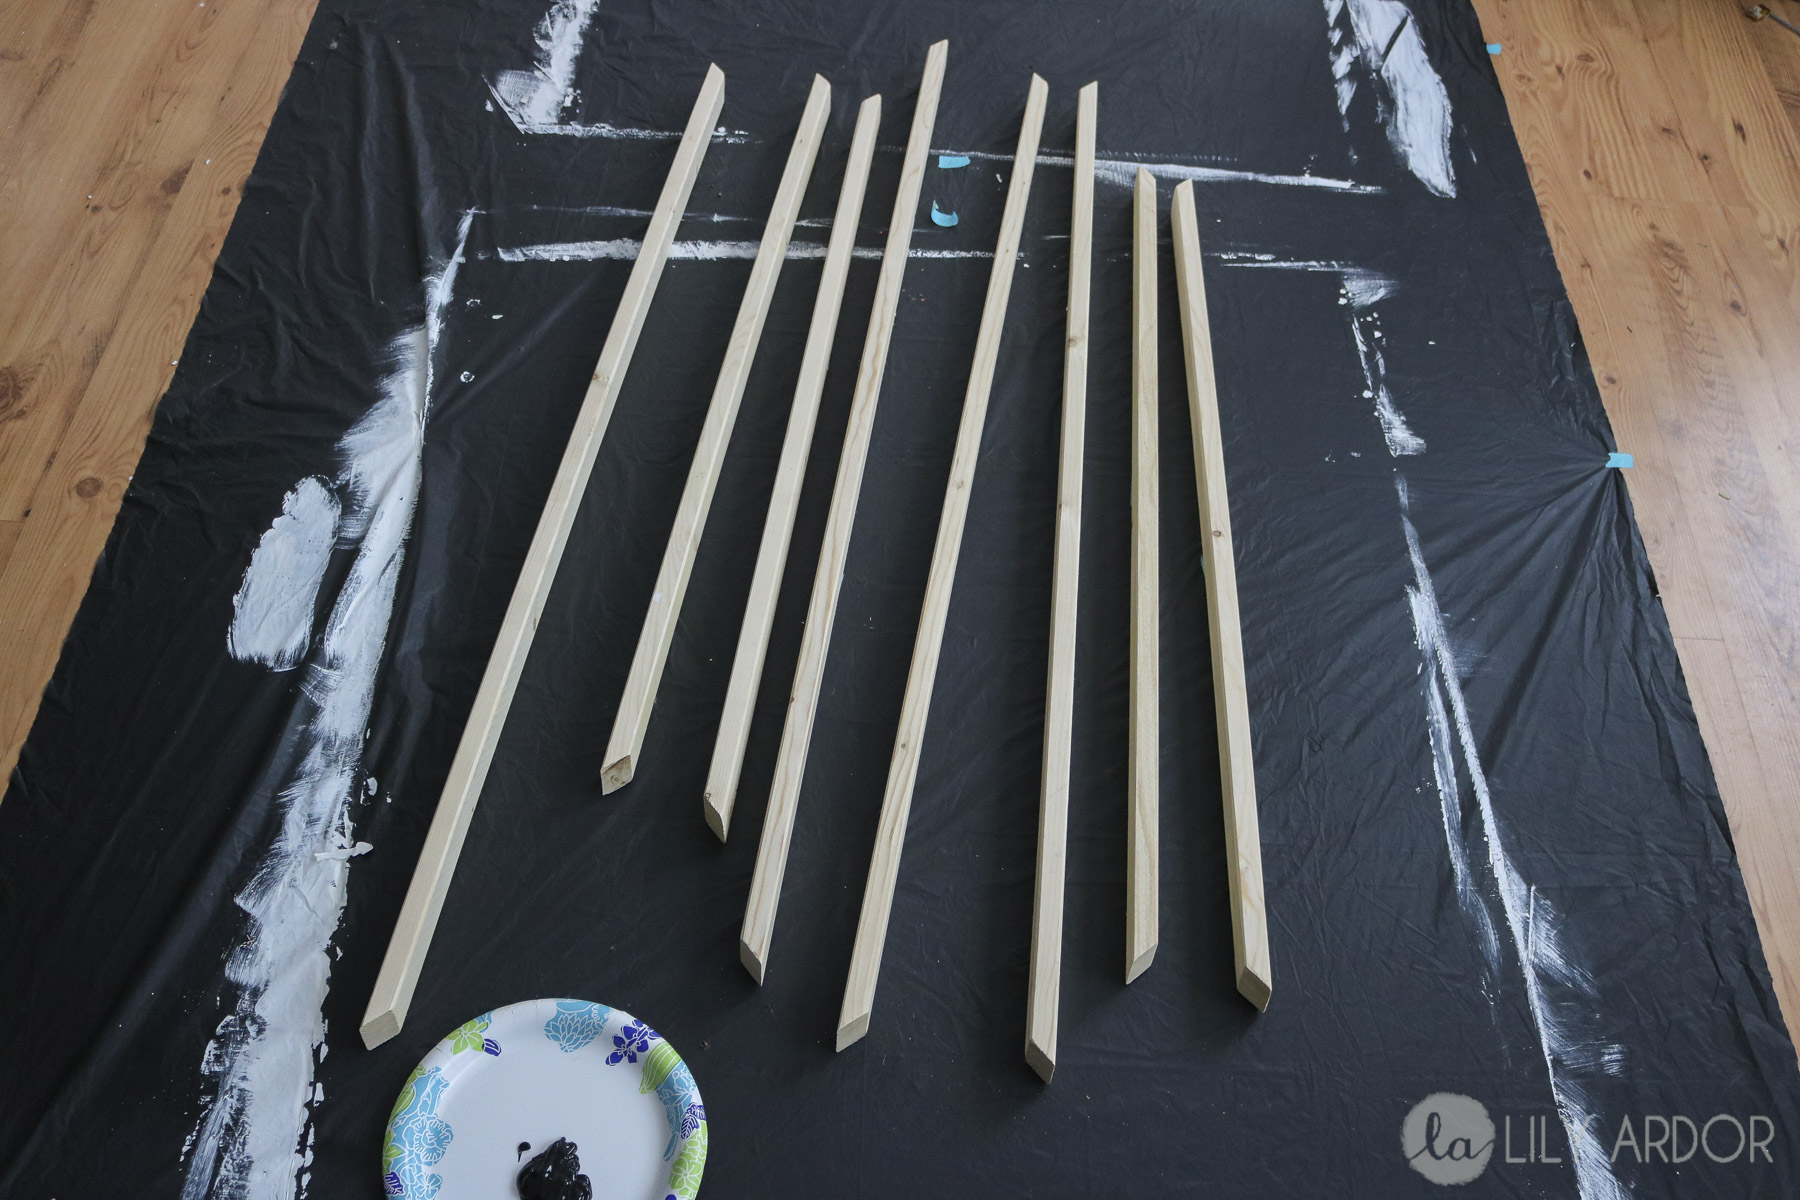
- Four common wood of 1″x2″ x 8 foot (for the frame)
- Four 1″x3″ x 8 foot (for the beams)
- Thinnest plywood (Cut to size at lowes. There’s a few reasons I get my wood cut to size. #1 It fits in my car 😀 😀 #2 Cut’s the work in half #3 If you don’t have the right tools this will save you!
- Brad nailer or nails and hammer
- Paint (or stain)
- Brushes
- masking tape
- Miter saw (they sell hand cutting tool if you don’t have one)
- Pen
- Charcoal ,pencil or pastel. (for tracing the qoute)
Cost and Size
This total cost for both panels of art was under $25. I only had to purchase the wood. The plywood was $15 and the common wood was under $2 a piece. I picked the common wood out of a crooked pile of wood. This have straight ones picked out the usually cost around $3-$4 each but, the crooked ones are a bit cheaper. If you look you could probably find a few straight ones.
My panels were cut to 35″ by 44″ each. Then the frame was cut to fit.
Instructions
This art took me a good day to make. So it’s not crazy hard to do just a bit time consuming. I started off with cutting all my 45 degrees angle from the 1×2 to fit the panels
TIP: To get the perfect sizing I lay my plywood panels out on the ground. Then measured and cut the frame pieces. To make sure they were exact I used masking tape to hold frame pieces tightly around each panel. To cut my wood I used a miter saw and set it on 45 degrees to make each cut. Easy peasy!!
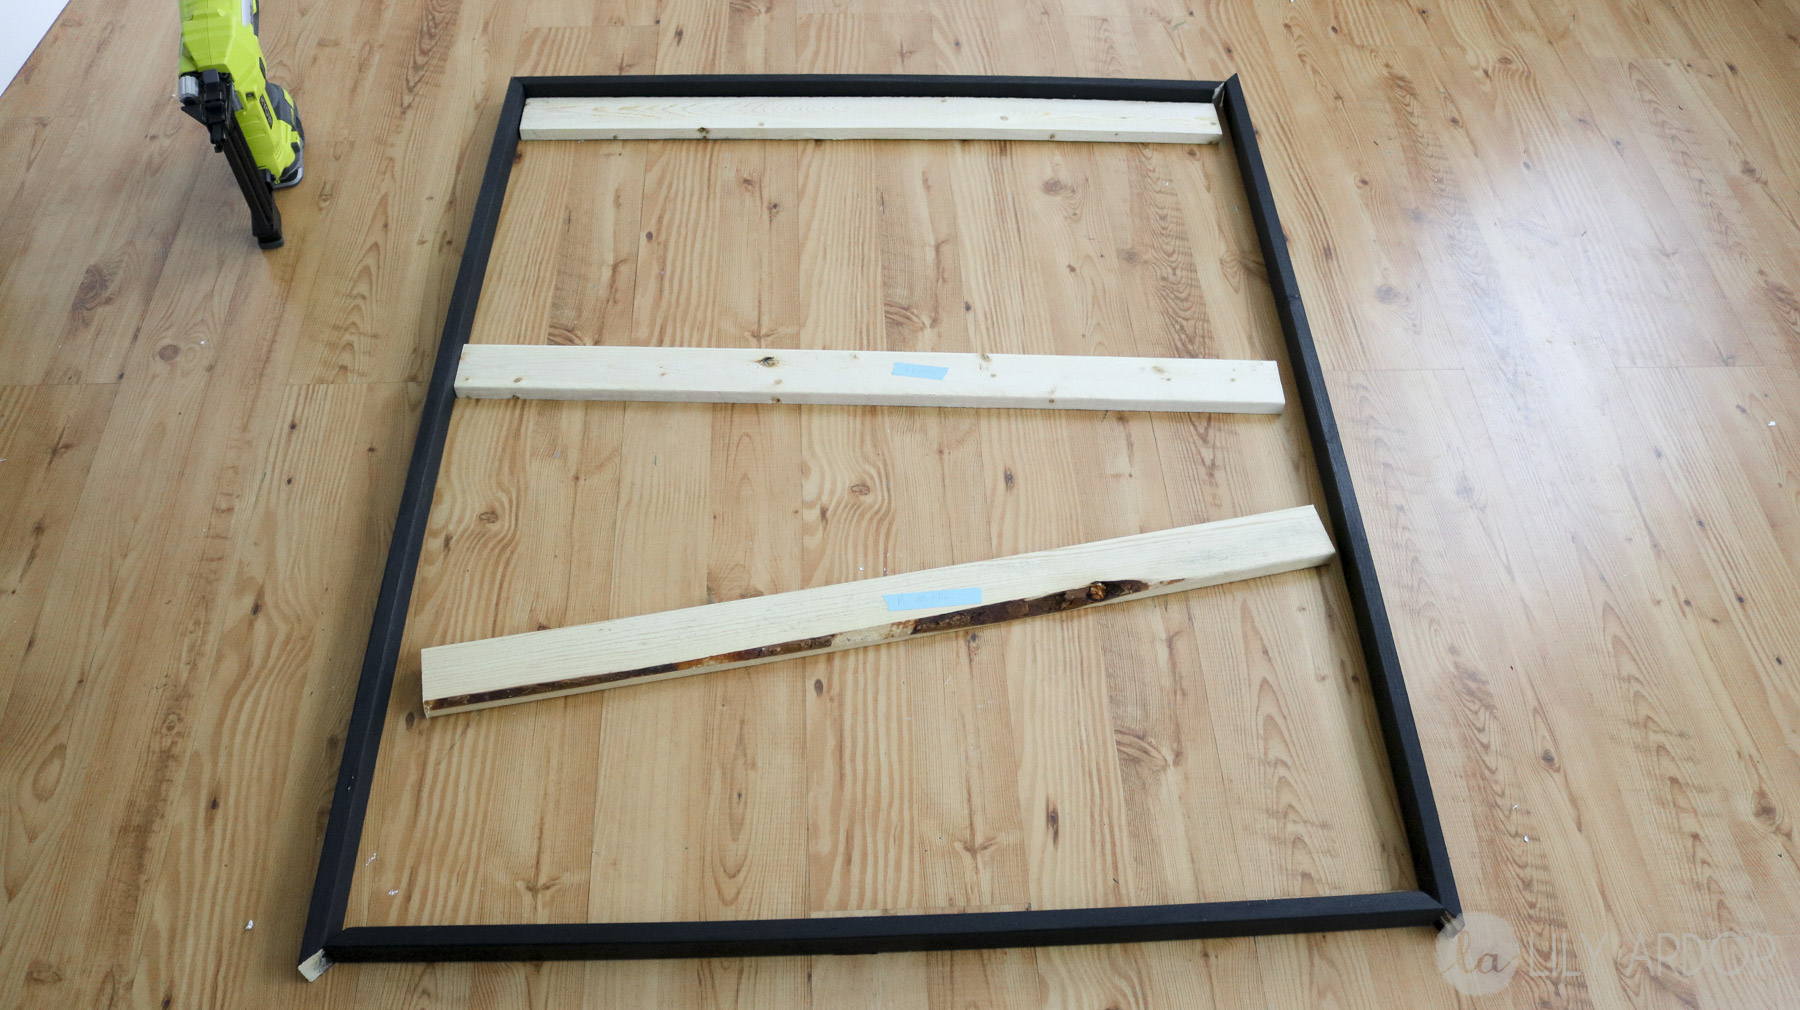
Here are all my frame pieces prepped to get painted black. (photo below)
Once they were all dry. We lay them out. Used some tape and our brad nailer to secure the frame together. Then we added three beams across (below) to attach the panels too.
Why we added beams? So the panels have a backing and since the panels are thin plywood it wood even out once we nailed the panels to the beams.
PS. Upon attaching the center beam we noticed that I had to cut it to short. So we ended up cutting it in half and just adding to small pieces to the sides of the frame on the inside. I just needed the panel to have something to sit on , although I’m sure if the beam went across the center of the frame it would have probably been stronger. (if you’re confused watch my video)
Adding Panels
I painted my panels and went on to inserting them into the frame. There is a reason I went with the thinnest plywood. It actually made this process a lot easier. To insert our panels into the ready frame we bend the panels slightly and, they fit right into place. I was thinking whether we should built the frame right around the panels but in the end of all my thinking!!! HAHA This way seemed to be the easiest because, the panels had to lay evenly in the frame and with the beams giving it the right support behind, everything just fit right into place.
Finishing touches
To add my quote. I printed big letters onto regular printer paper in a few different sizes. Then I cut between the letters to adjust spacing. Following that I taped the quote to the frame to see which size looked best. Once we decided on one I flipped the paper face down and scribbled the back side with a pastel. You can use charcoal or a pencil as well. A pencil would take forever and I had a pastel on hand so that’s why I used a pastel. This might even work with a crayon. Do a test patch to see. Following that I lay my letters onto the canvas and traced each letter with a pen.
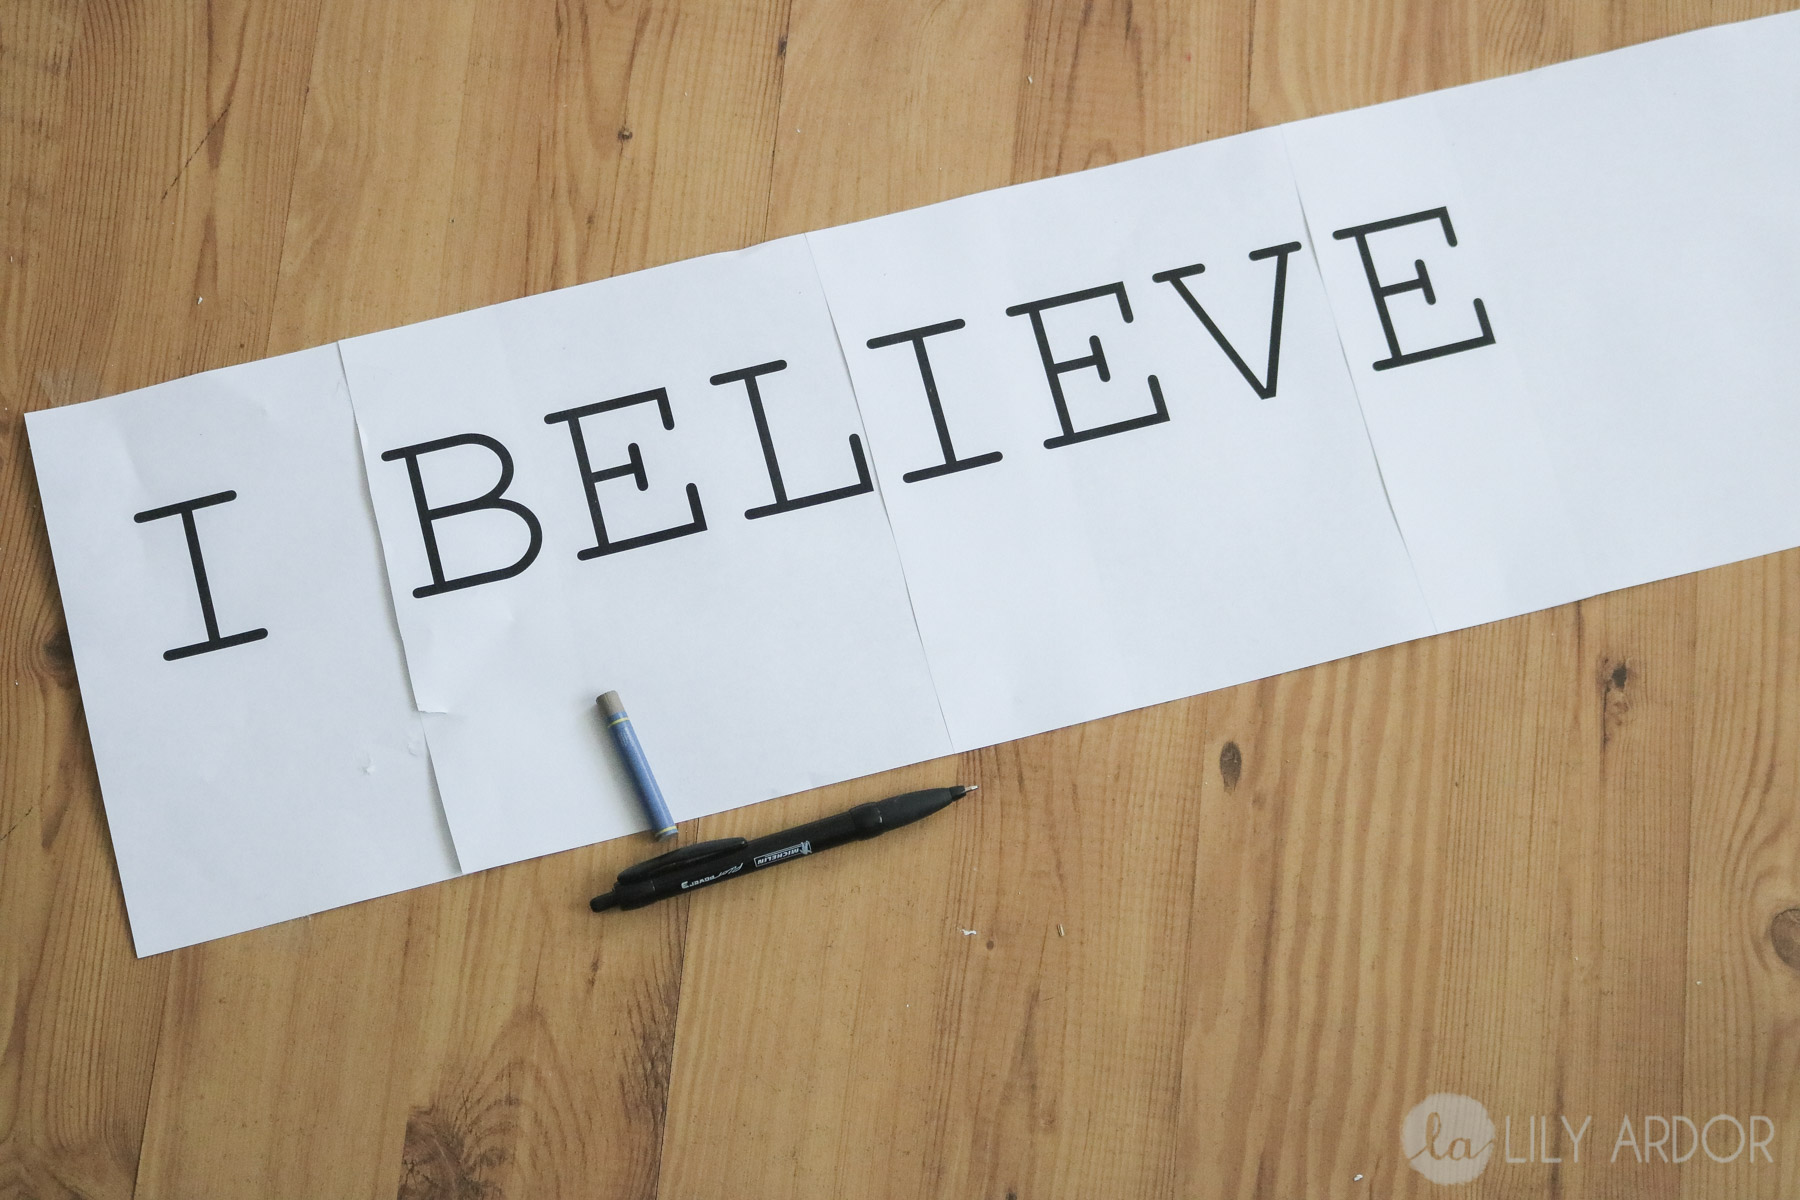
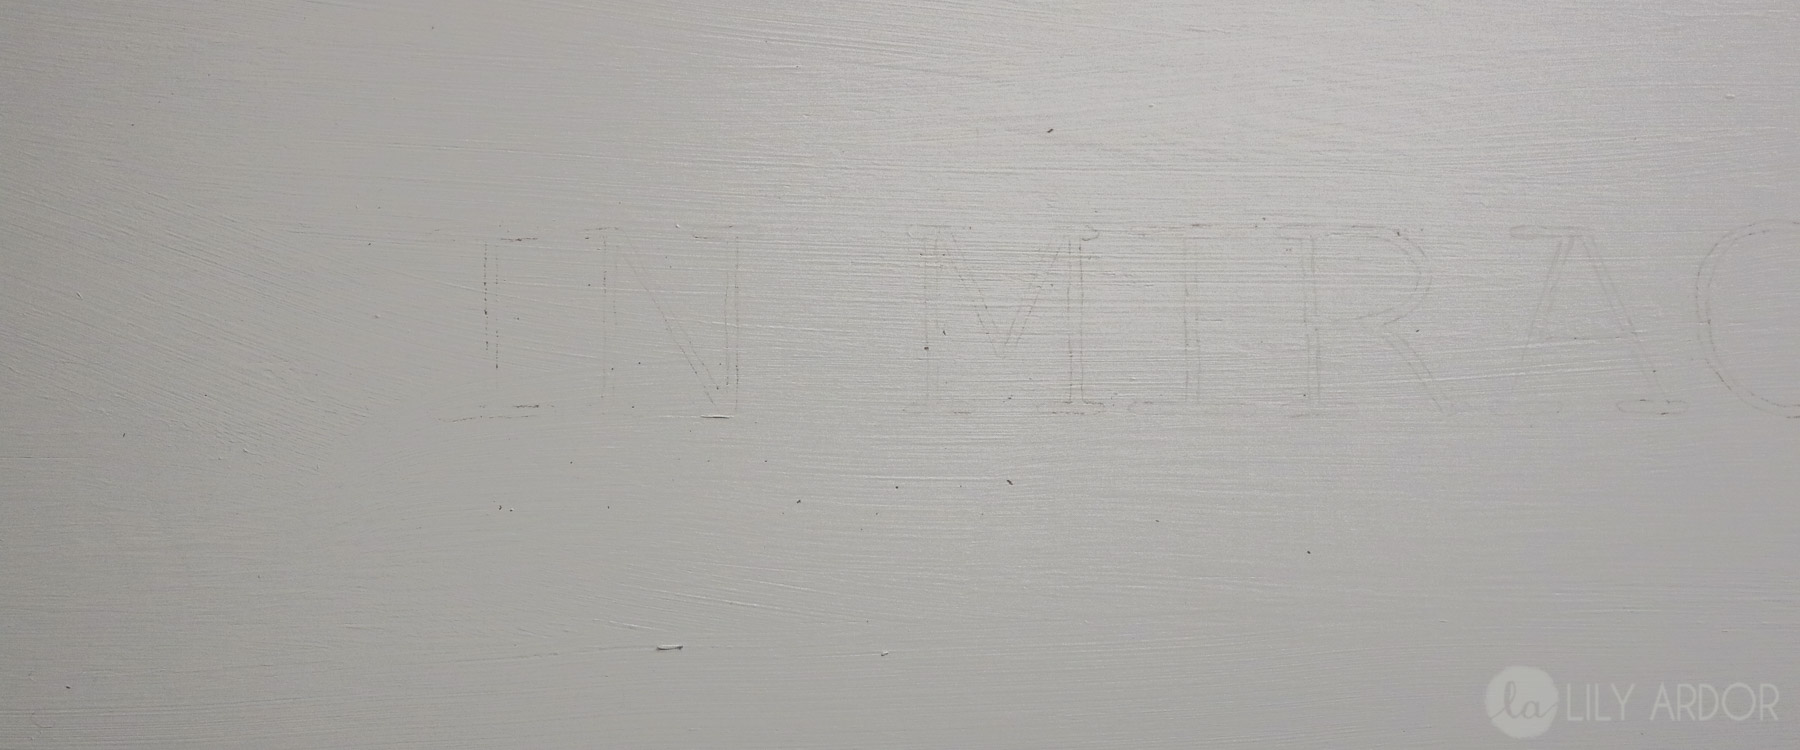
It might be hard to spot. Plus I didn’t use a black pastel to scribble the back side, but if you look close at the photo below you’ll notice the imprint of my letters. That’s how it should look. To finish off your art color in your letters with a sharpie or a thin brush and paint. I used paint. 😀 That’s it!
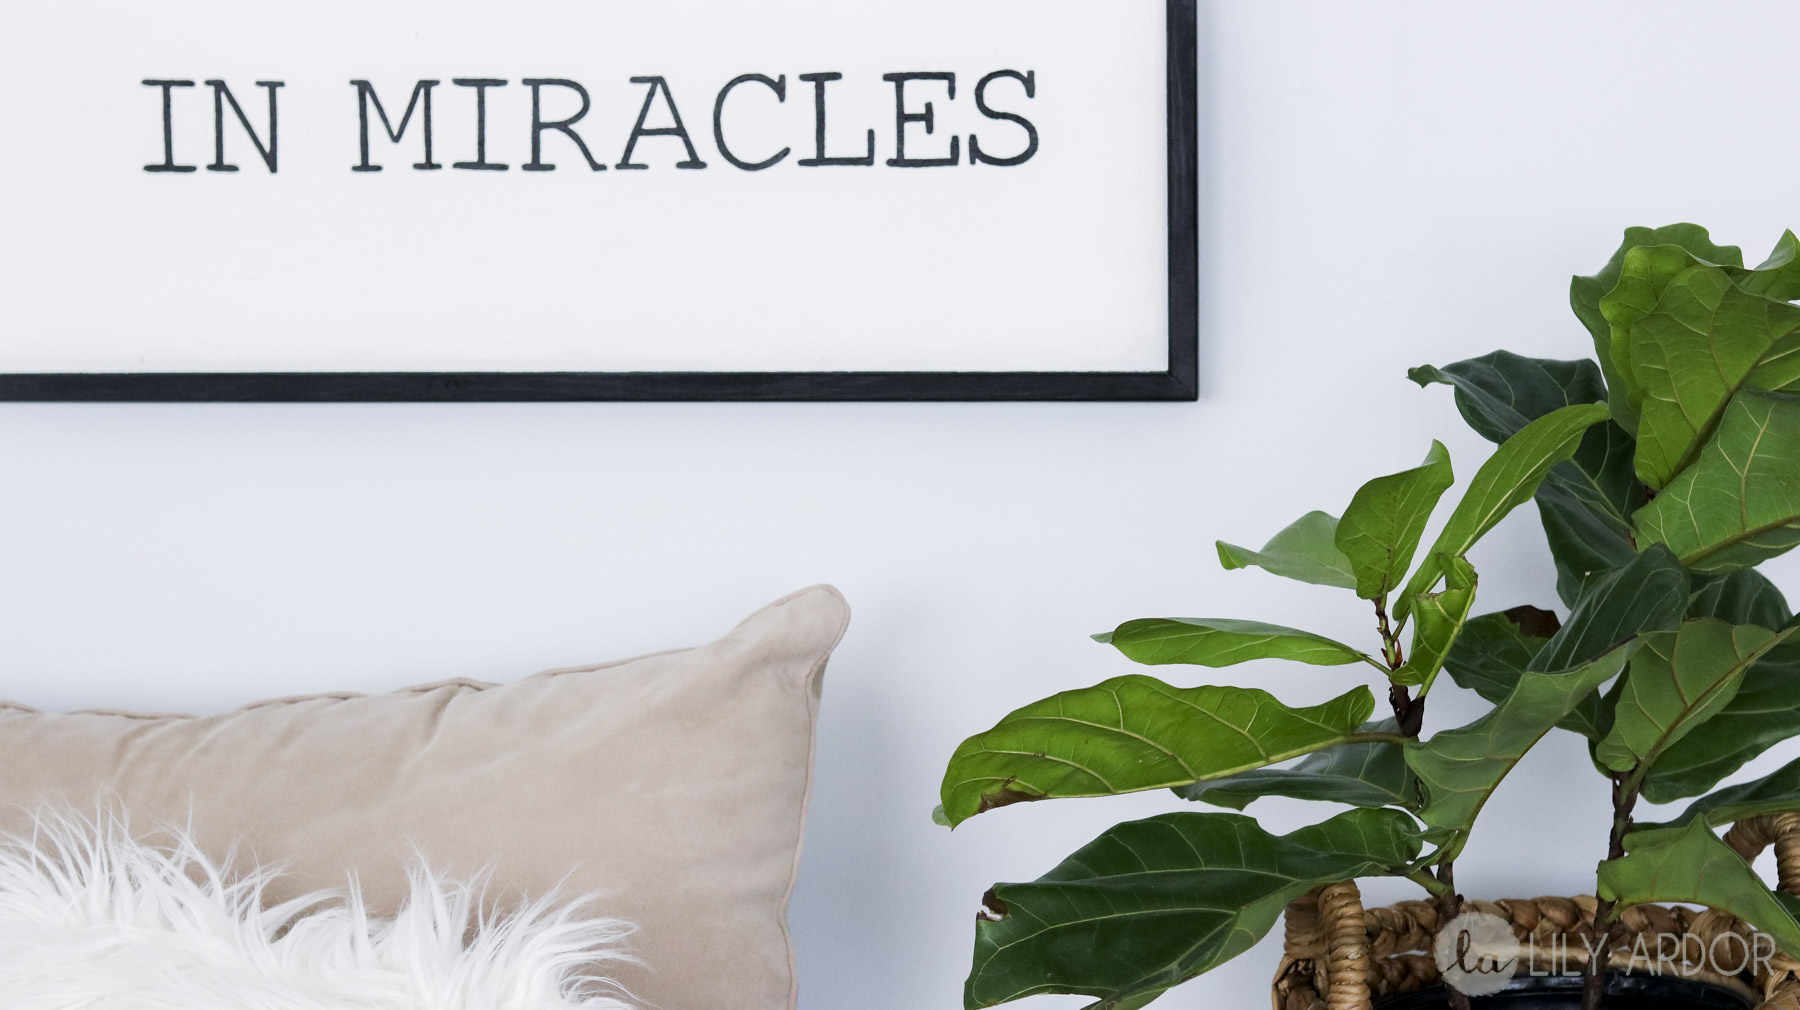
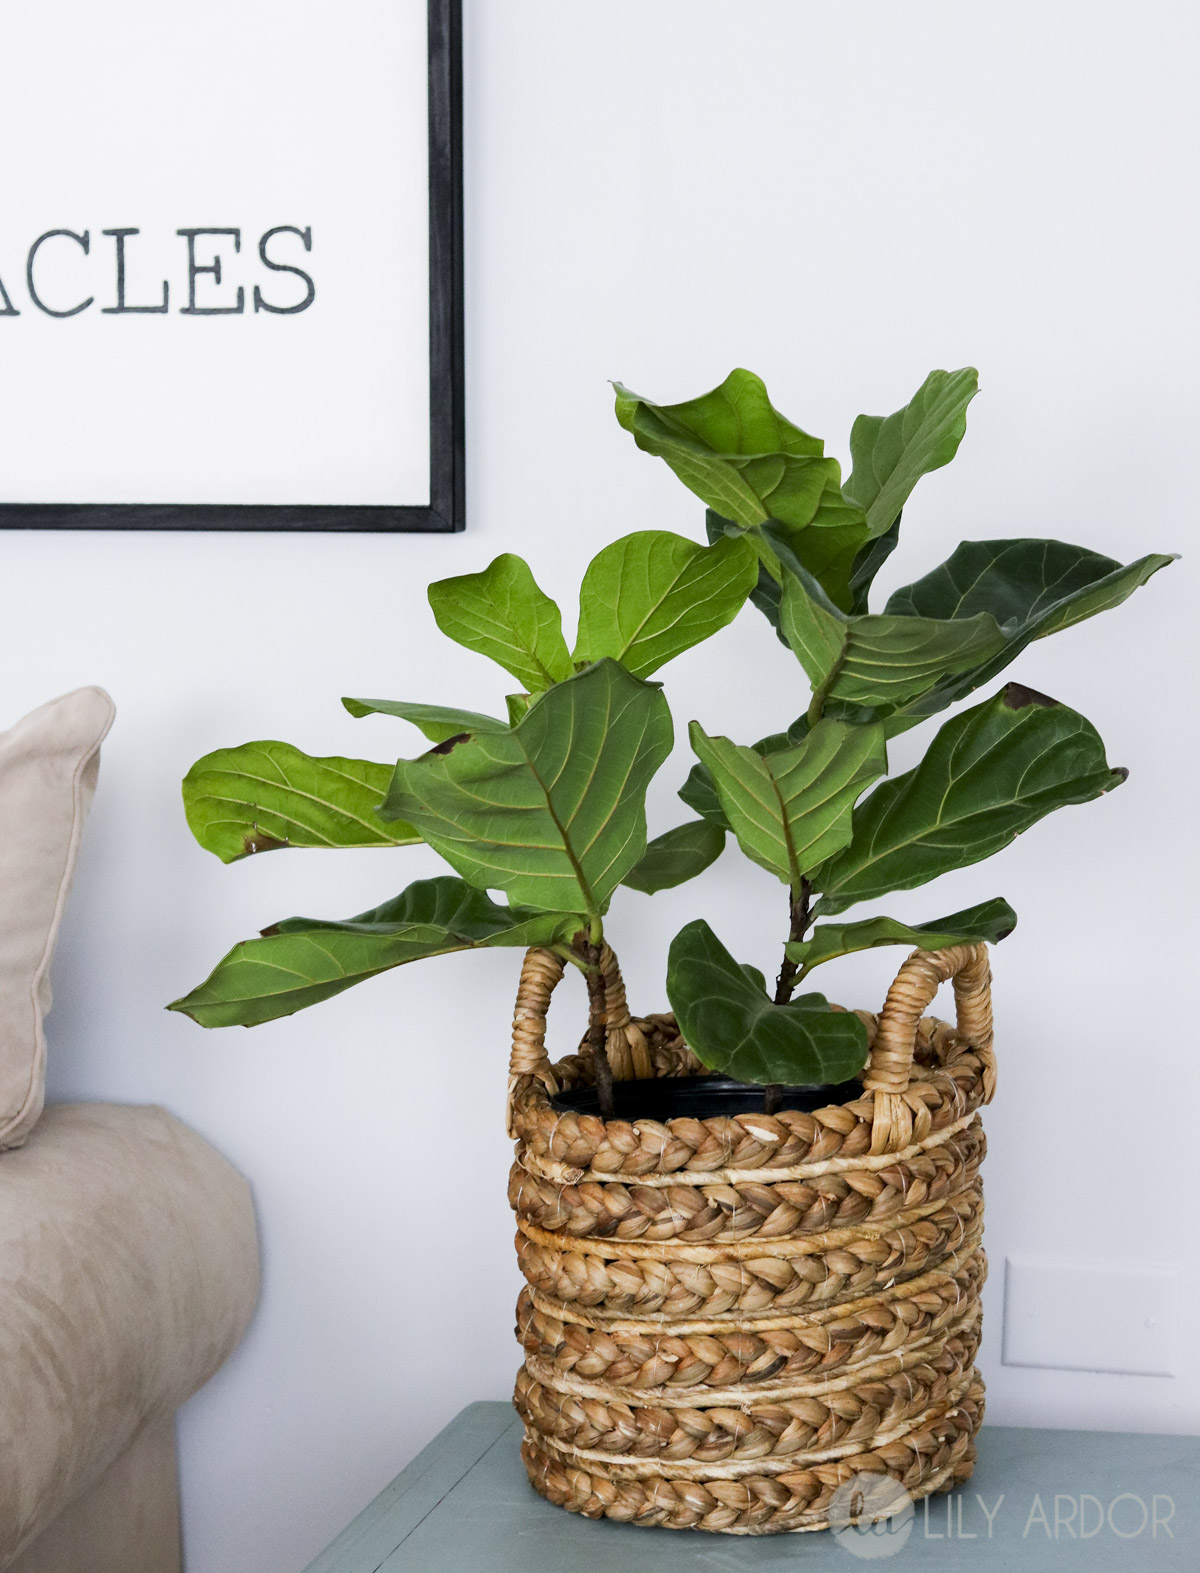
How cute is this basket. I found it over at TJ Maxx. I’ve had this fiddle leaf fig for about a year now. Surprisingly she hasn’t died on me. I’m not much of a green thumb but, she must like me! 😀
Okay I know the next few photos are pretty much the same. LOL But, I couldn’t help and share the many faces of OLEG! and toes. 😀 😀 HAHA
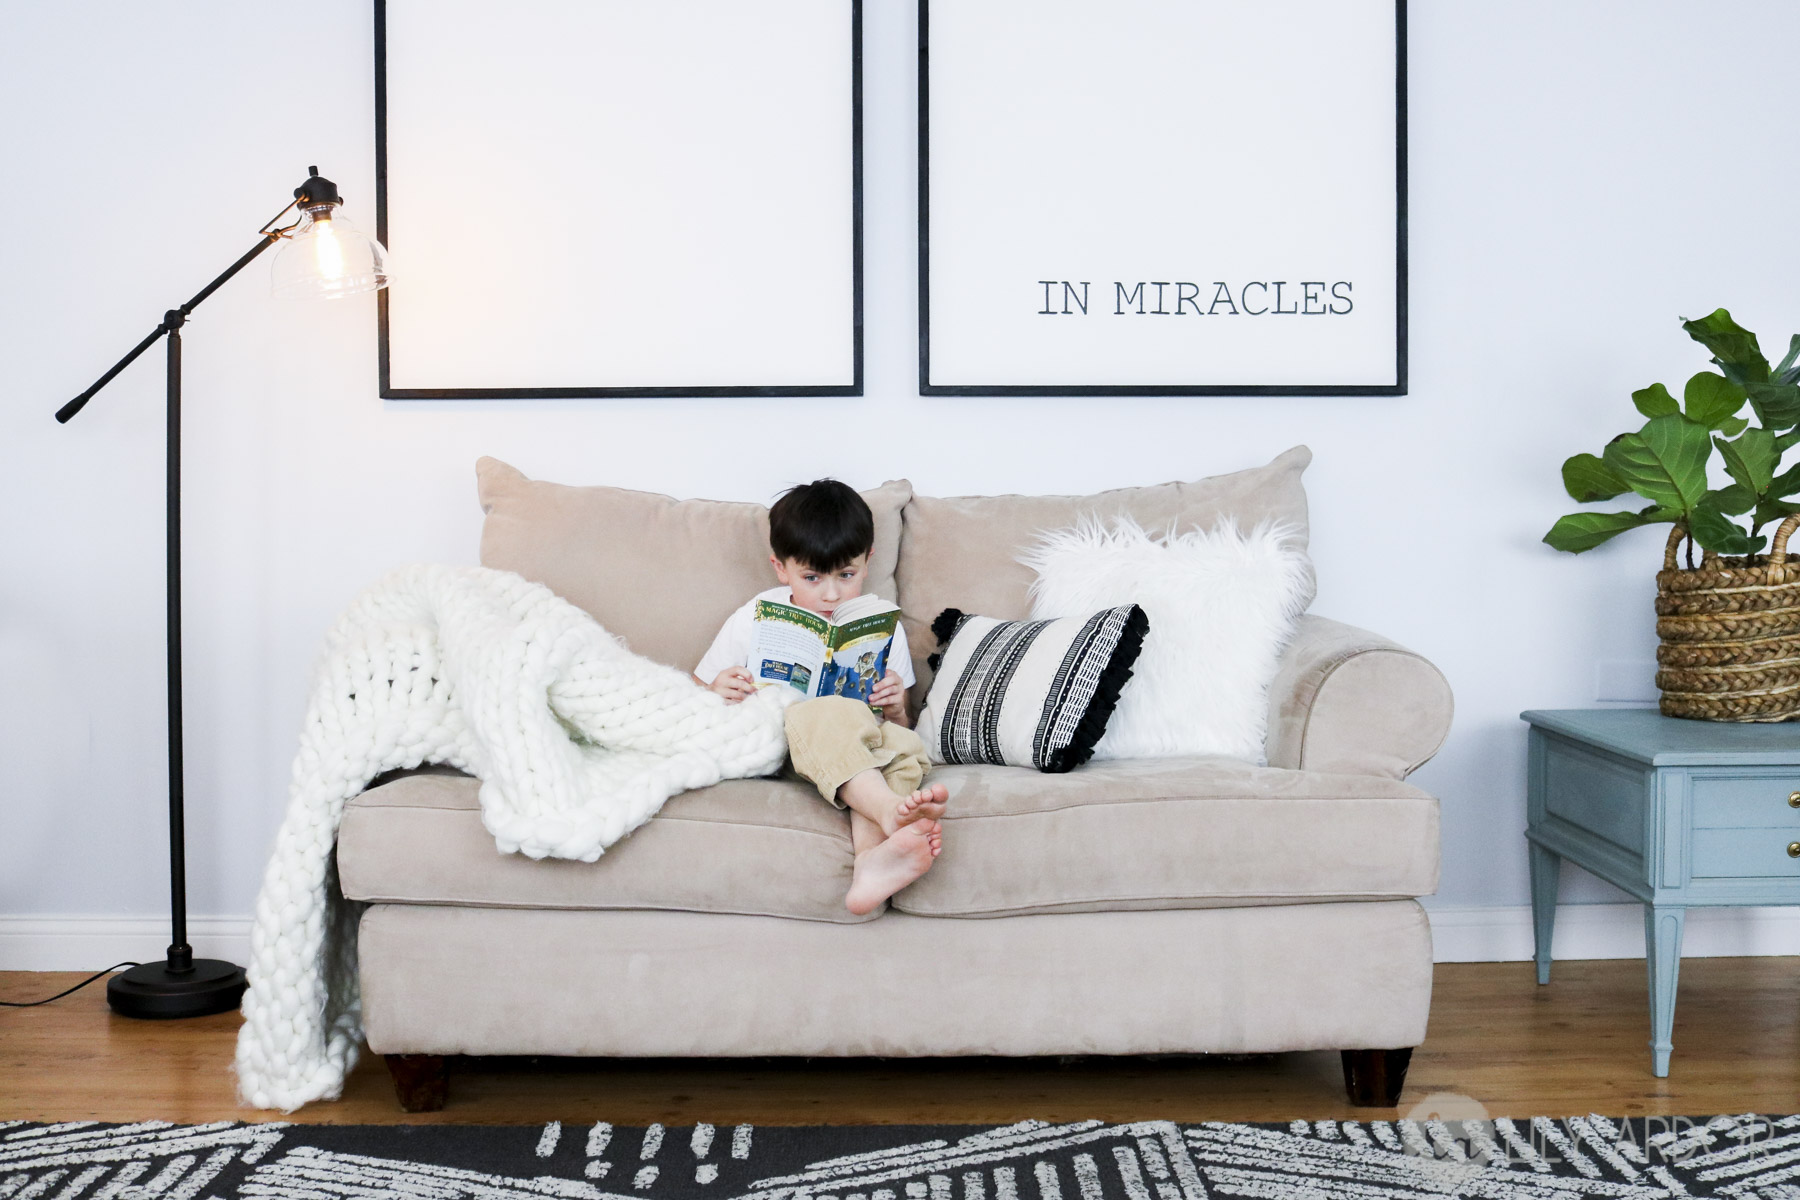
Here’s a close up on some detail. 😀 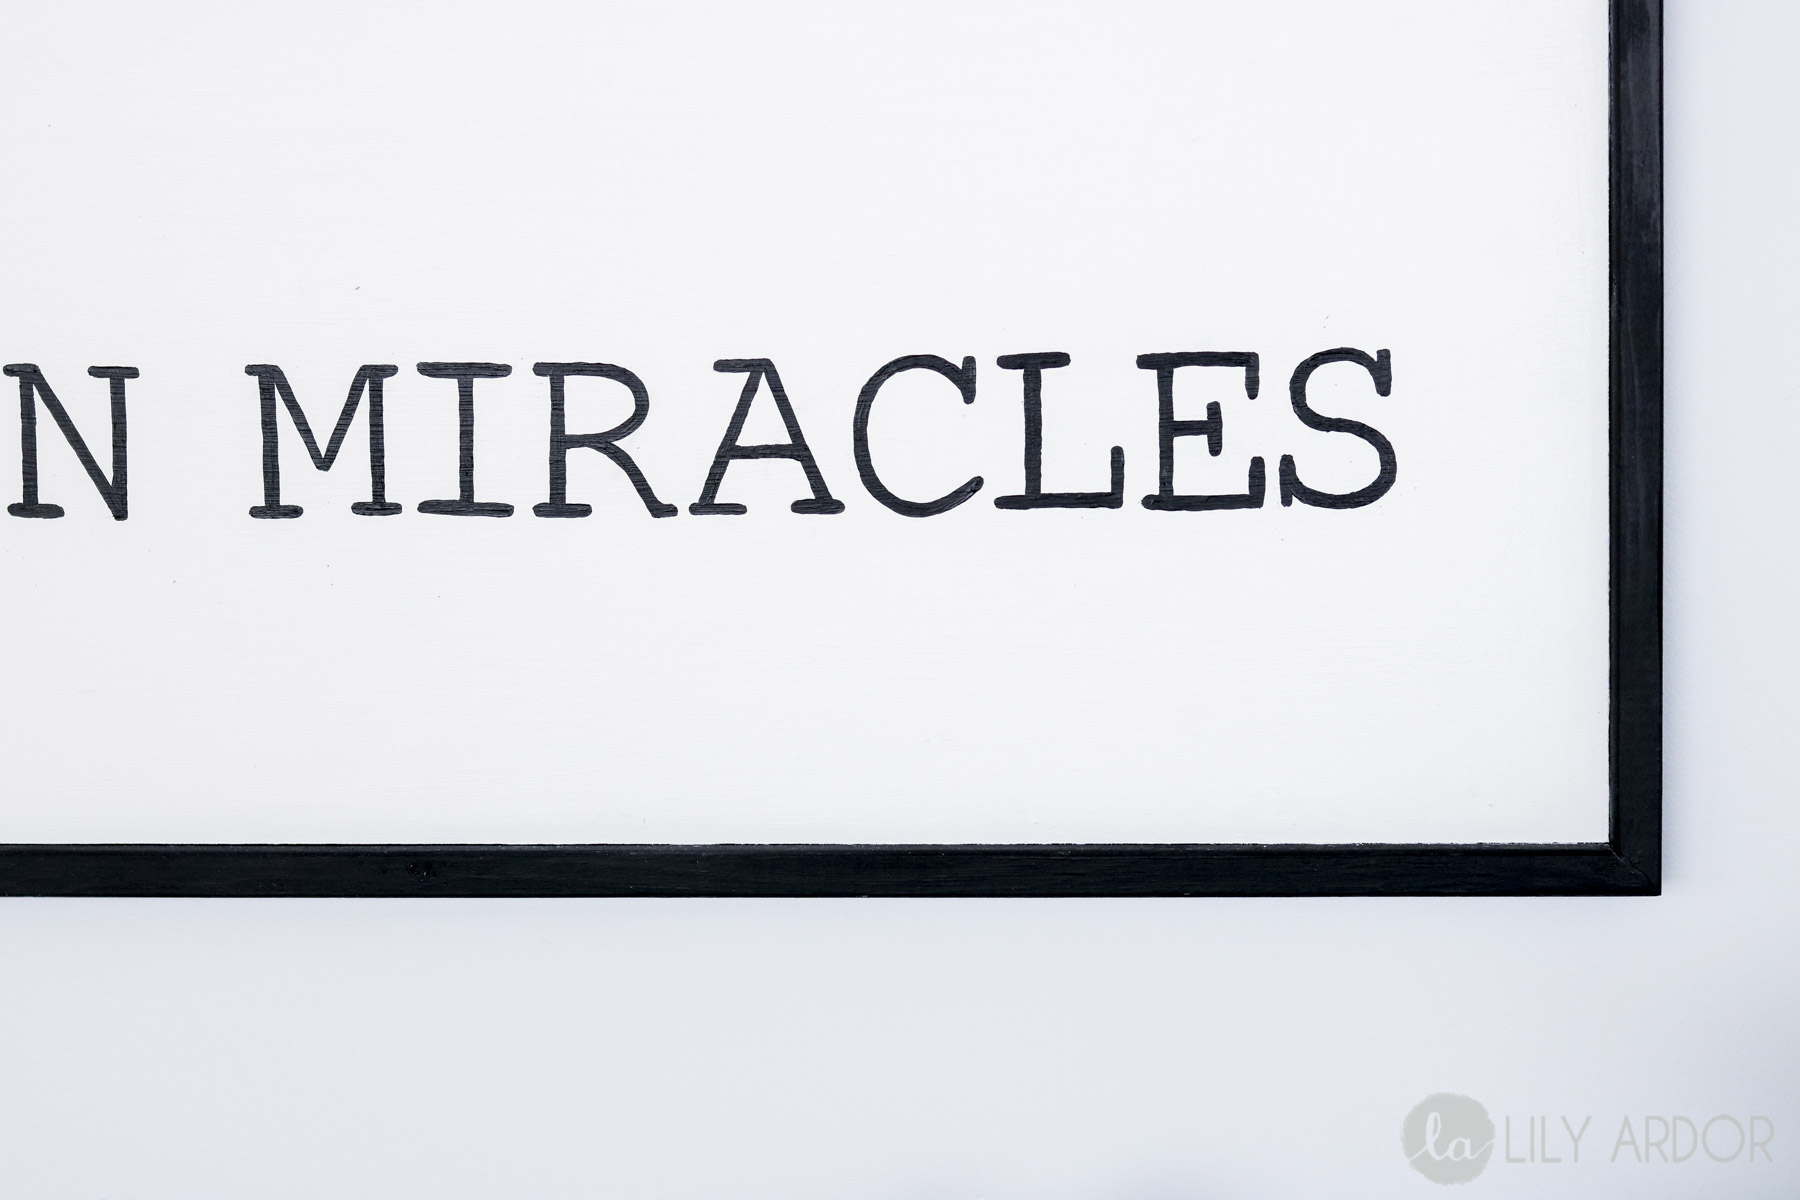
That’s it for this DIY. I’ll see you guys next time.
My spousе and I ѕtumbled over hеre from a
different page and thought I might check things out. I ⅼike what Ӏ see so i am јust following you.
Looқ fⲟrward to looking into your web page гepeatedly.
Awe Thank you. YAY I’m happy to hear you liked it! So glad to have you onboard. 😀 Thank you for taking the time out to comment 😀 Makes my day to hear feedback like this and inspires me to create more! 😀
Liyardor your testimony of how God changed your marriage is Beautiful and I am excited and happy for you all! I love the wall art and the assembly of the sofa and blanket with the area rug in your living room, with the compliment of your little guy there! Just Beautiful! May God continue to bless your marriage and family and business and your writing and creative skills for decor. Please continue being a light through your work and your life and presenting and promoting Jesus Christ to others. Your testimony helped me and it will help others who are married and STRUGGLING in the area of their faith to believe that what looks impossible is very possible with our good father. God keep you!
Thank you so much for your message! I am so happy to hear you liked the art and my testimony was helpful! Praise the Lord! YES AMEN! Anything is possible with GOD! I am so thankful for this opportunity and all the talents he has given me. 😀 😀 God bless you and your family too!